Green Feathers App Guide for 3rd Generation Wired IP Camera (GFIP3)Updated 7 months ago
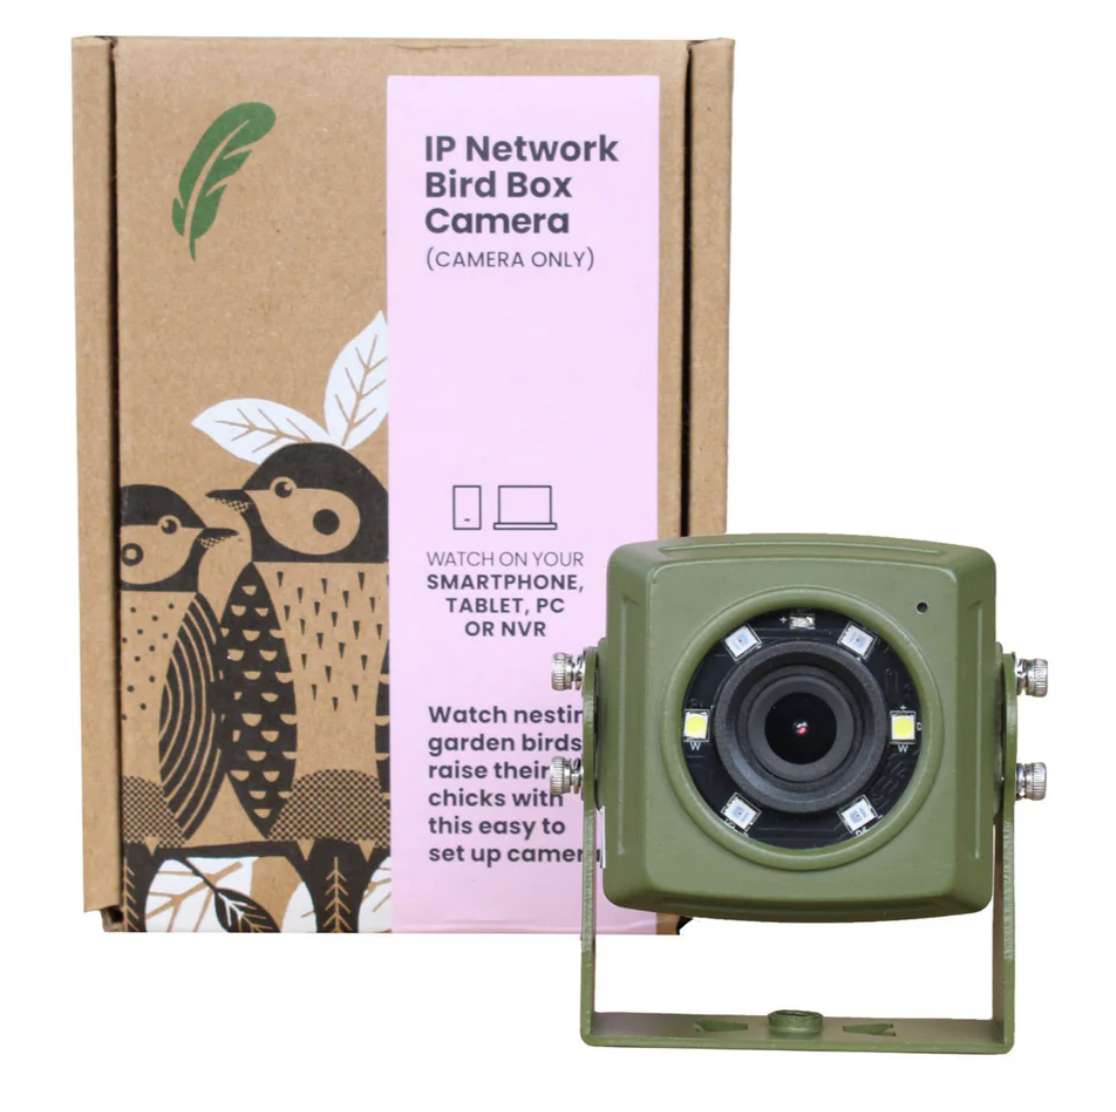
This guide will run you through the Green Feathers app, specifically for the 3rd Generation Wired Bird Box Camera (GFIP3) pictured below. If you are unsure of which camera you have please check here.
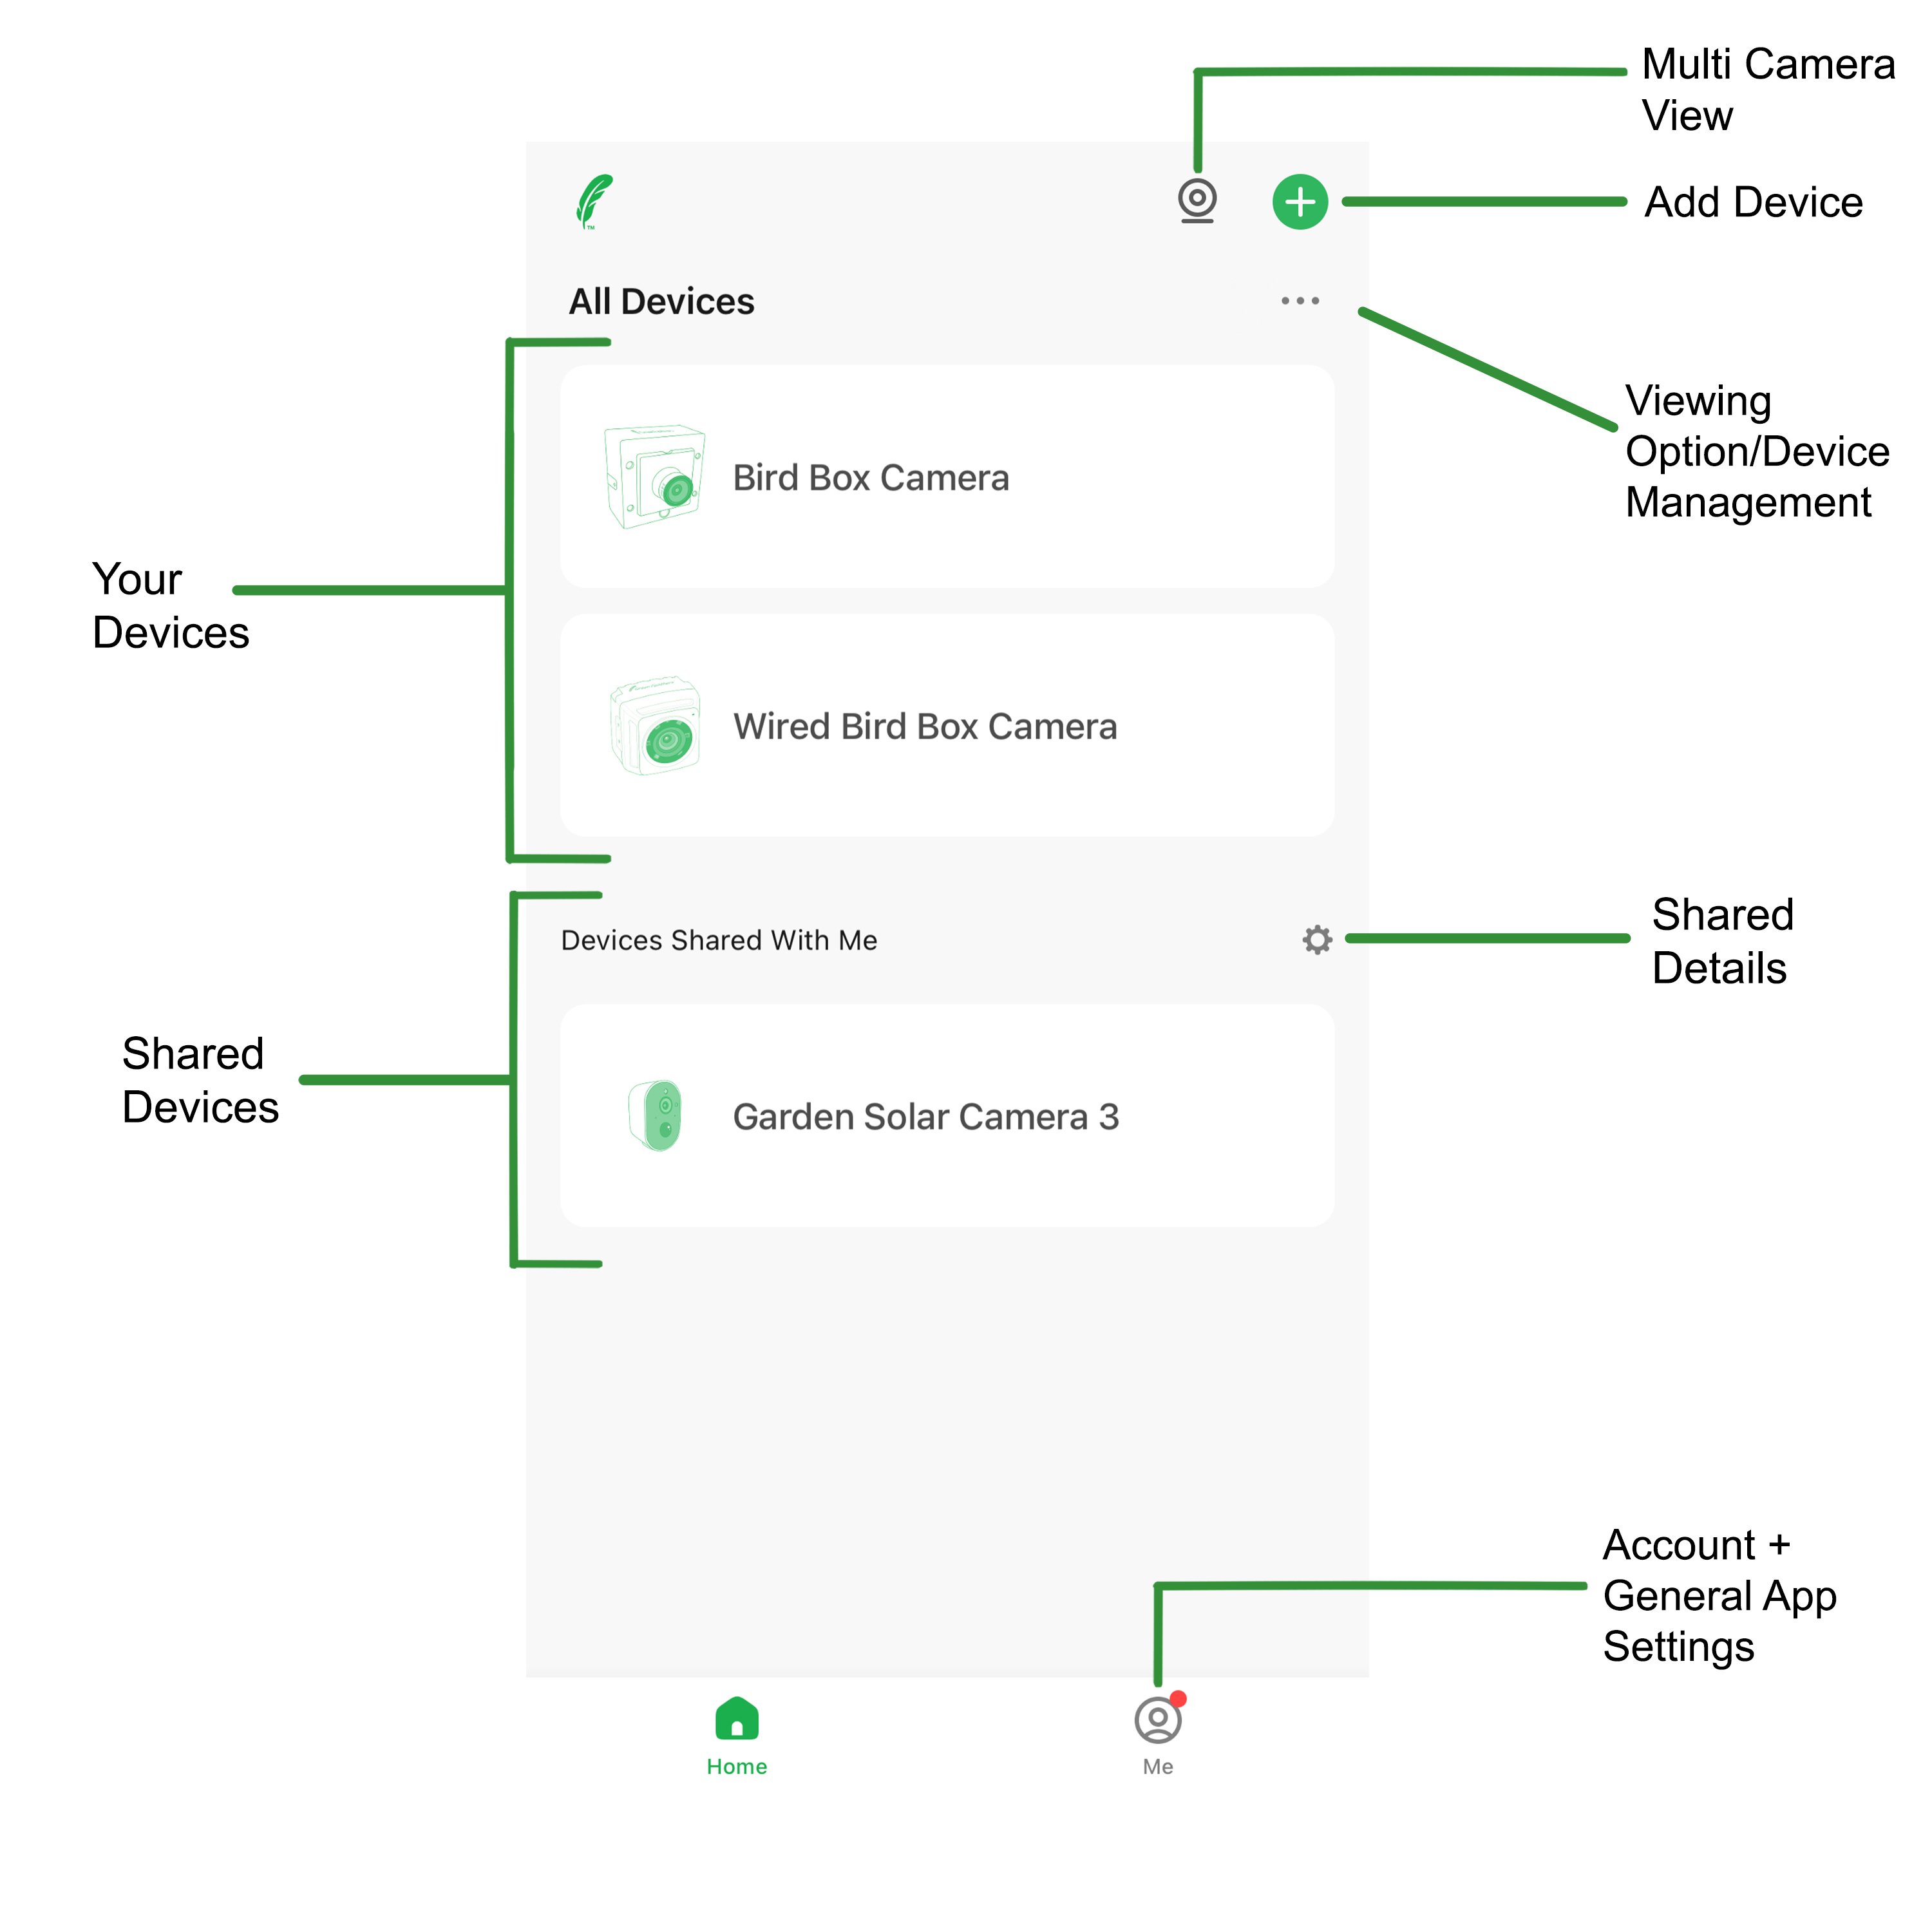
Let's start at the homepage of the app, here you will see the following options:

Your Devices - This section will show you the devices you have connected to the app. There is no limit to how many cameras you can connect and they will all show up here.
Shared Devices - This section shows you the devices that have been shared with you.
Multi Camera View - This allows you to view all of your devices live feeds at once in a tile view. You can view up to 16 at once. You can also record and screenshot from your live feeds on this layout.
Add Device - Select this when you want to add a new device.
Viewing Option/Device Management - Viewing option gives you the choice between list view and grid view. Device Management lets you edit the order the cameras as well as delete them.
Shared Details - The shared details option lets you see who has shared the camera with you
Account + General App Management - For more information on this have a look at this guide here.
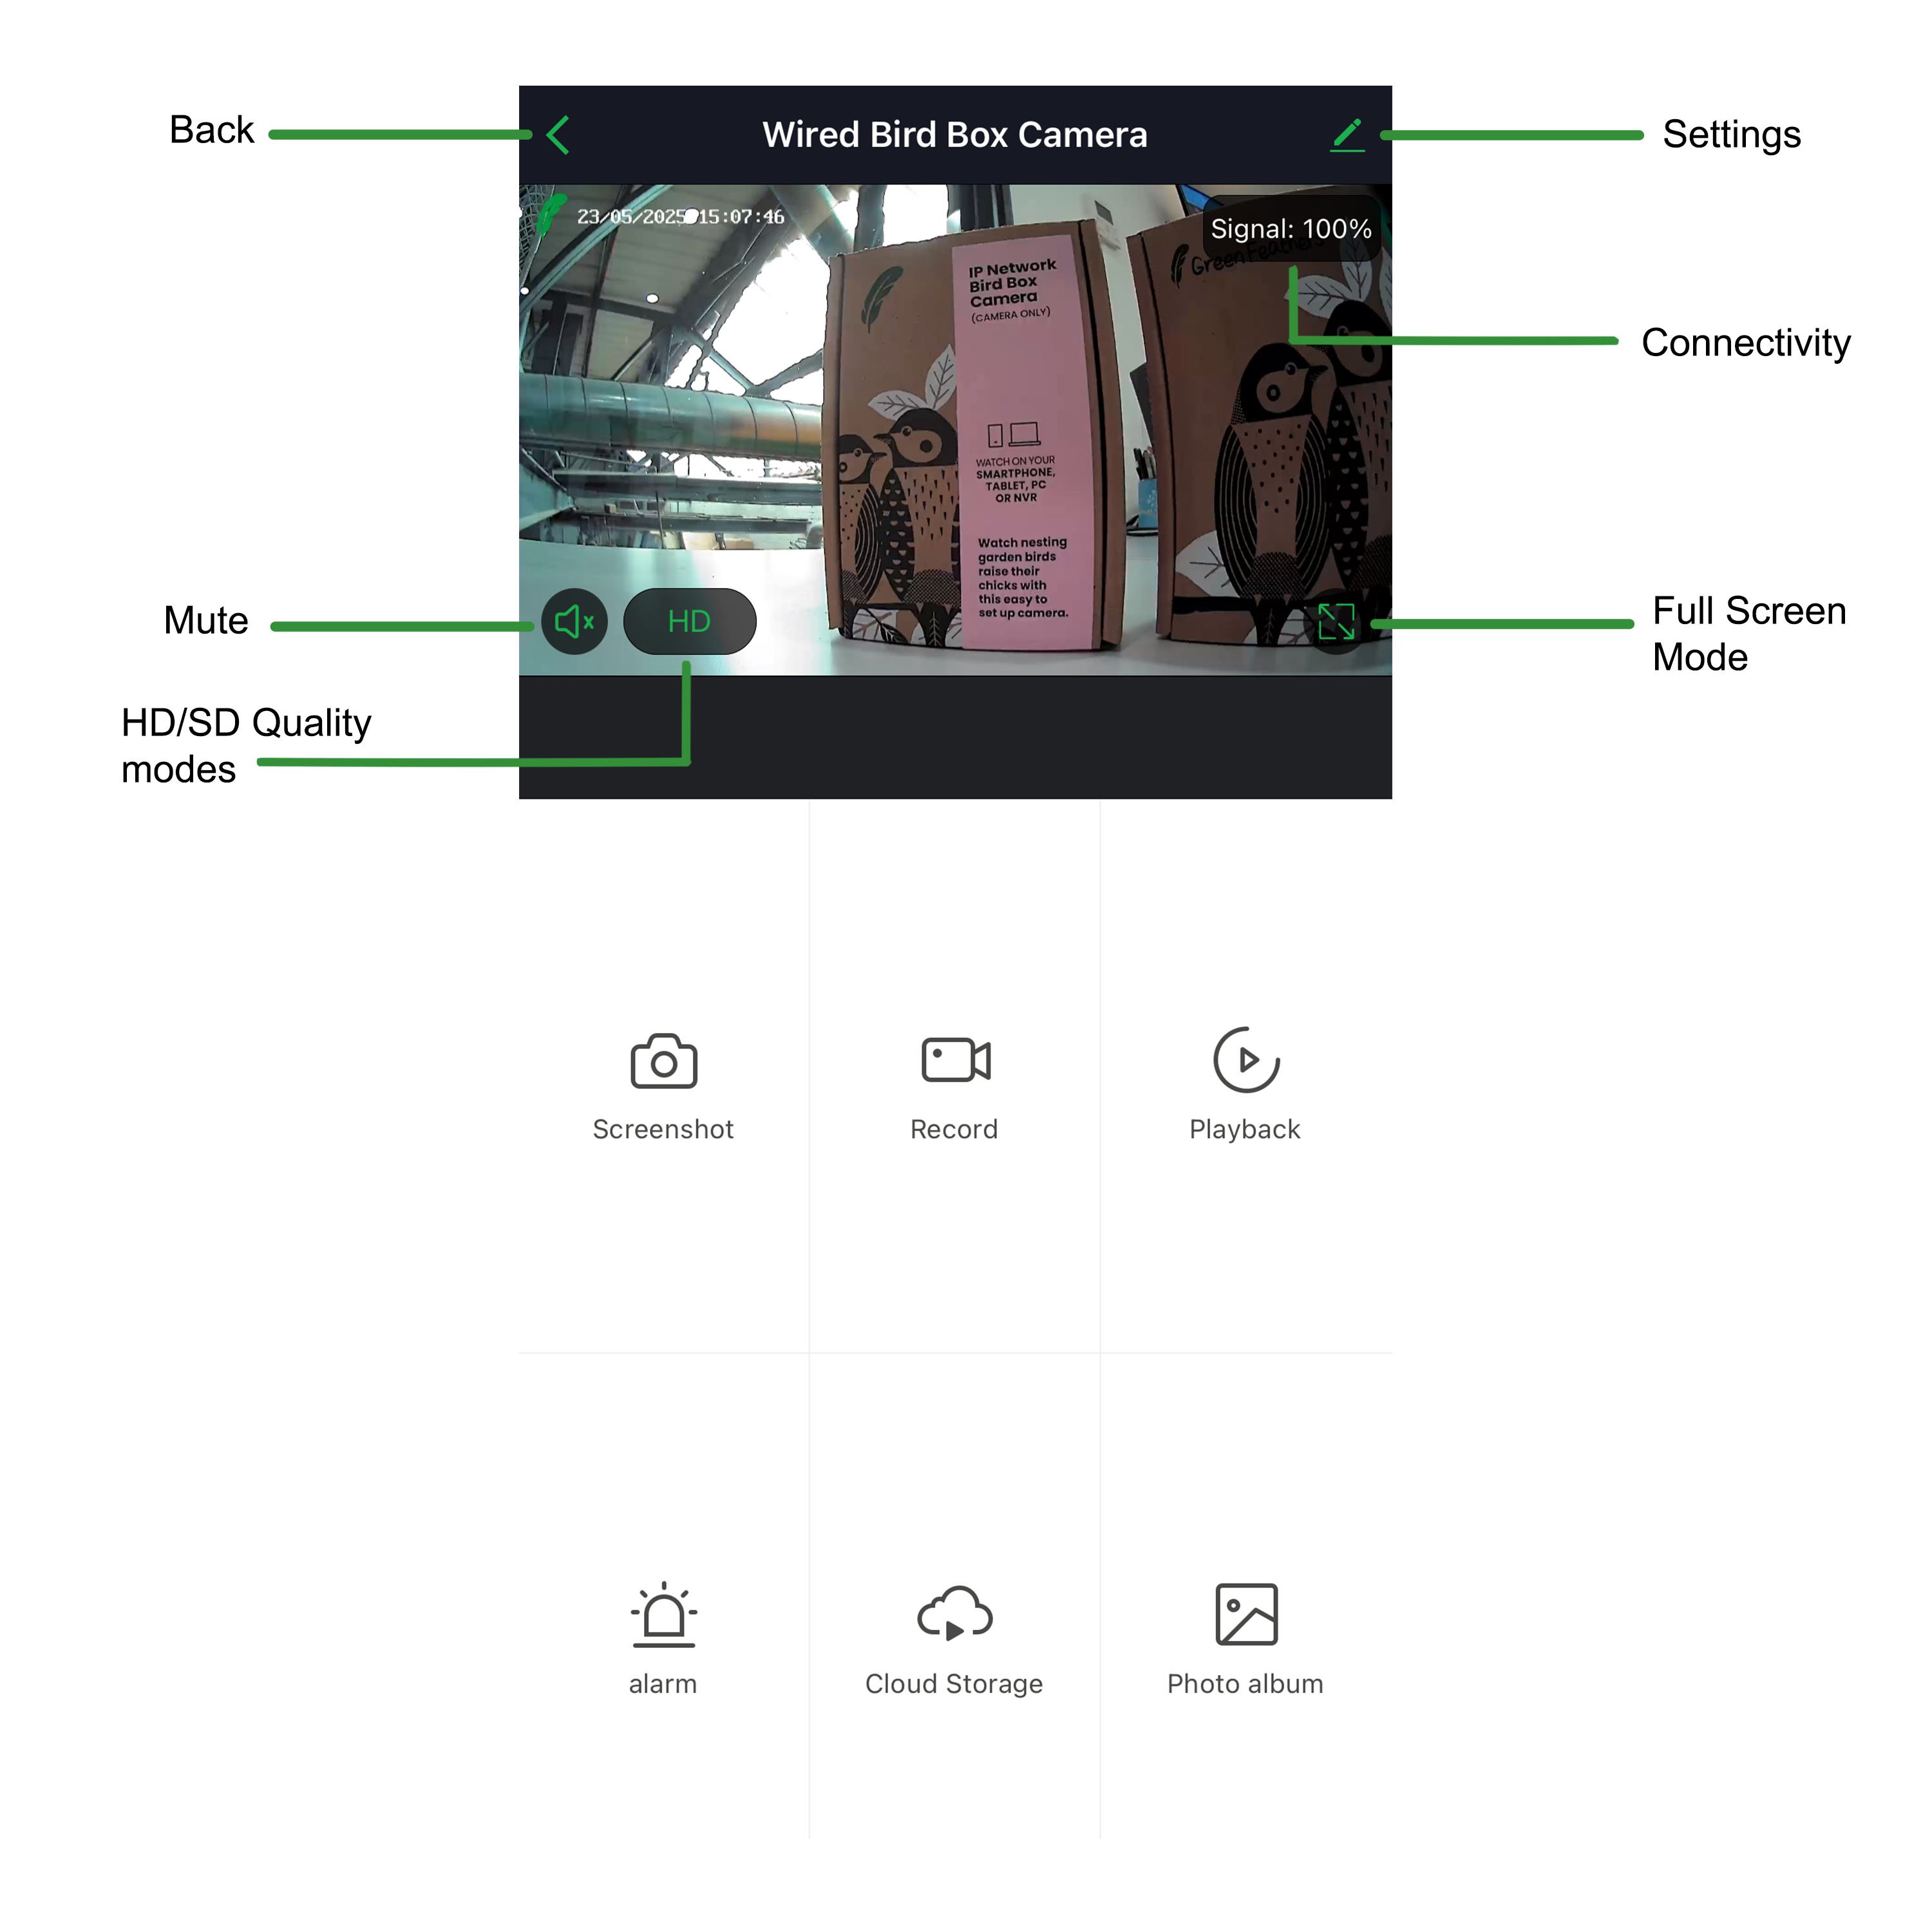
If you select the camera you have connected to the app it will take you to the live feed page for that camera and you will see the following icons:

Back - Takes you back to the homepage of the app.
Mute Live Feed - This just mutes to noise you are hearing from the live video.
HD/SD Quality - This allows you to switch between HD and standard definition.
Settings - This will take you into the cameras settings, for more information on the camera settings please look here.
Connectivity - This shows you the current connection percentage and the KB/S.
Full Screen Mode - Selecting this will change the live feed to landscape and full screen.

Screen Shot - This will take an image of the live feed and saves it to your gallery on the app. (For more information on screenshots and recordings, please see here)
 Record - This allows you to record a section of the live feed you are seeing, you can record for as long as you like and this will be saved into your gallery on the app.
 Playback - The playback function shows you any videos recorded from motion detection/continuous recording (this is only if you have an SD card installed). If you have bought a GFIP3 before July 2025 the playback option does not apply.
 Alarm - This takes you to the motion detection settings of the camera, to find out more about the motion detection and recording settings click here.

Cloud Storage - Click here to see more information on the Cloud Storage function
 Photo Album - This is where any of your saved images/video clips will be stored.
Need more help?
If you need help with anything else please check out our other guides or get in contact.
