How to: Set up your Solar Camera camera using QR mode on Green Feathers appUpdated 5 months ago
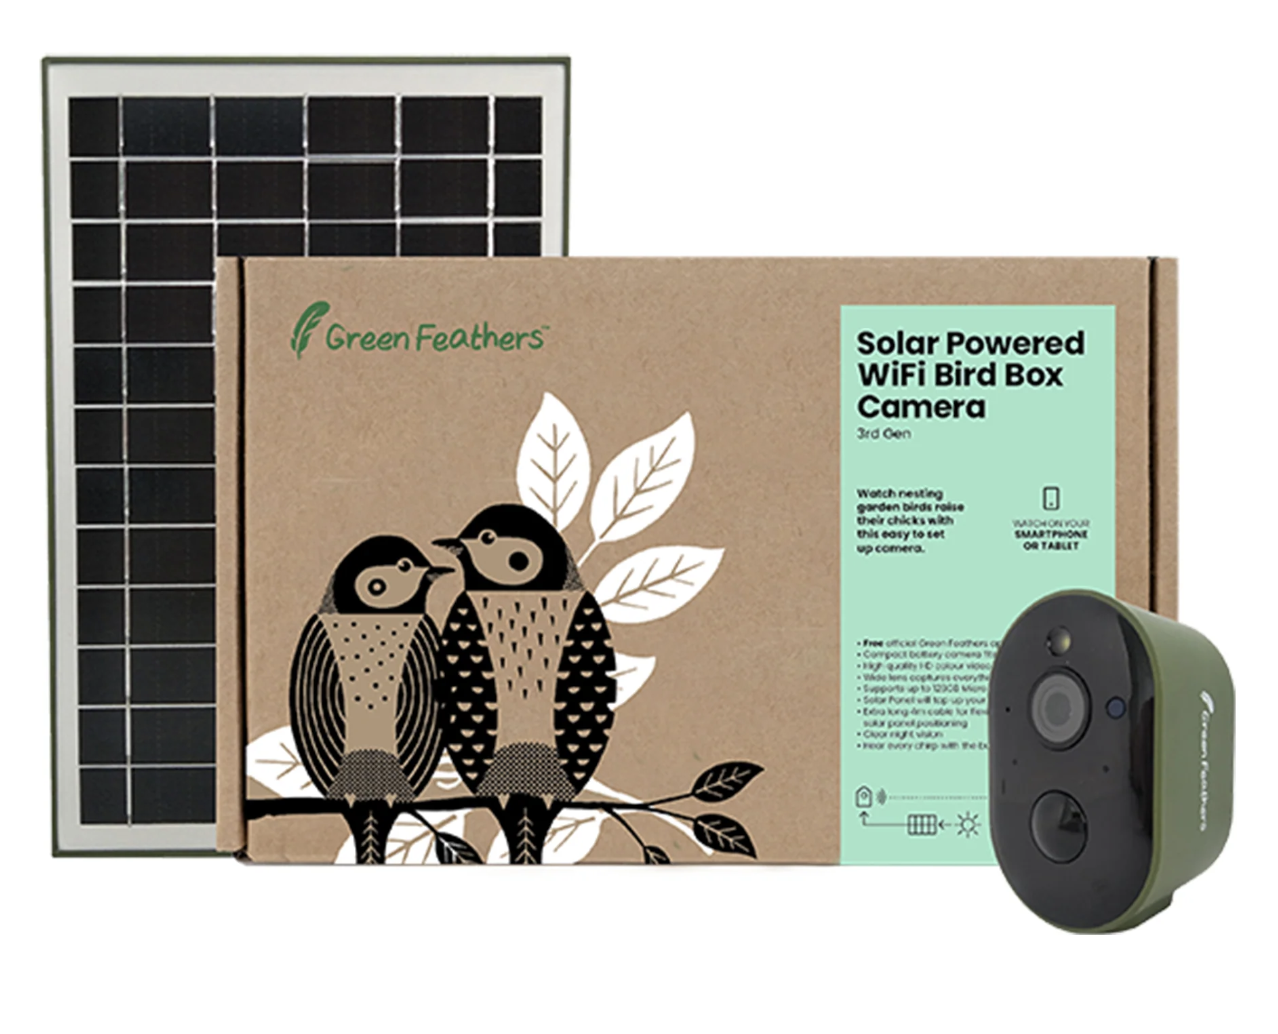
This guide will run you through the QR set up method on the Green Feathers app, for the Solar Camera pictured below. If you are unsure of which camera you have please check here.
To Start:
Test the WiFi signal strength by taking your smartphone/tablet to the site where you plan to install your camera; if it has a weak signal at the installation site then the camera may struggle to maintain a connection.
Insert a micro SD card if you have one; hold the camera with the lens facing away from you, then insert the micro SD card into the TF slot with the metal contacts facing you. Push it in fully until you feel it click into place. If you have trouble inserting the SD card to the point where it clicks into place, hold it down with your thumb then use a thin object like a pen to push it down fully. For more information on this, have a look at our guide here.
Before you mount the camera in the bird box, make sure it's connected to your WiFi router and can be viewed on the app. It's best to set the camera up when it's plugged in a different room to your router, then once it's connected you can unplug it and install it in the final location
Fully charge the camera and solar panel before mounting in position as this will maximise running time.
Getting started with connecting your camera
If you haven't registered an account Tap 'Sign Up' to create an account, then select 'Agree' for the 'User Agreement and Privacy Policy'. If you have already signed up then skip below to the section called 'Adding the camera to the app'.
- Enter your email address, tick 'I Agree User Agreement and Privacy Policy' then tap 'Get Verification Code'. If you would like to use your Google or Facebook account to sign up you can do so by tapping the relevant icon at the bottom of the page.


- Enter this code into the app.

- Set a password for your account - make sure it is something memorable.

Once your account is all setup, just log in to the app!
Adding the camera to the app
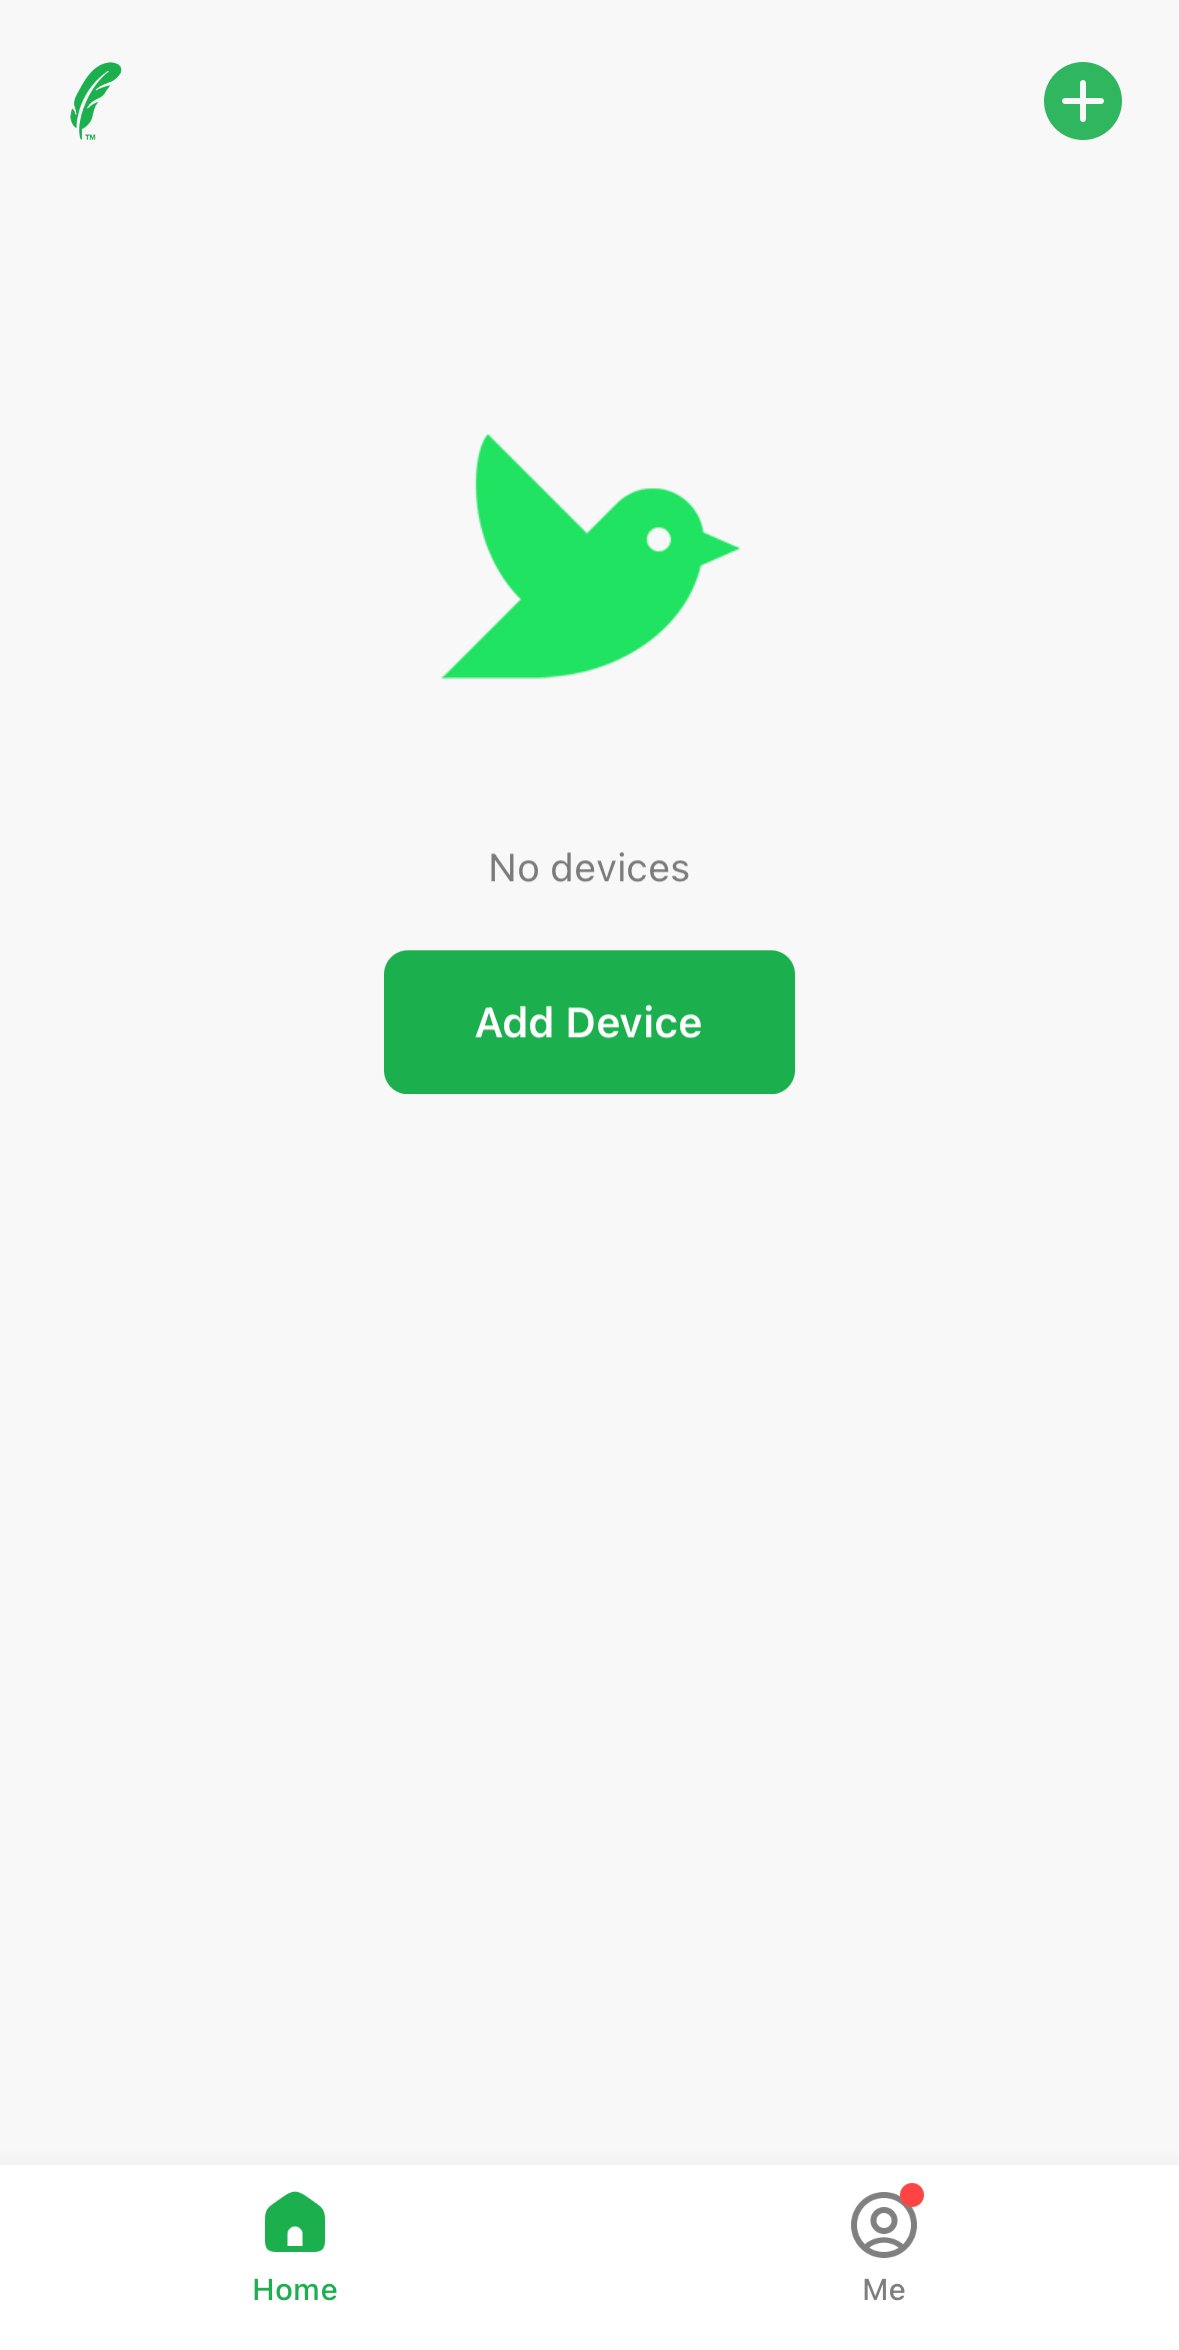
The first time you go to the Home page, you can choose to allow the app to use your device location. This is not essential but helps with some features. Next 'Add Devices' or click the green '+' icon at the top right of the screen and select 'Add Device' from the drop down menu.
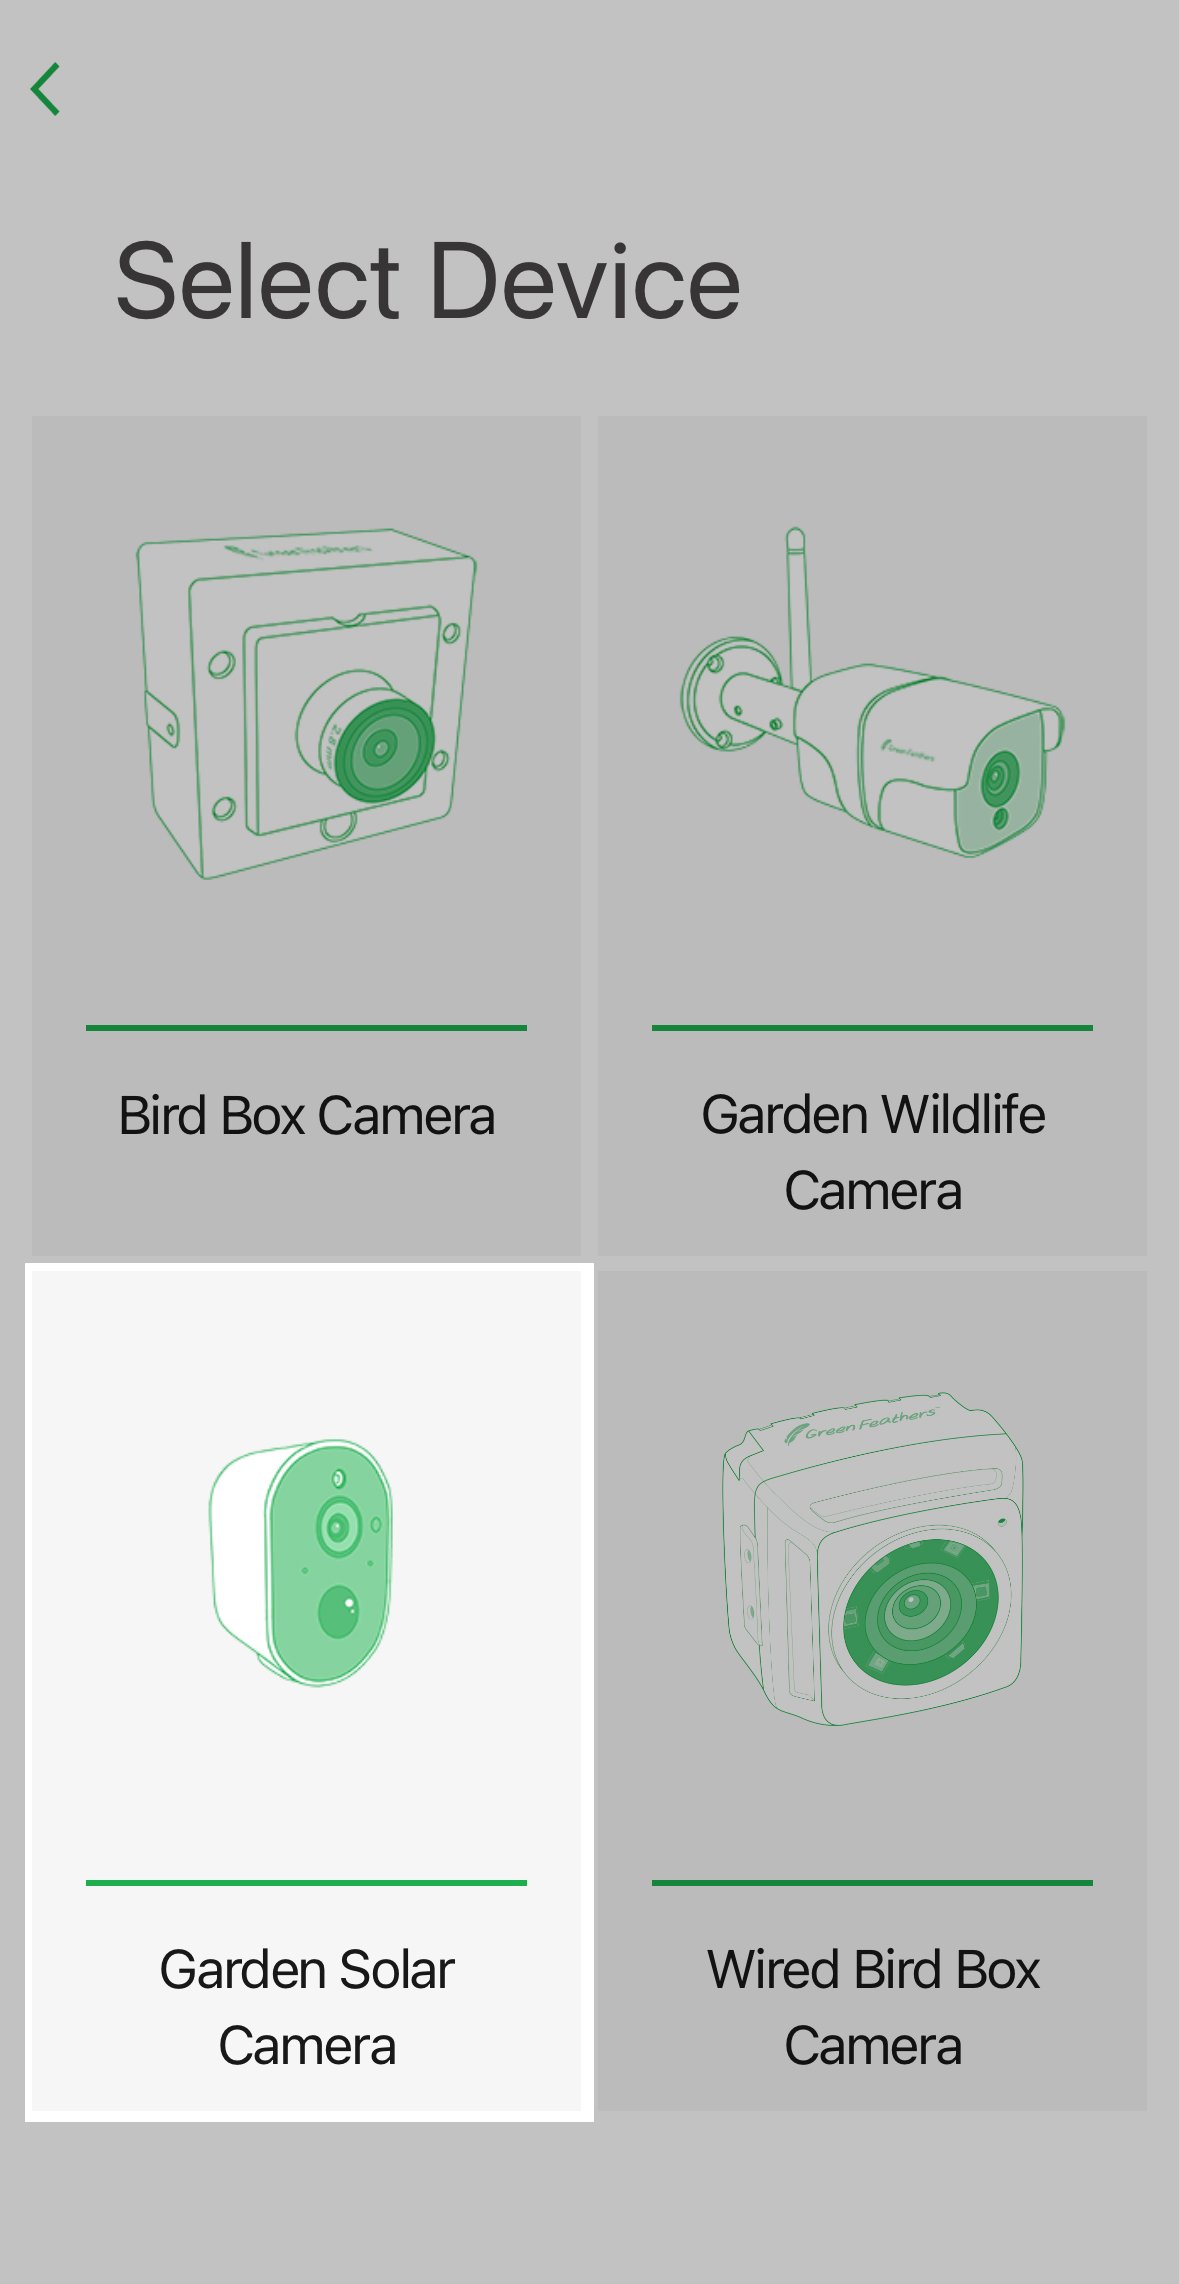
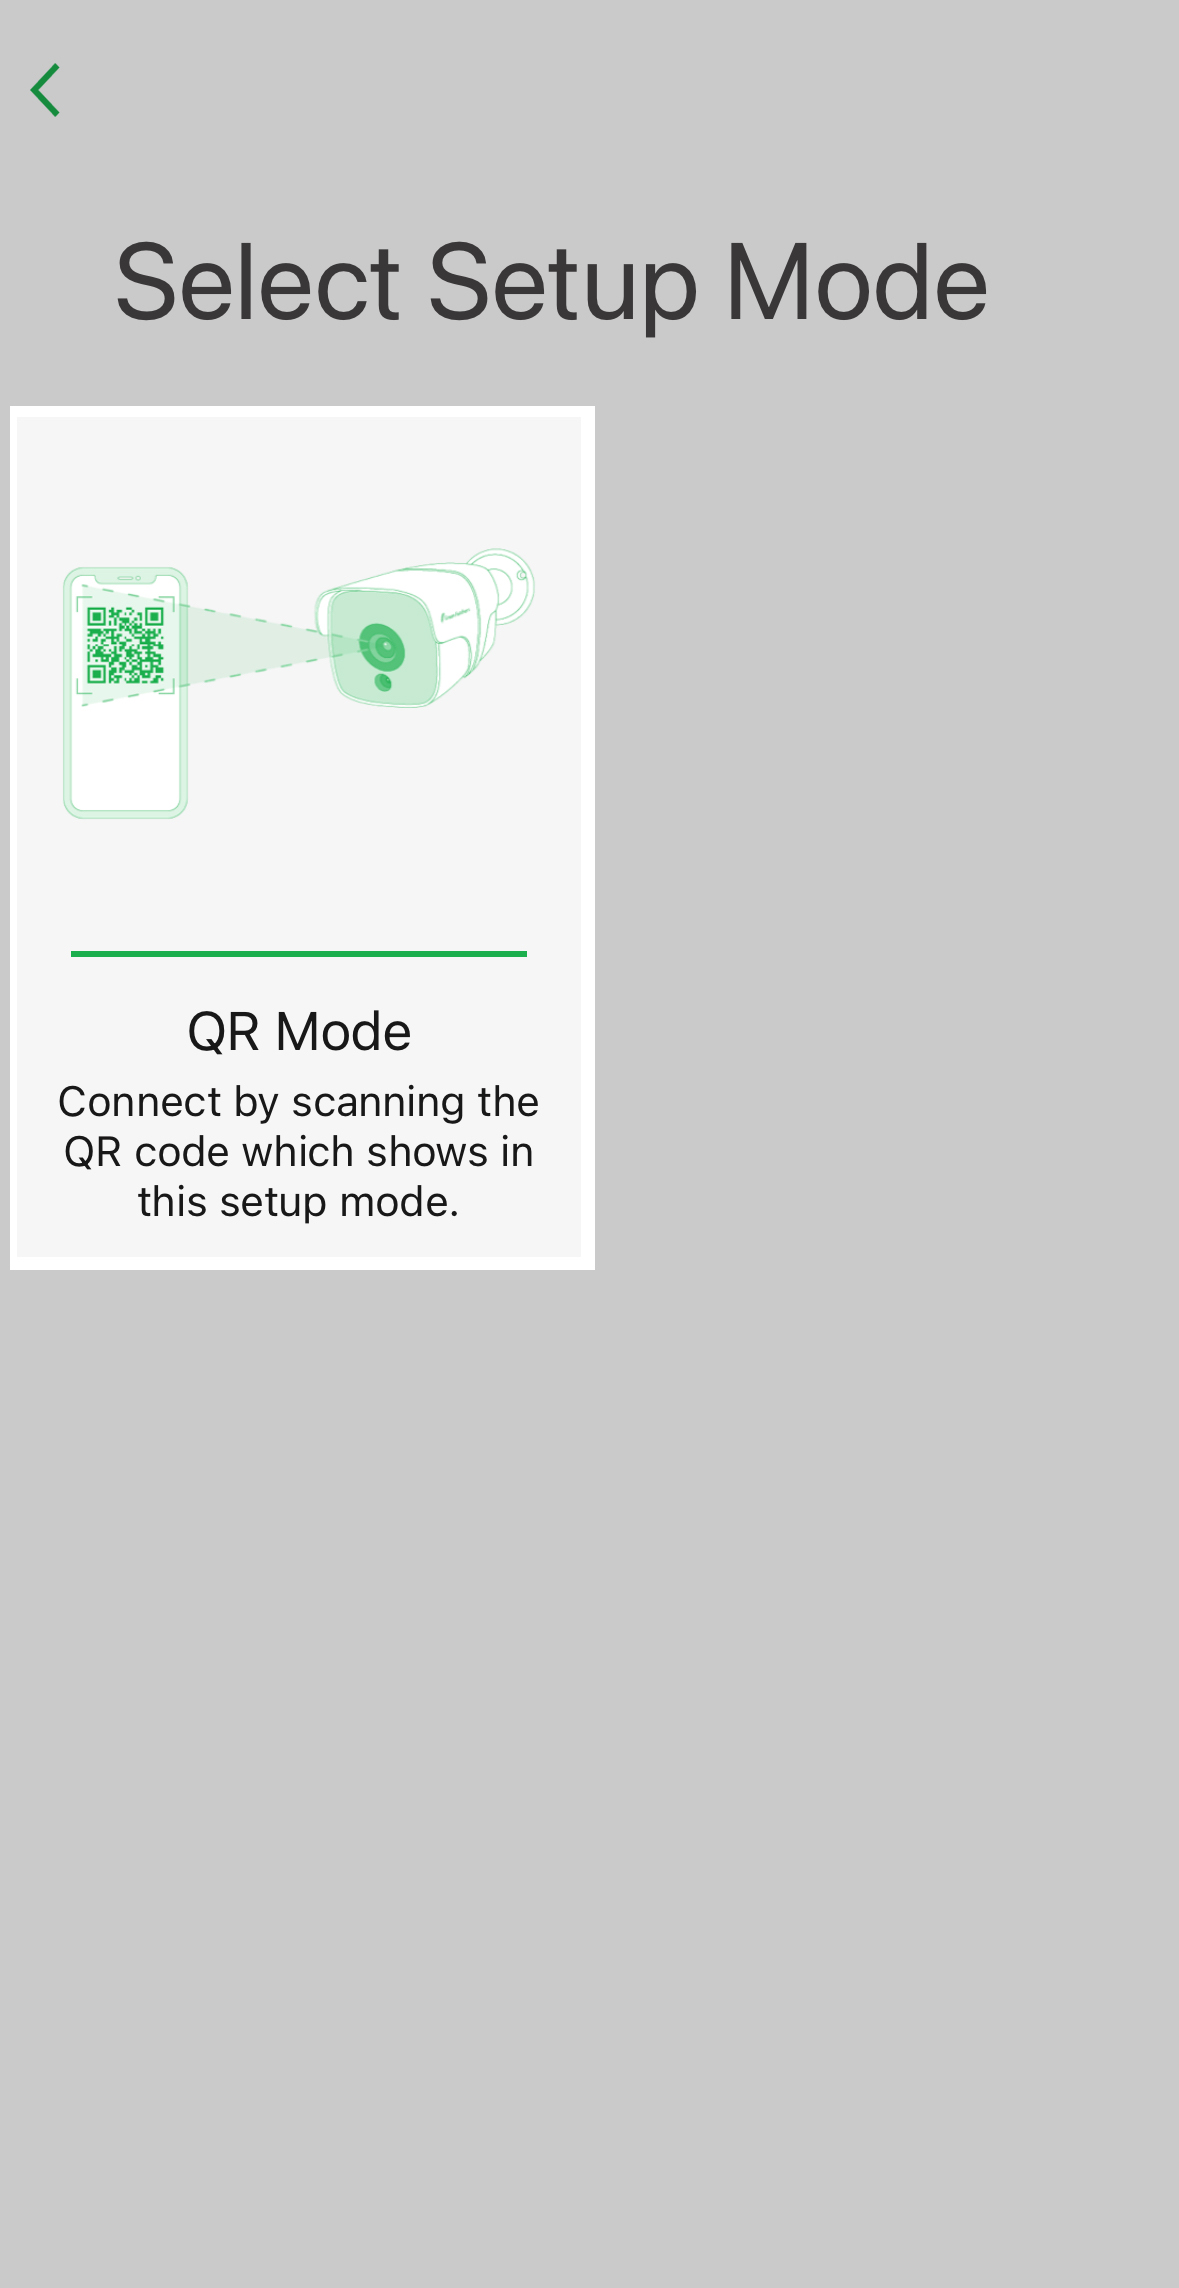
Now select Garden Solar Camera, then select "QR mode" and follow the steps through.
 |  |
Now that your camera is charged you will want to power it on, to help with the first-time setup you will want to do this in a separate room from your WiFi router.
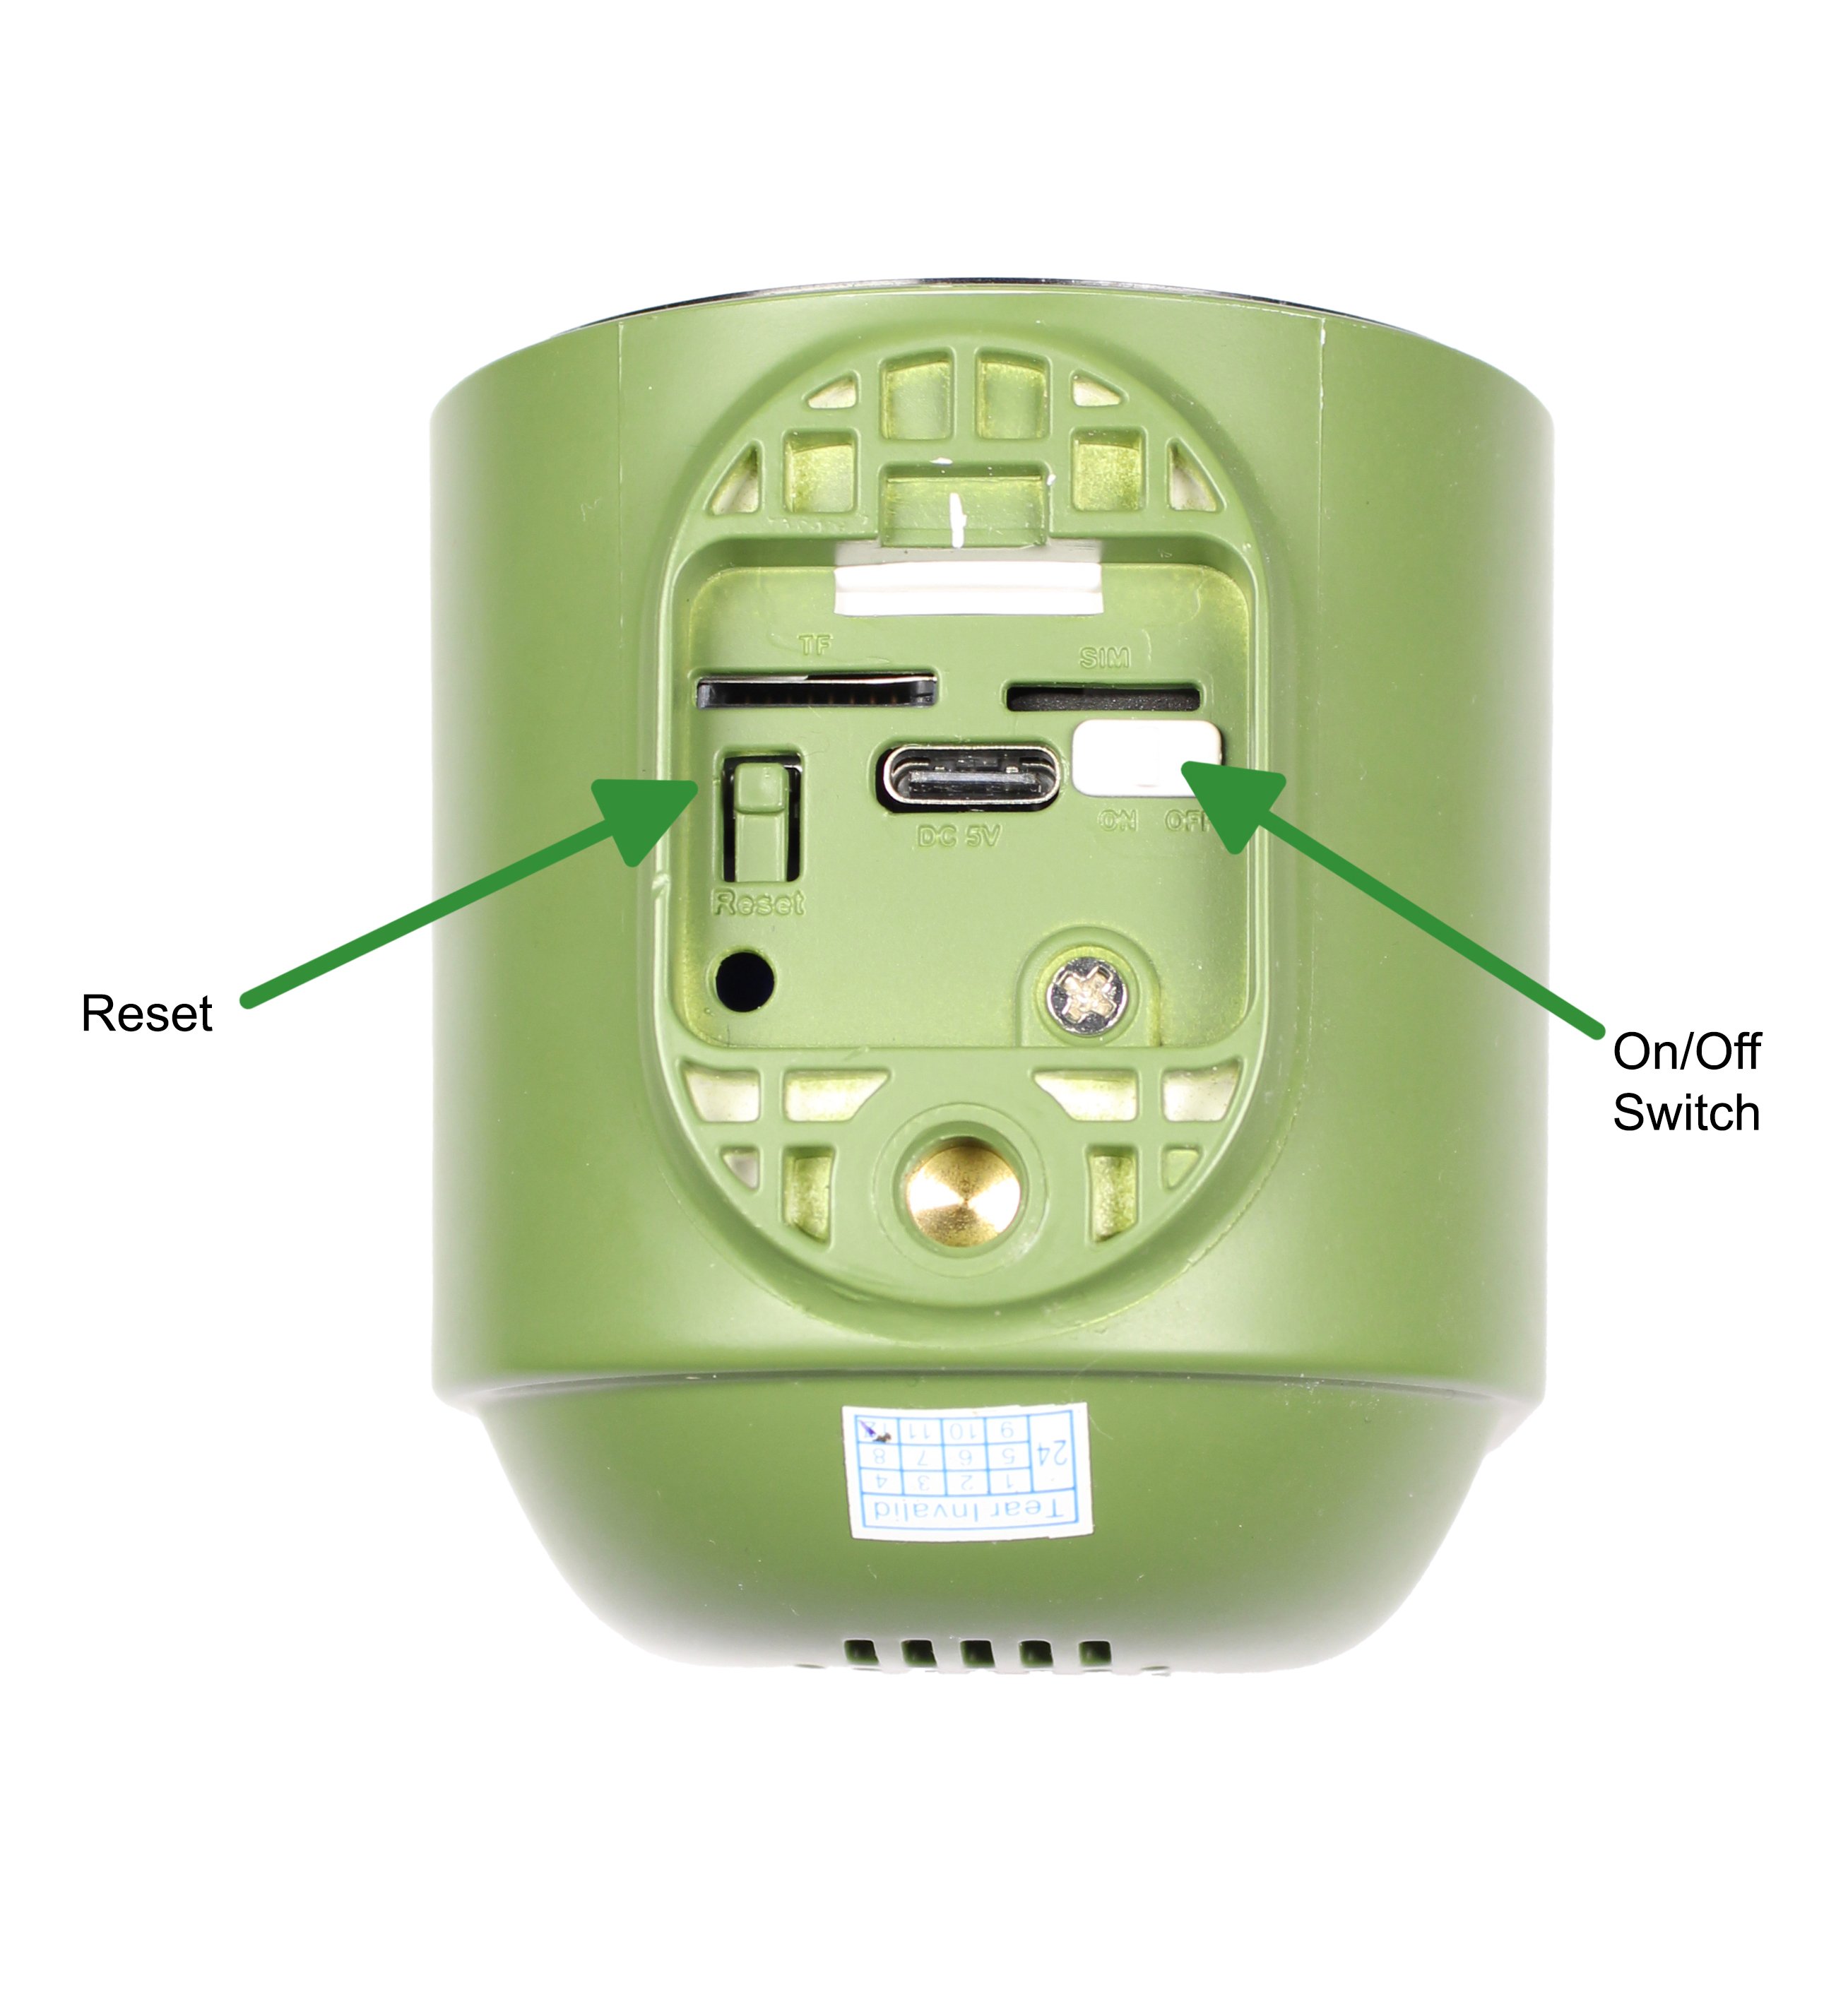
Turn the camera on. And then press and hold the reset button for 5-10 seconds, and an audio prompt will sound to show it's been reset. The red indicator light on the front will be blinking to show it is ready to be set up.
Now you need to enter the details of the WiFi network that you want the camera to connect to. The name of the WiFi network which your phone or tablet is connected to should be automatically filled in, so just enter the password. To change the WiFi network your device is connected to, tap the icon to the right of the WiFi name:

Press next and then point your camera at the QR Code on your phone/tablet. The camera needs to be 10-20cm away. One tip that can work well is placing your phone on a flat surface and then slowly moving the camera closer or further away. You will hear an audio prompt from the camera when it has connected, you can tap next to move on with the setup.
The camera will now connect to your WiFi and prompt you with a screen to give the camera a name.
The Solar Camera will only do event recording due to it's battery powered nature, you cannot continuously record. It records when triggered by it's PIR (Passive Infrared). This is slightly different to our other cameras that work using motion detection, it's less sensitive and is triggered by heat.
Need more help?
If you need help with anything else please check out our other guides or get in contact.