How to: Set motion detection & recording on Green Feathers 3rd Generation Wi-Fi (GFWF3/NCIP3WF, GFIP320BWF)Updated 6 months ago
This guide shows you how to find the motion detection and recording settings in the Green Feathers app, how to configure them, and where to view the motion notifications within the app.
Please note: To see a more in depth overview of the Green Feathers app and the settings, please have a look at this guide here.
This guide is not compatible with all of our cameras, if you are unsure of which camera you have, check this guide here. Please see below the cameras this guide is designed for:
 |  |
Let's Begin -
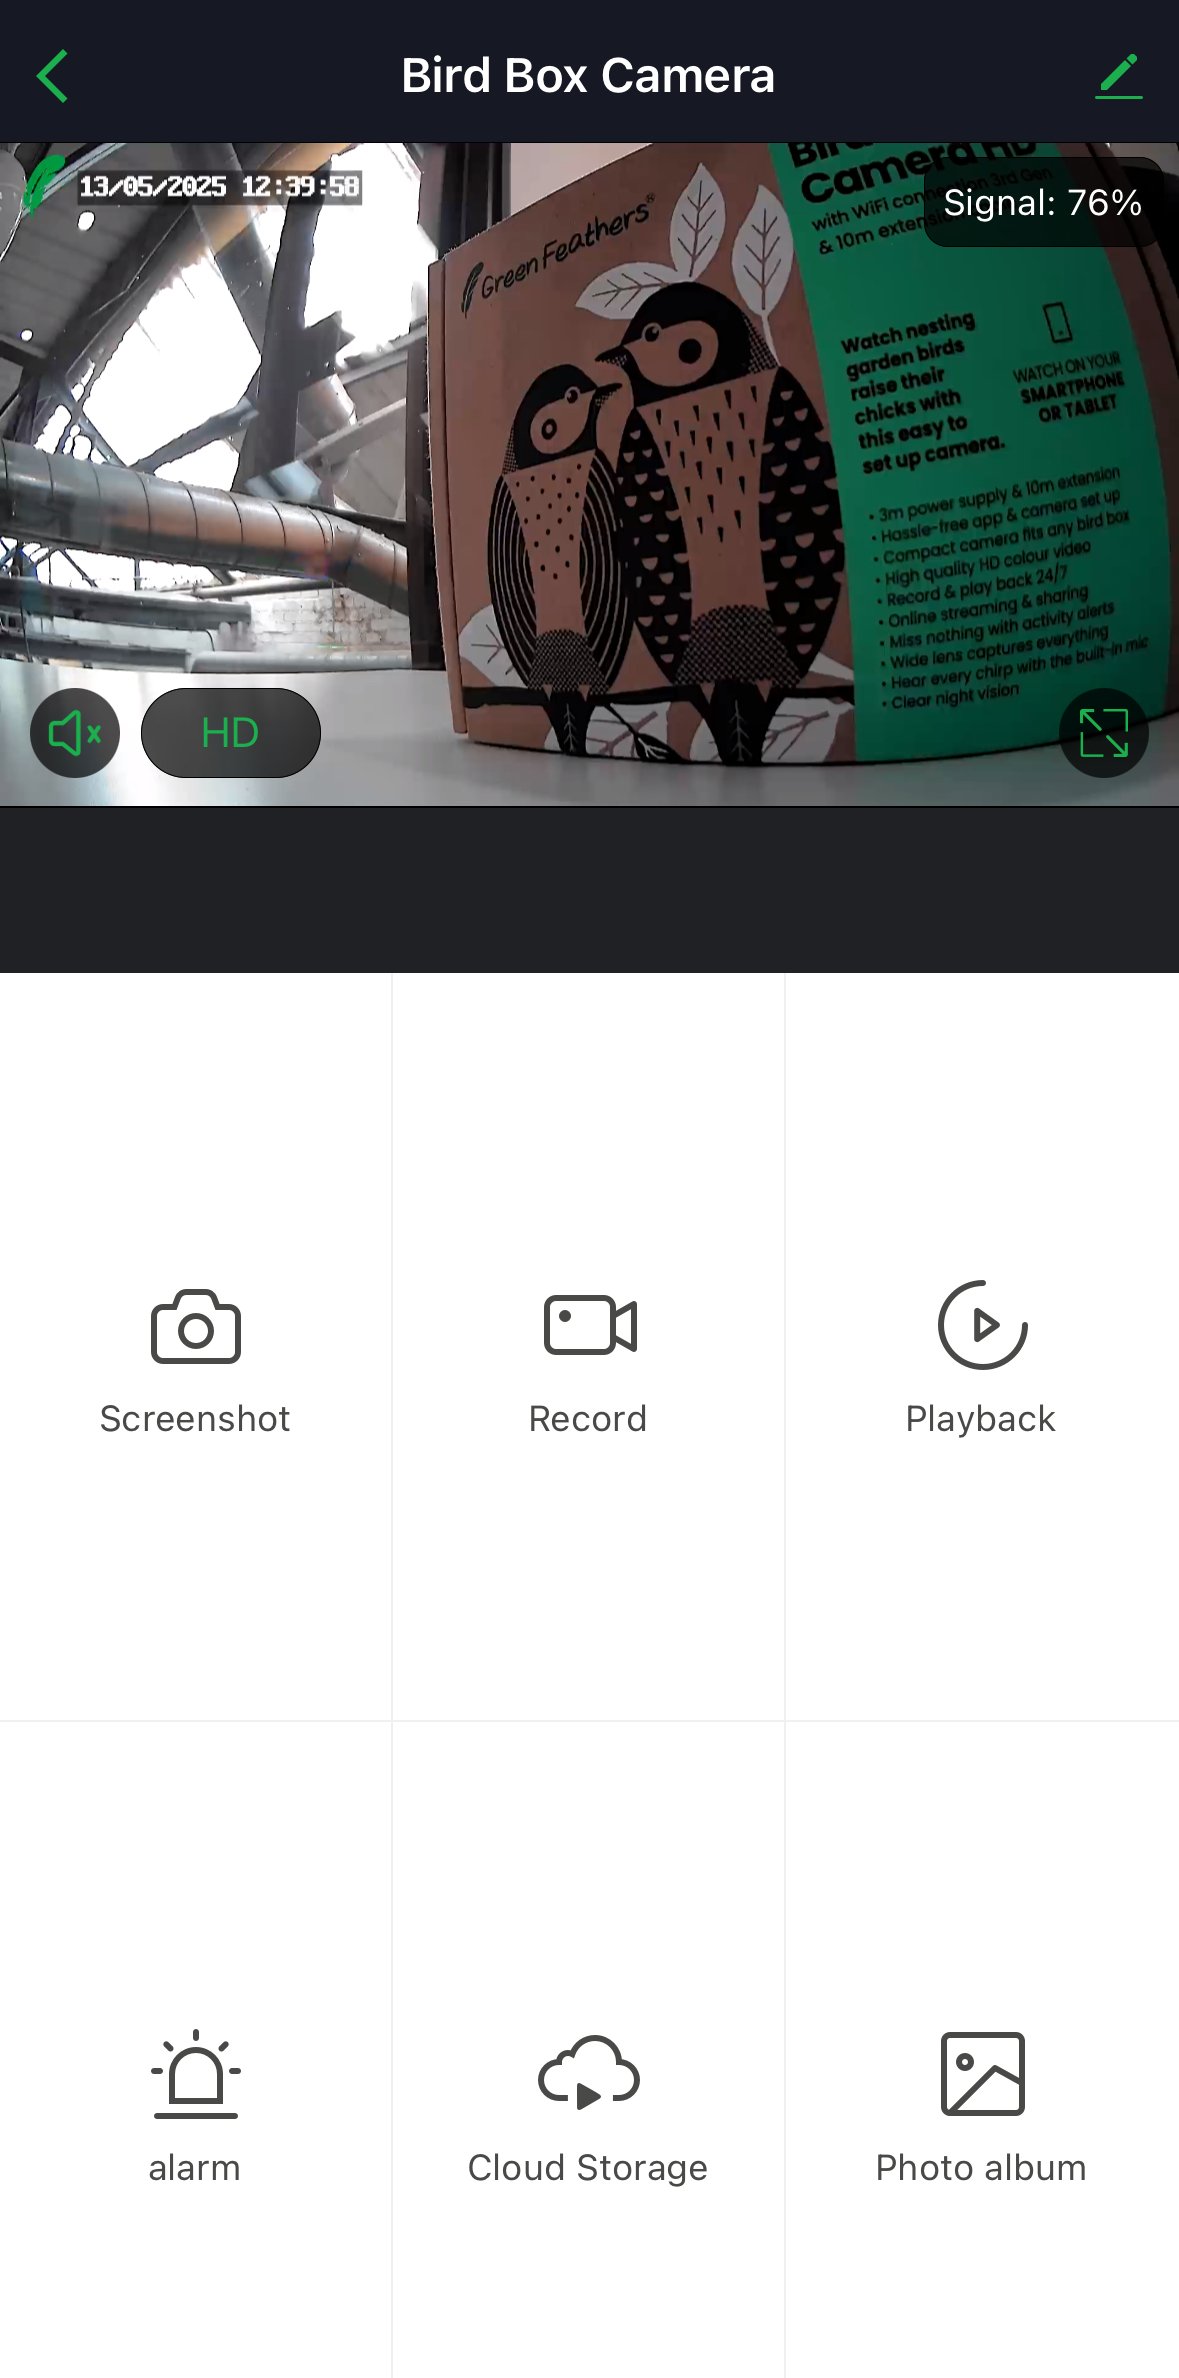
Firstly if your app is the older style (for older versions of the cameras) and your live view page looks like the image below, you will need to use this guide here.
Our recommended set up is to enable motion detection and event recording, this means that the camera will record events that are triggered by motion and alert you when motion is detected. You want to make sure you have an SD card inserted and have the camera connected to the app.
To enable the motion detection and set the recommended settings for recording, follow these steps:
Step 1 - Open up the live feed of your camera and select the three little dots in the top right (this will take you to your camera's settings) 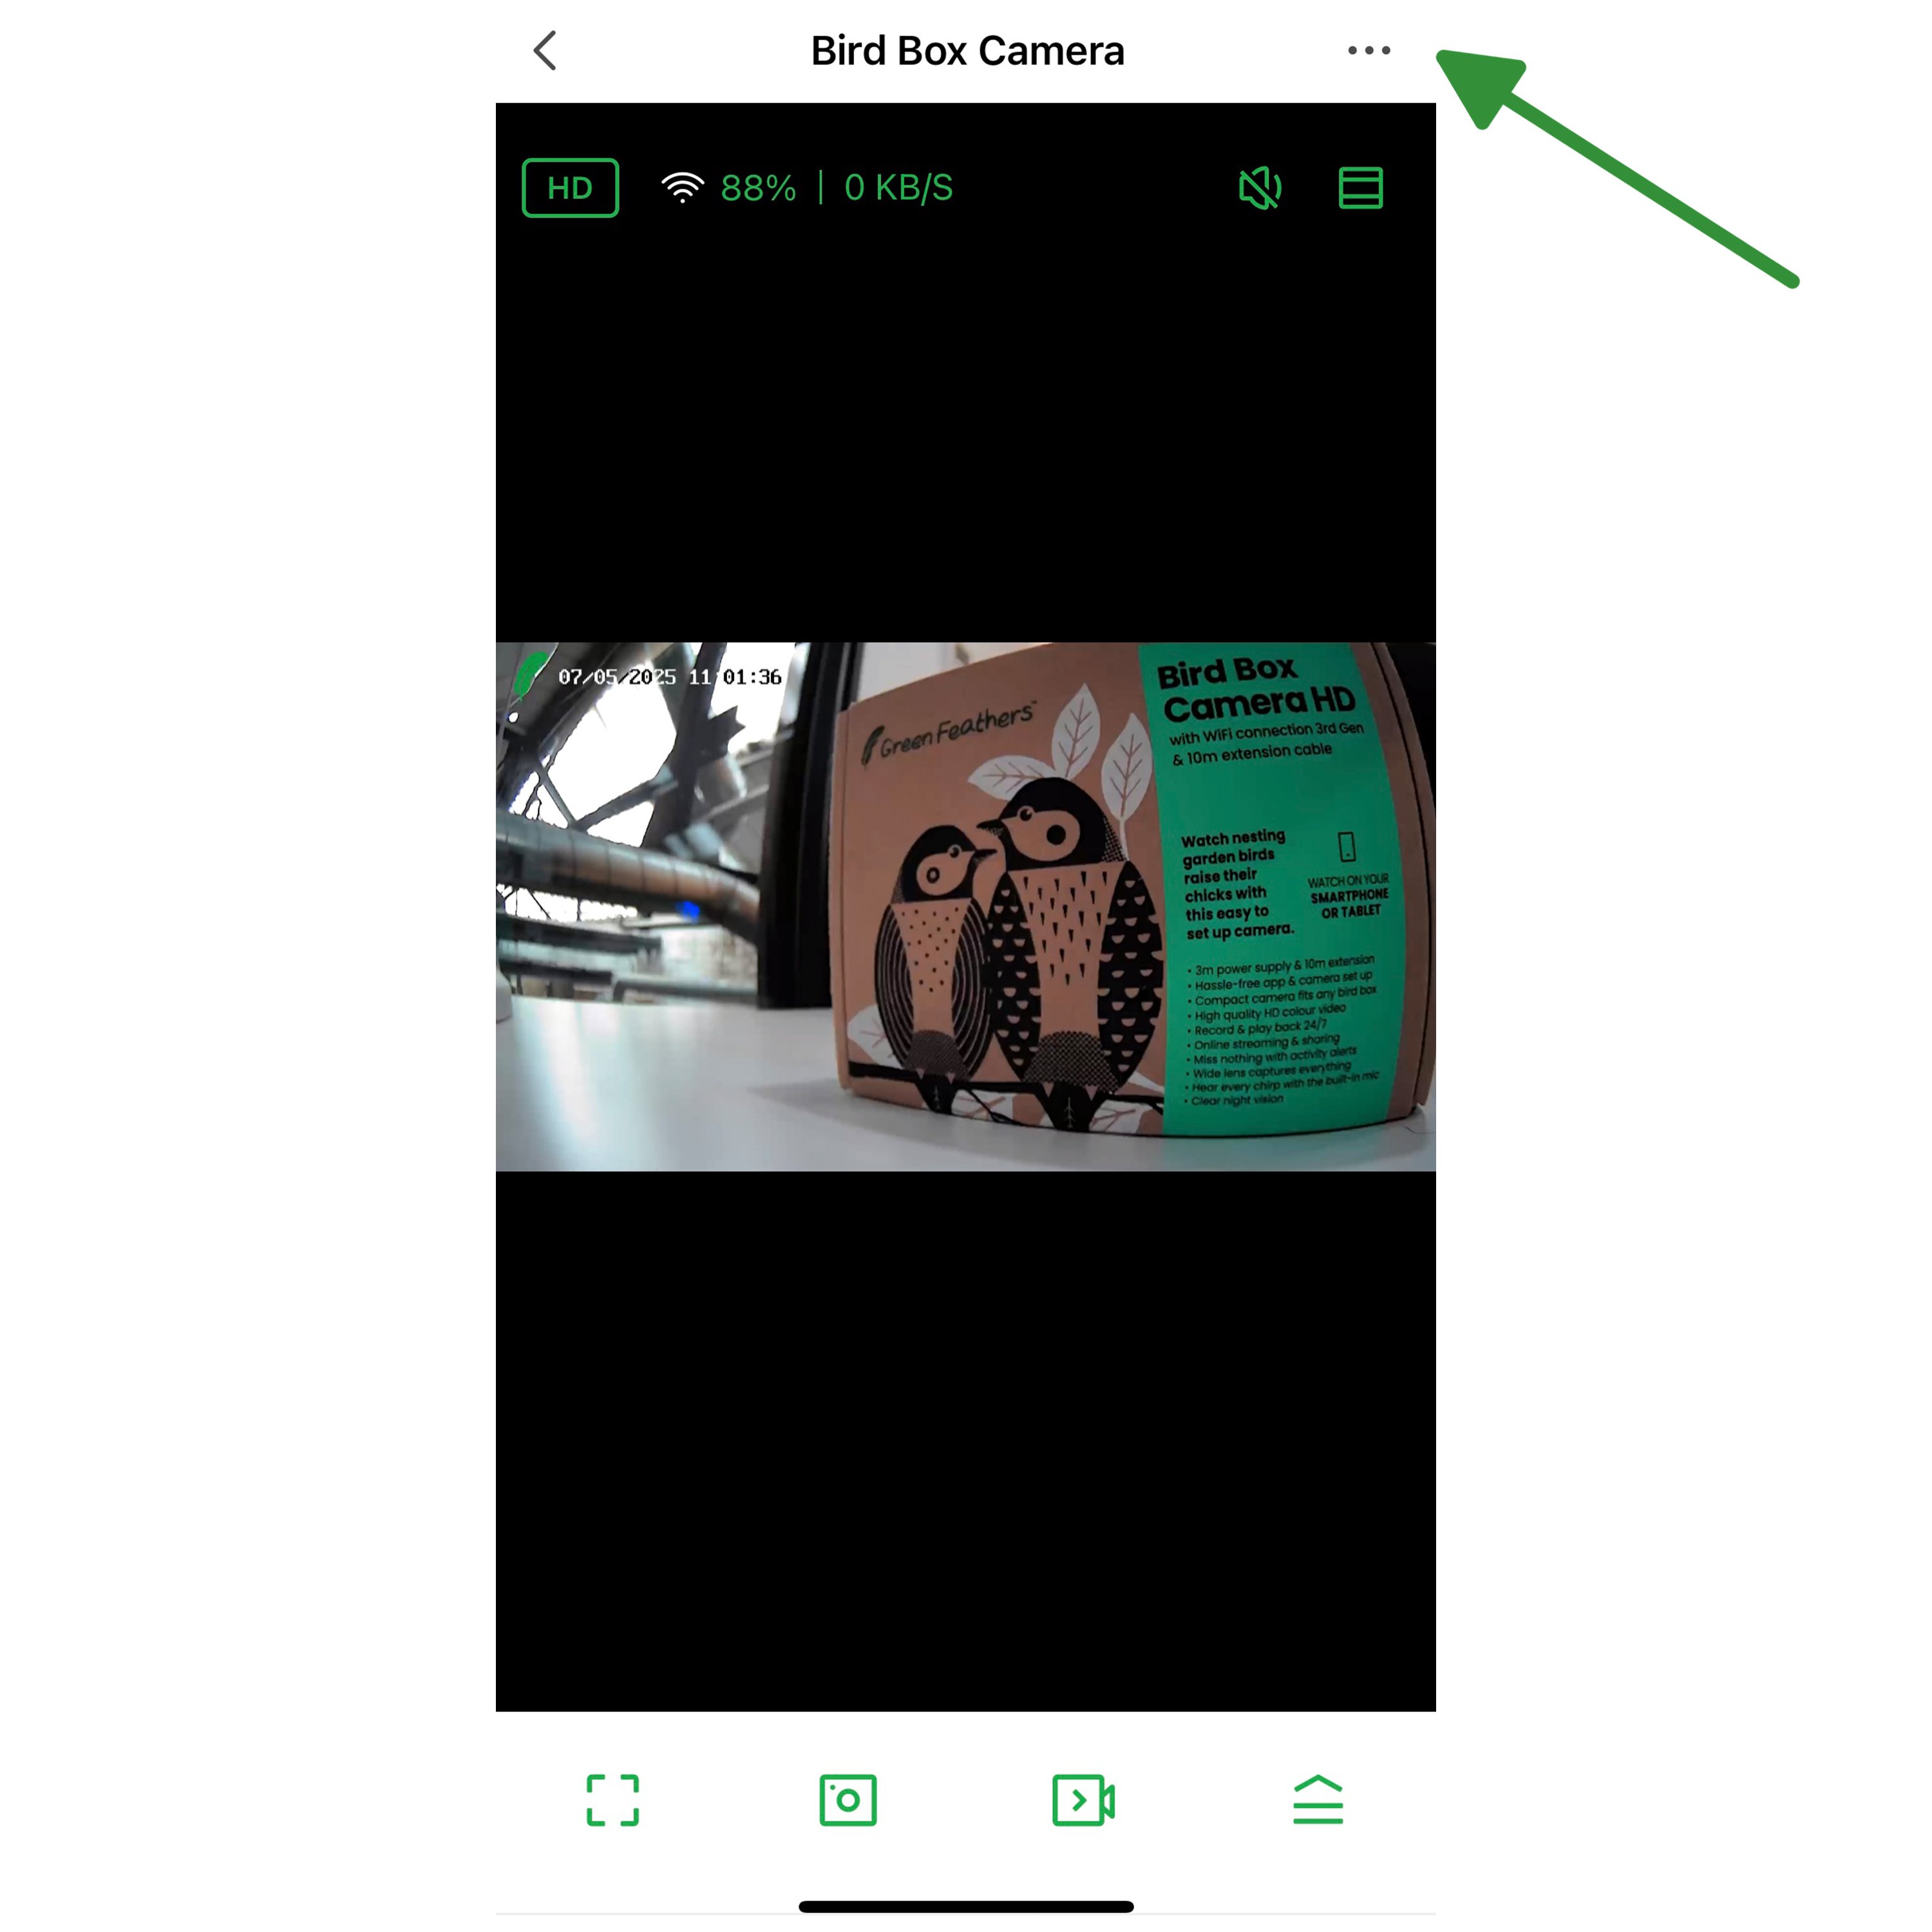 |
Step 2 - Once you are in the settings, scroll down and click on 'Detection Alarm Settings' 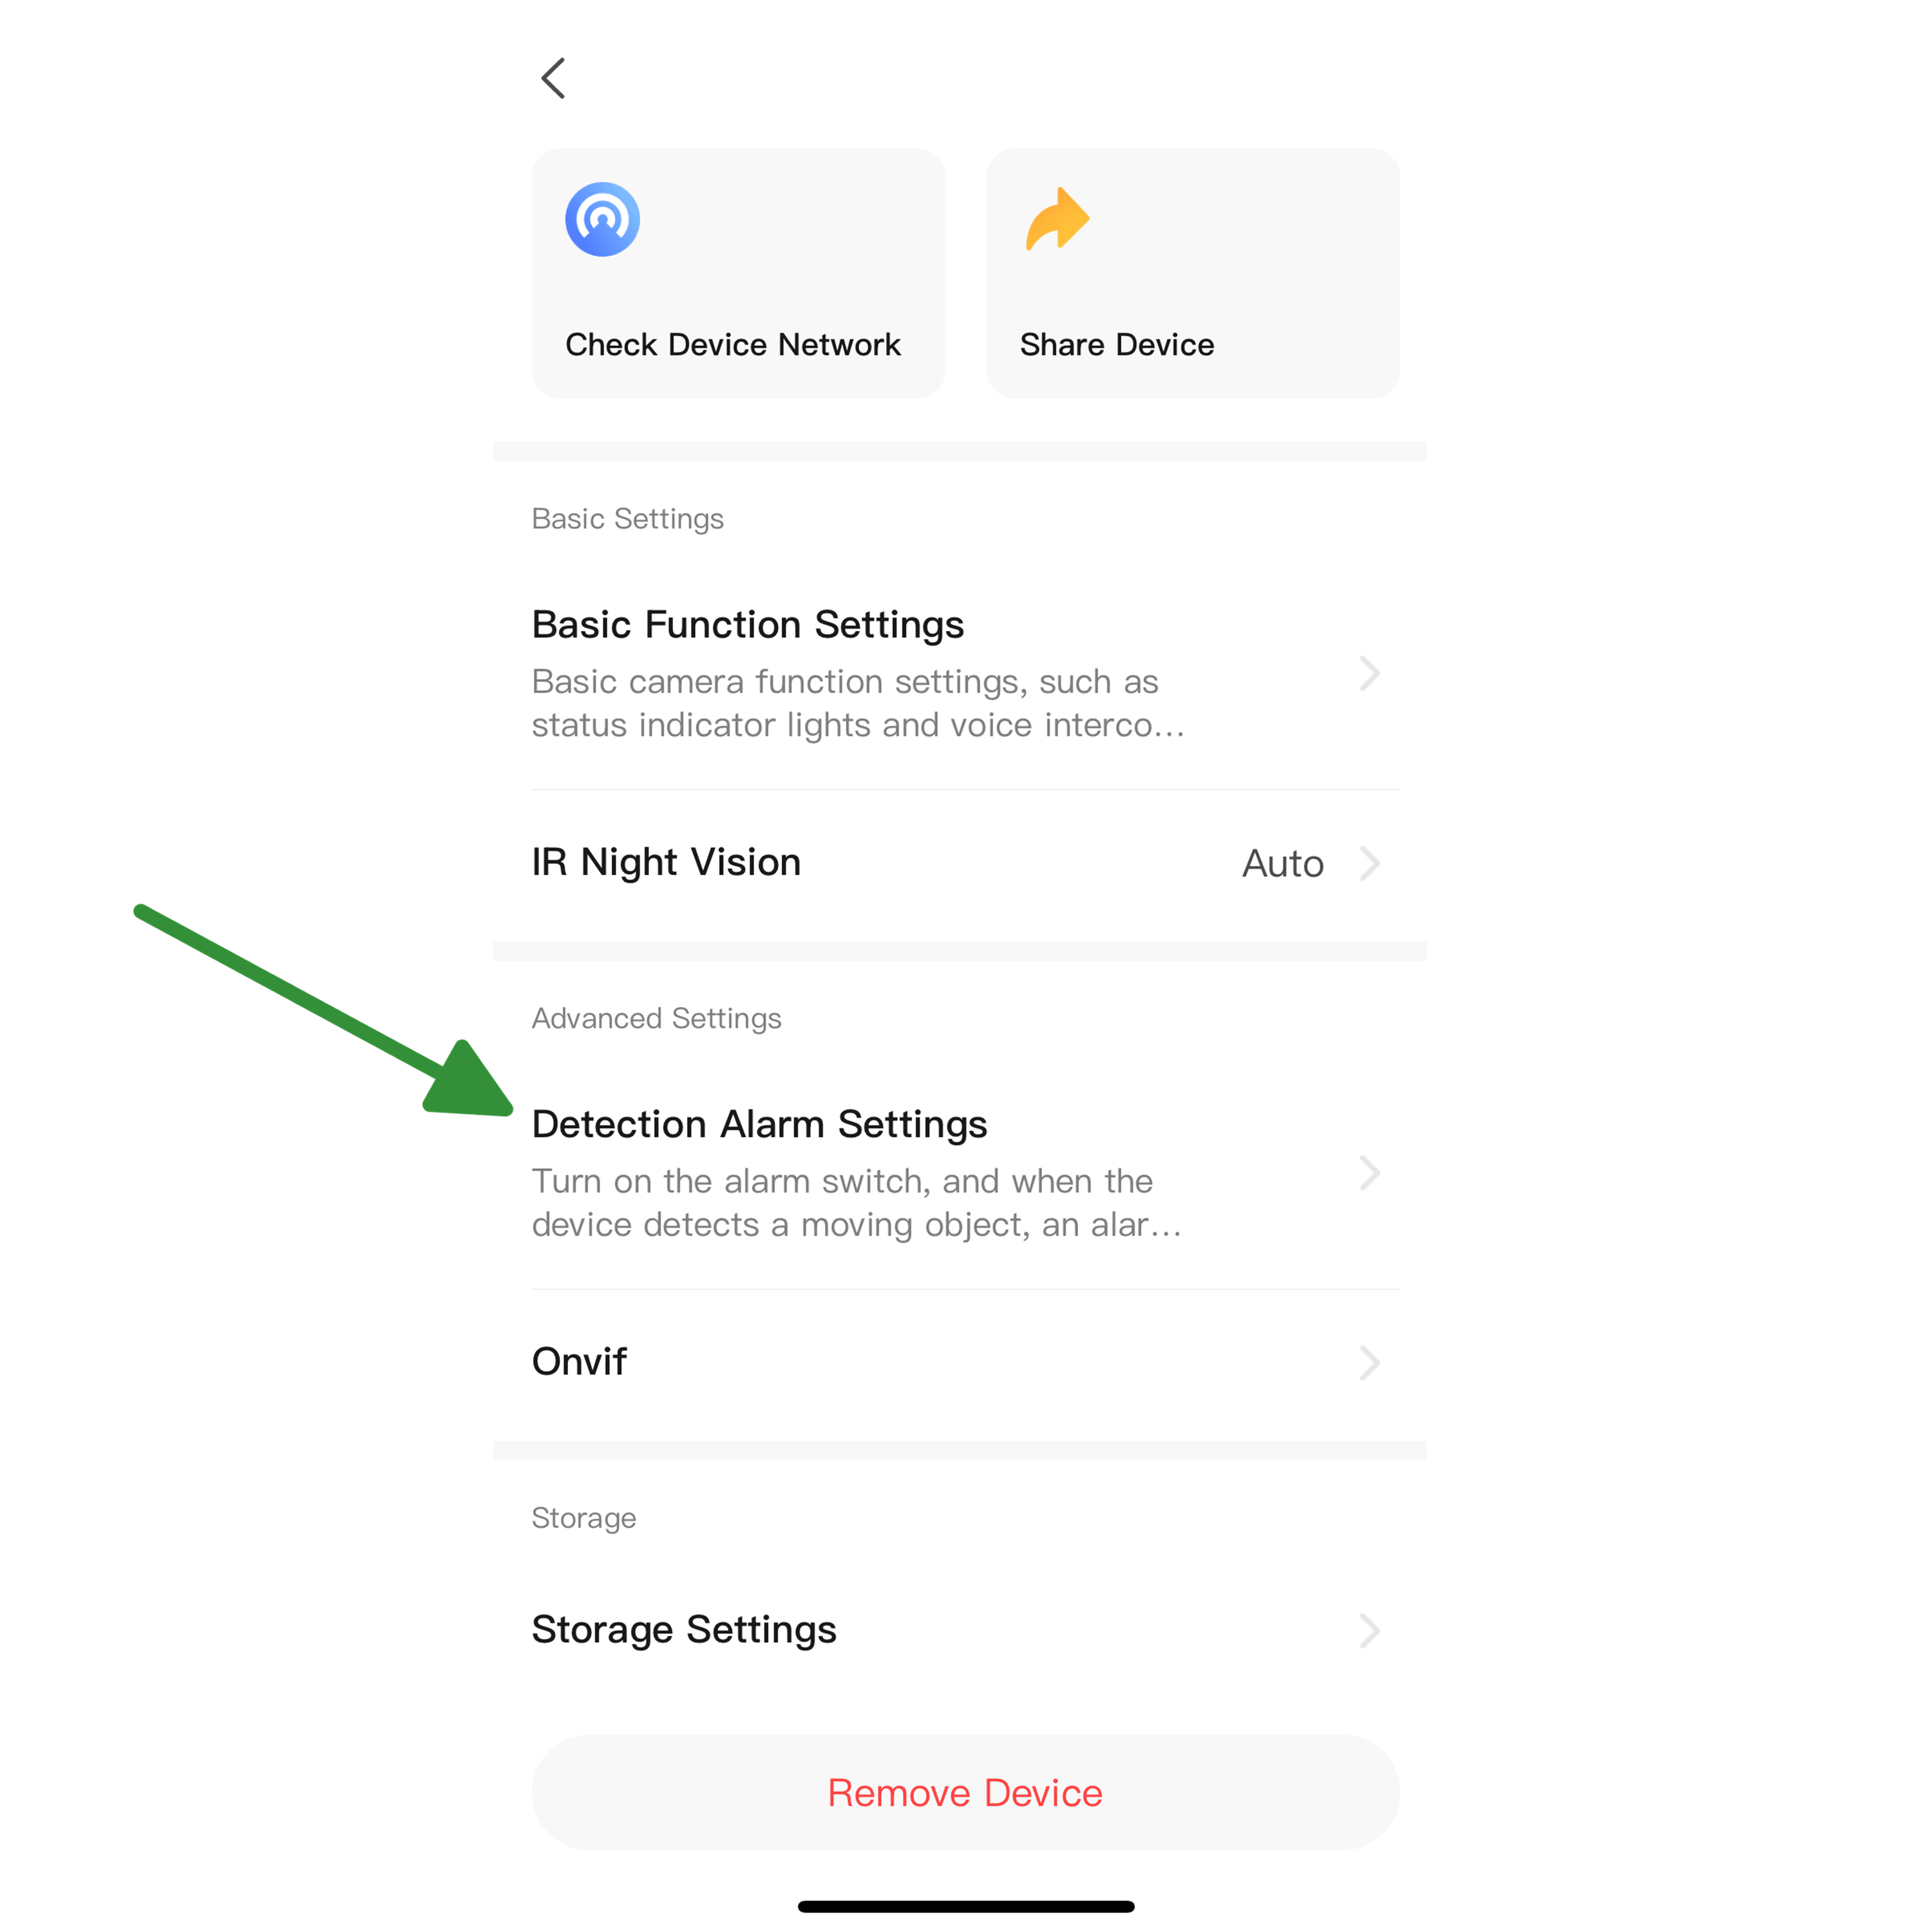 |
Step 3 - Tick 'Motion Detection Alarm'. This will then show you other options for customisation (We will go into more depth on these at the end of the guide). Once you have ticked the 'Motion Detection Alarm' press the back button in the top left 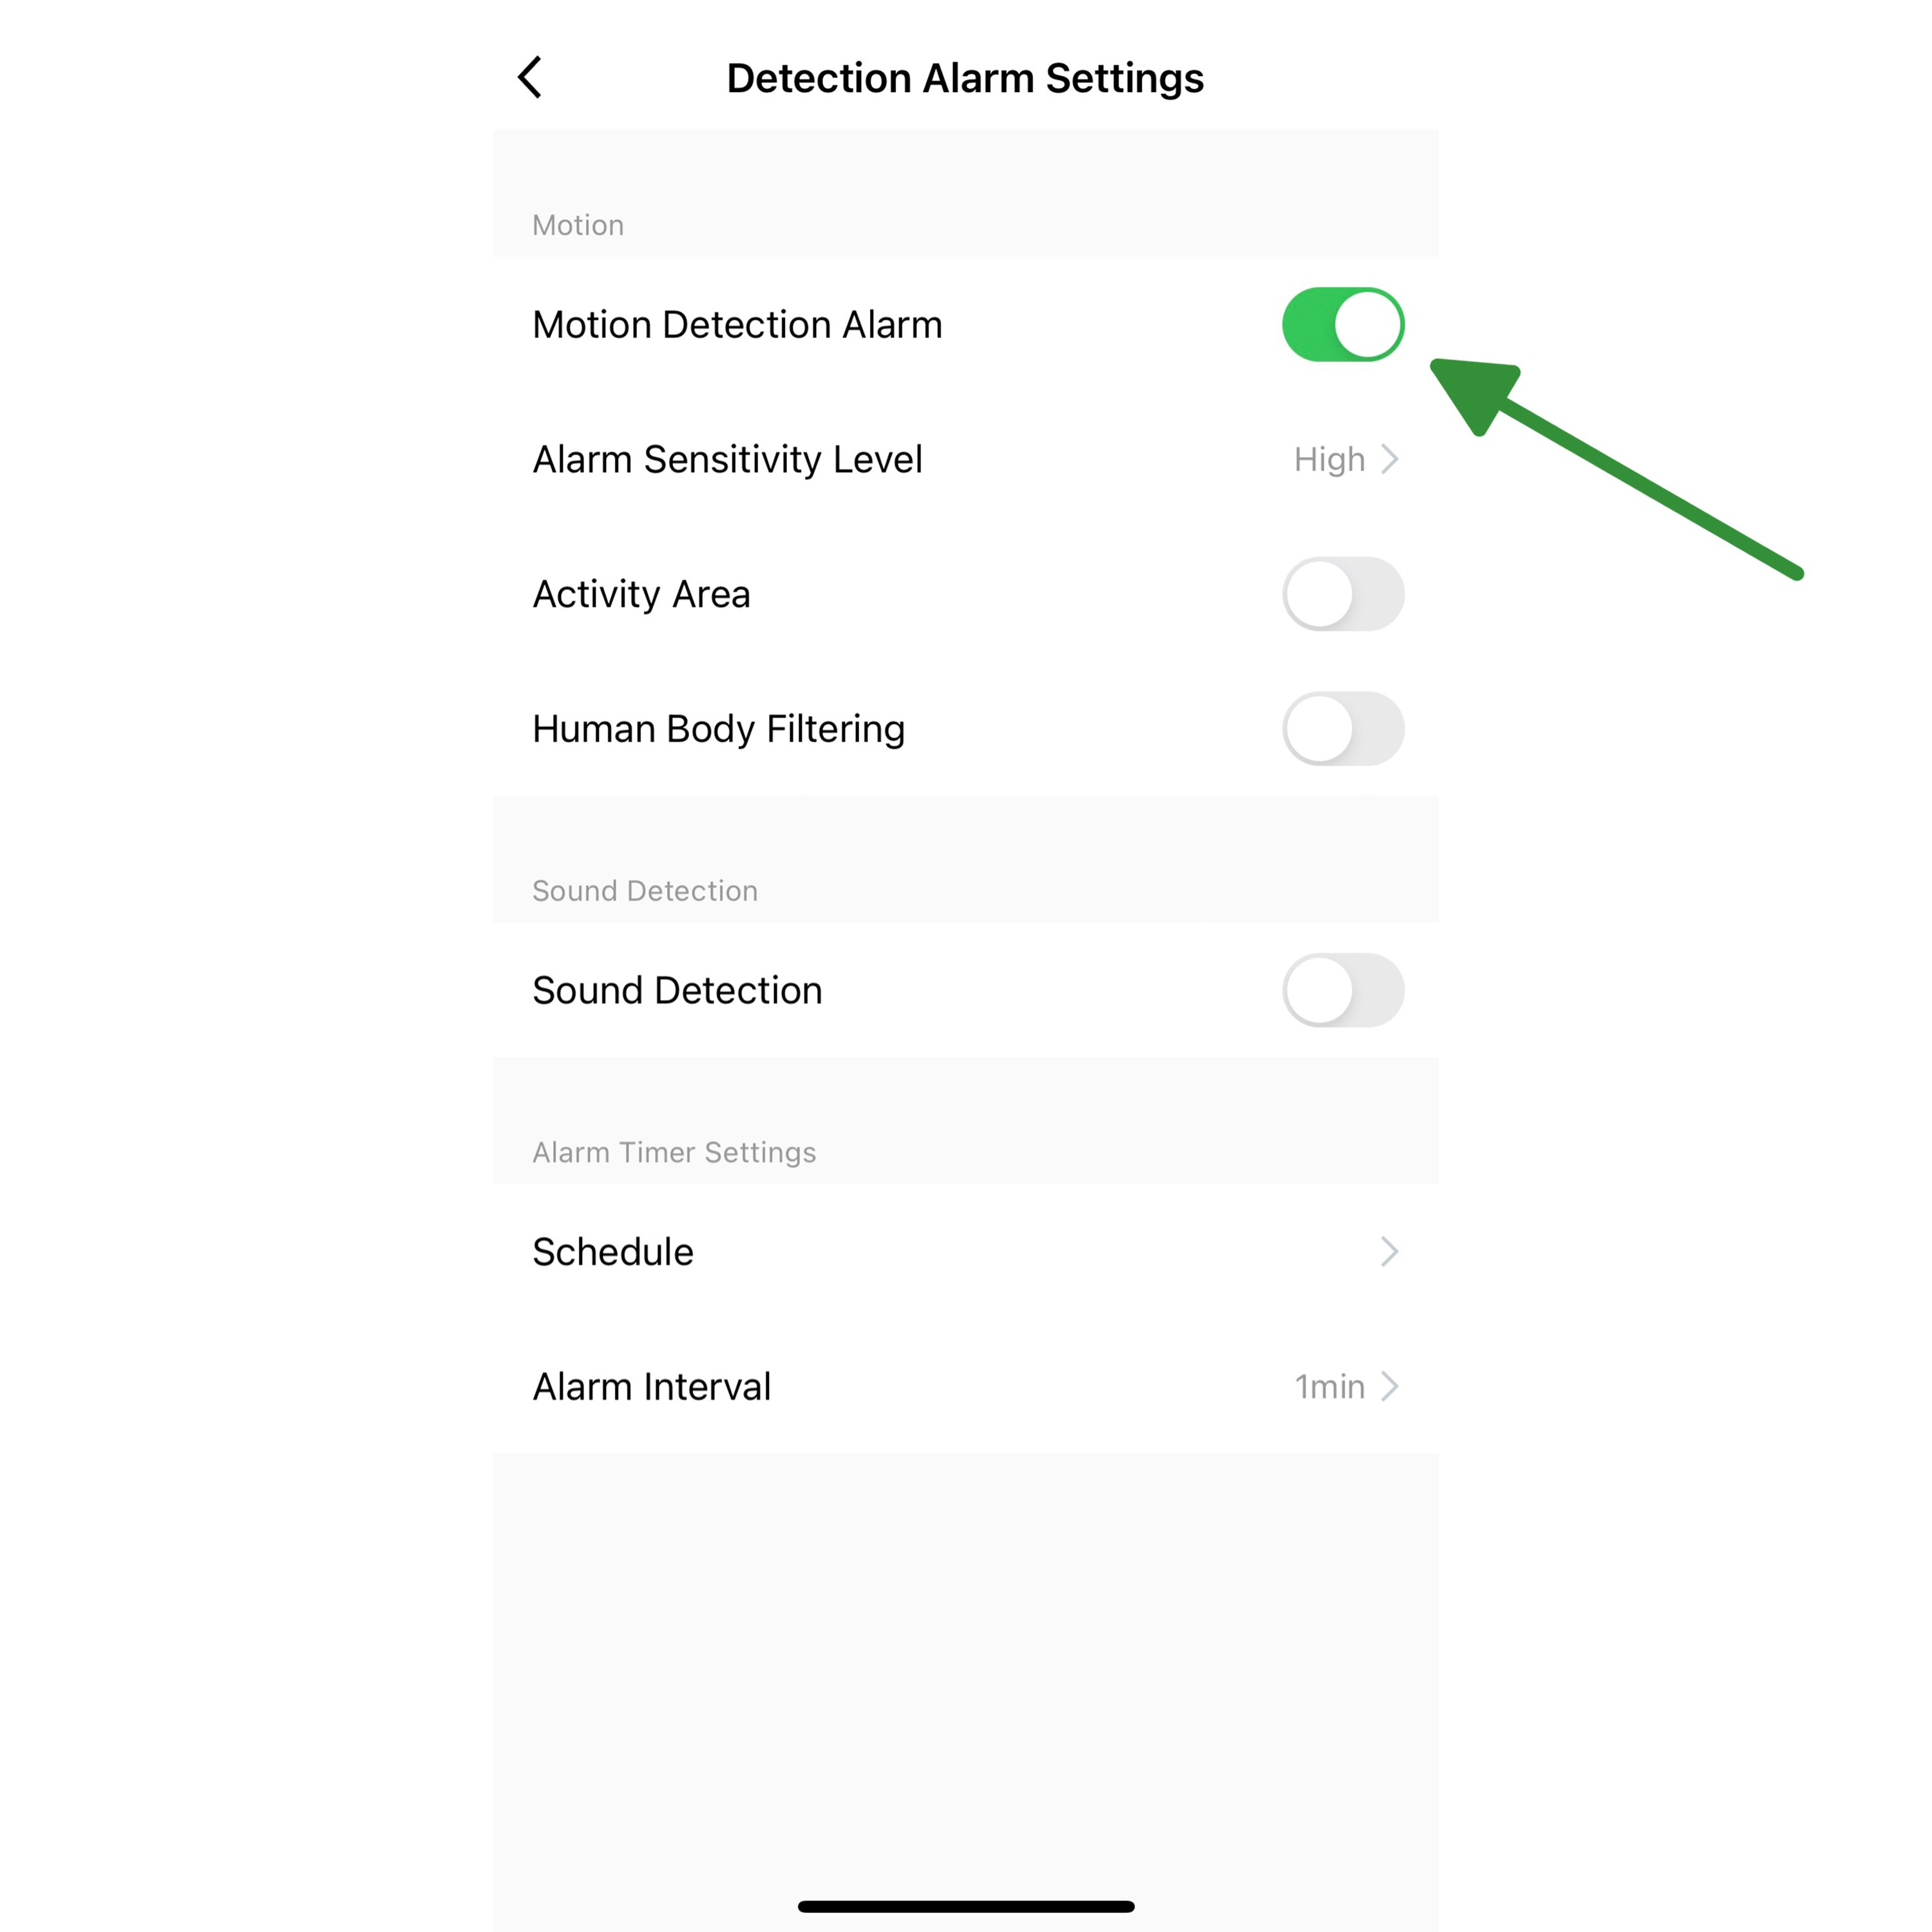 |
Step 4 - Scroll through the settings and select 'Recording Settings' 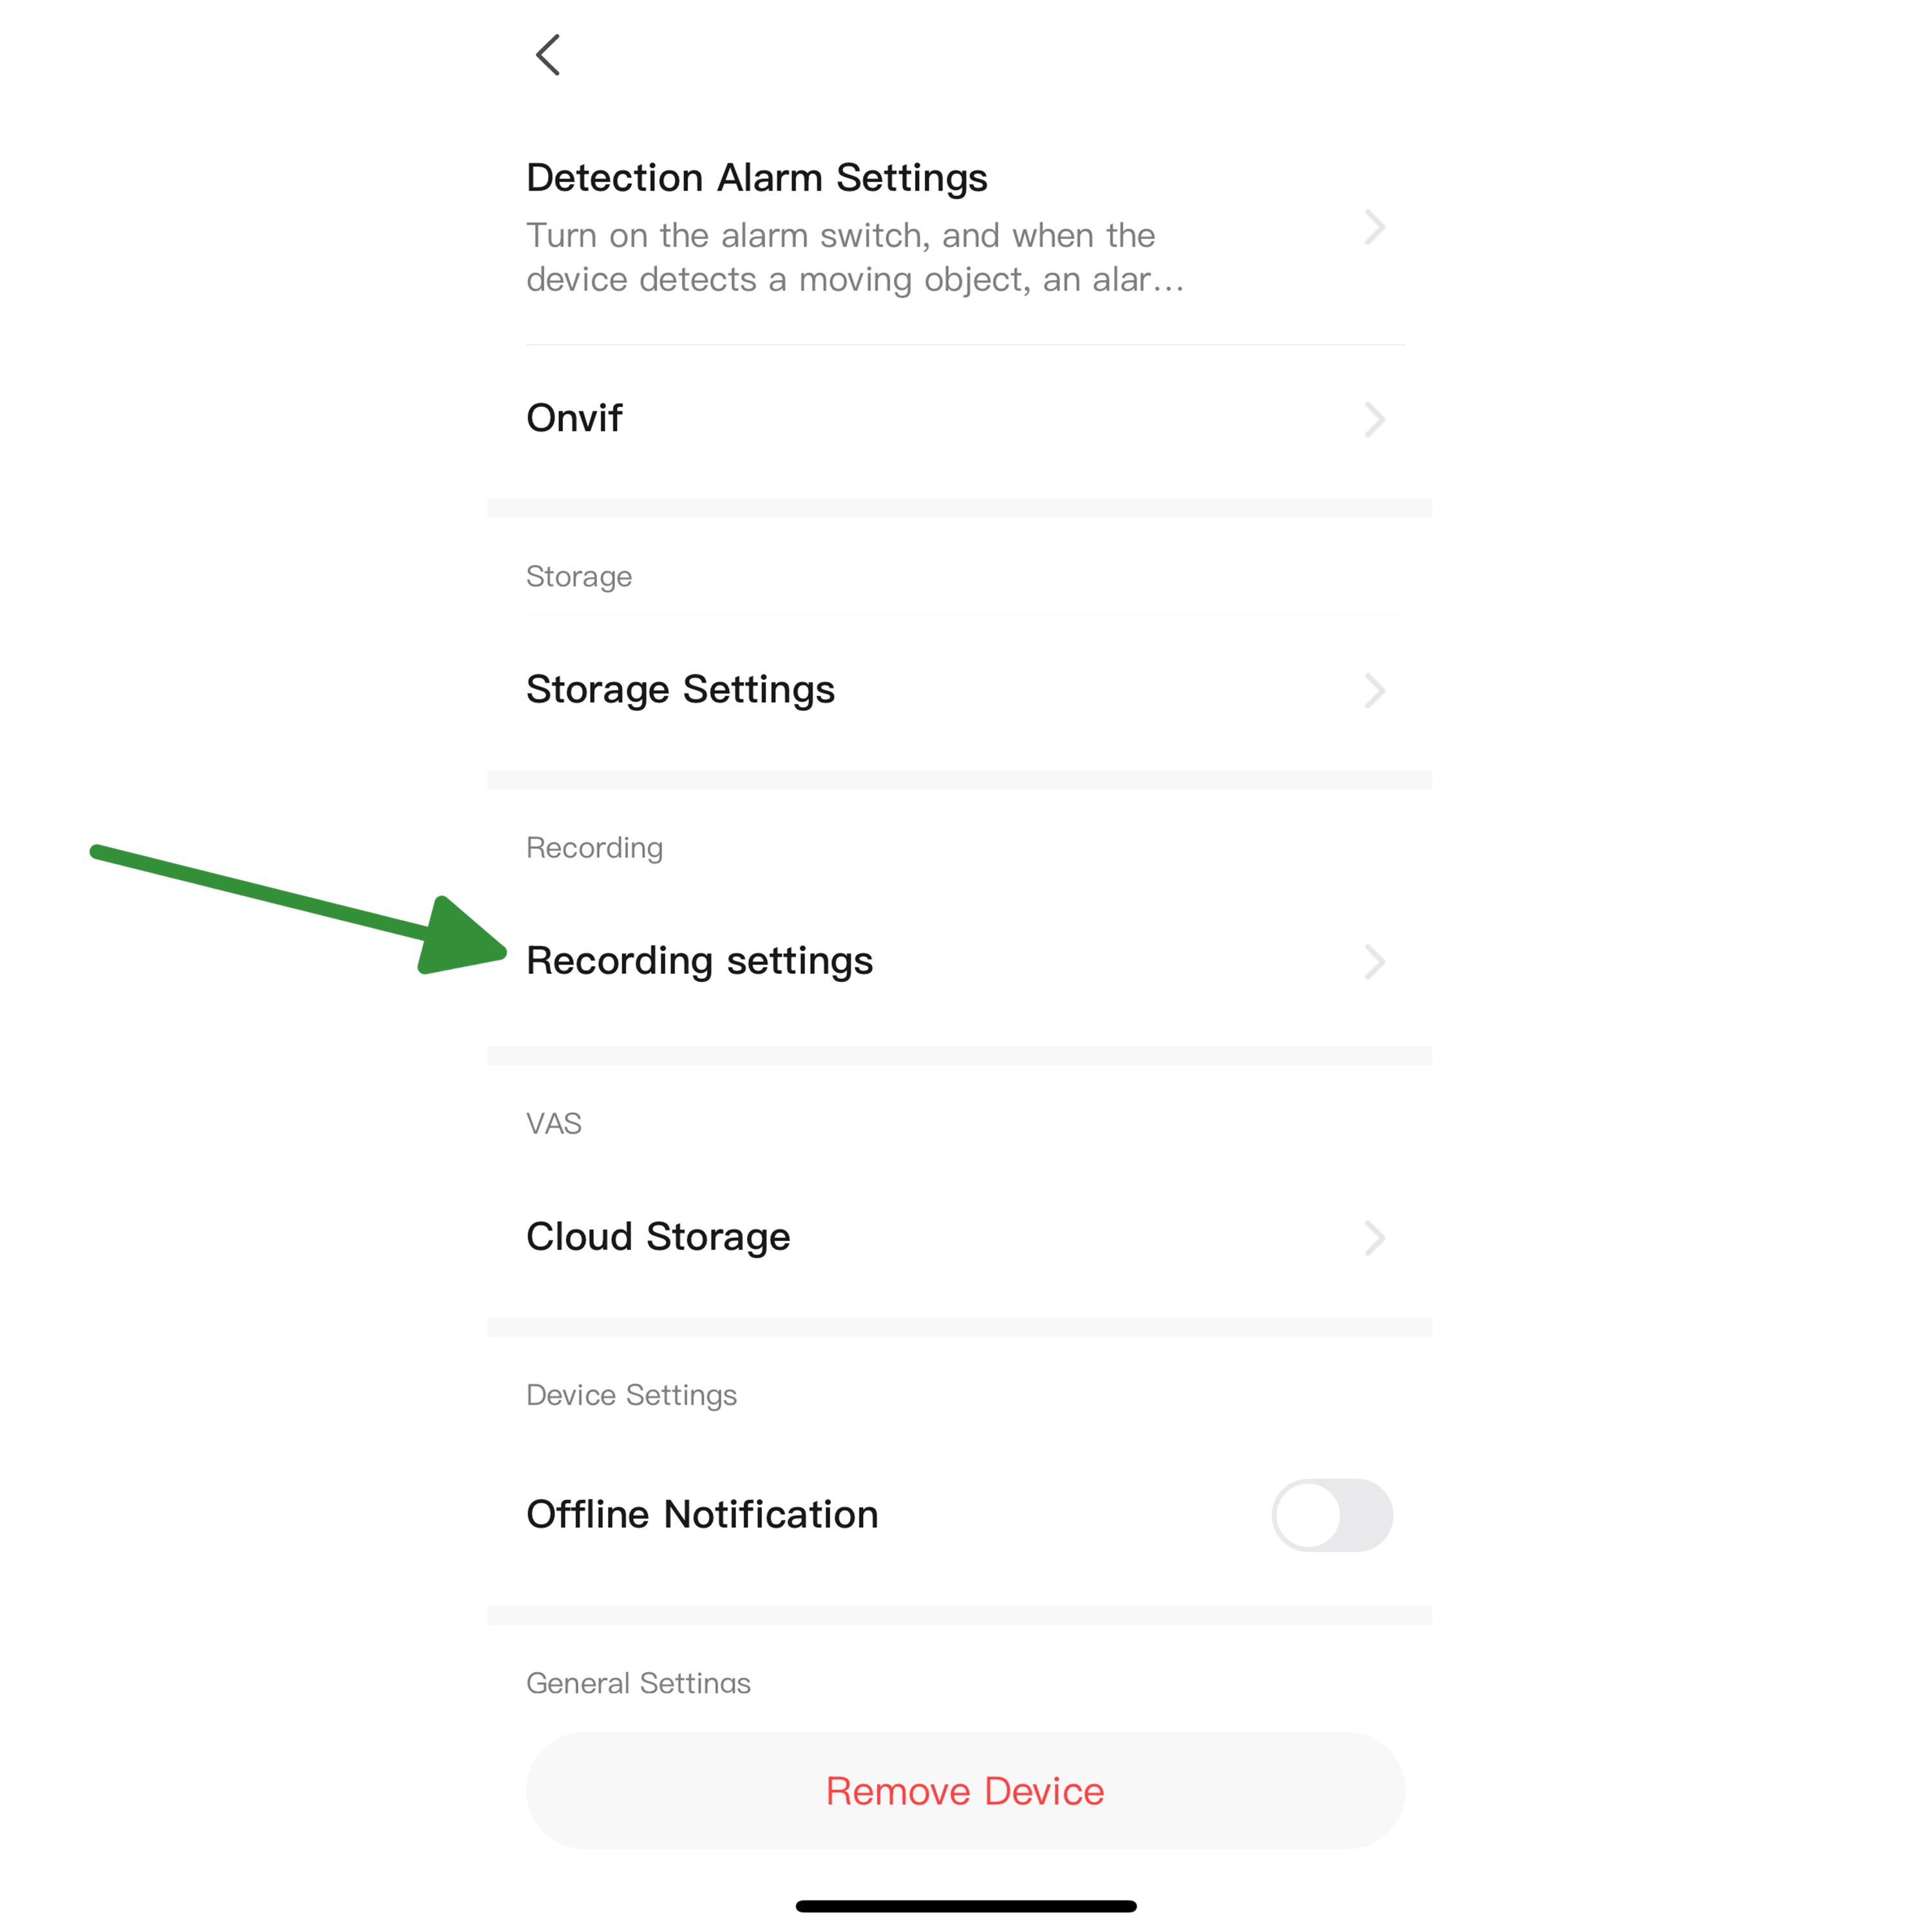 |
Step 5 -Tick 'Local Recording' and make sure you have the Recording Mode set to 'Event Recording'. You have now successfully set up motion detection and event recording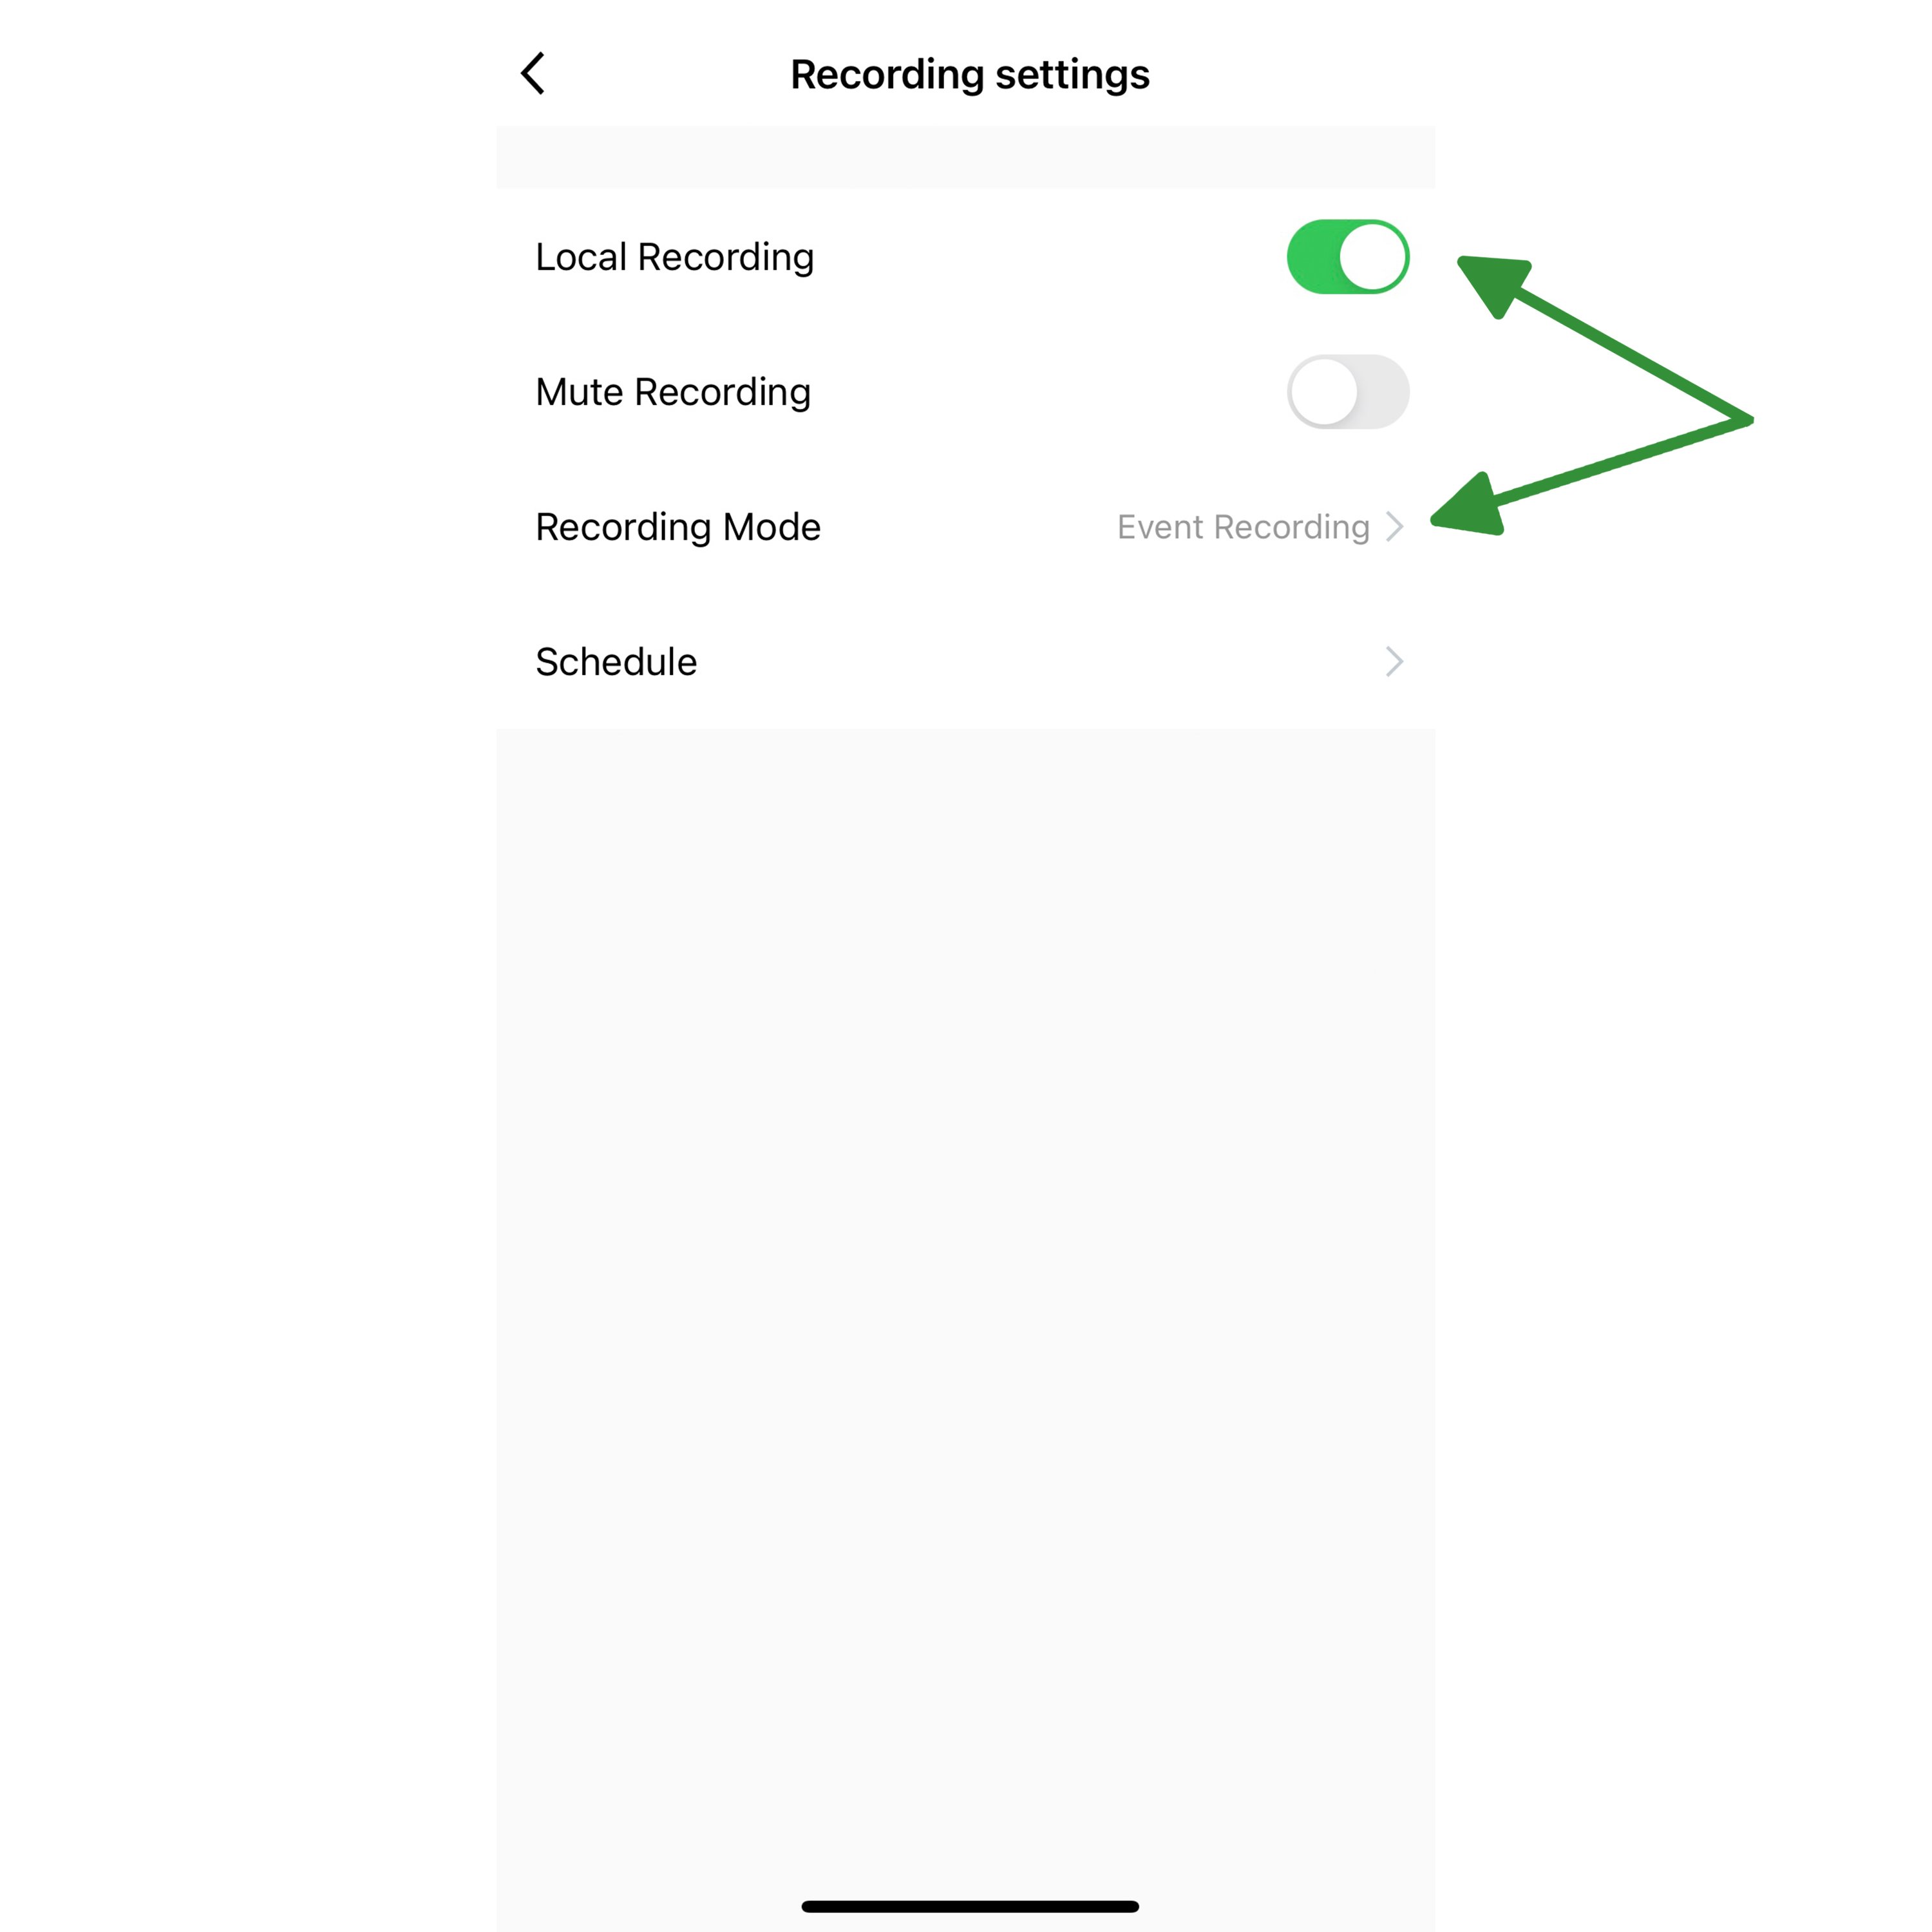 |
Information on other customisation settings for alerts, recording and motion detection -
Now let's go over what some of the other settings mean on these pages. On the Detection Alarm Settings you can see these options:

Alarm Sensitivity Level - This will allow you to change the sensitivity level of the motion detection alarm. You can choose between High, Medium and Low. If you find that your camera is alerting you to a lot of movement, you can change this to Low.
Activity Area - Activity area allows you to set a particular area where the camera will be triggered by motion. Once ticked it will give you the option 'Surveillance Area Setting', select this and a screen will pop up, this will show you the cameras live feed and a little box that you can resize and move to different locations.
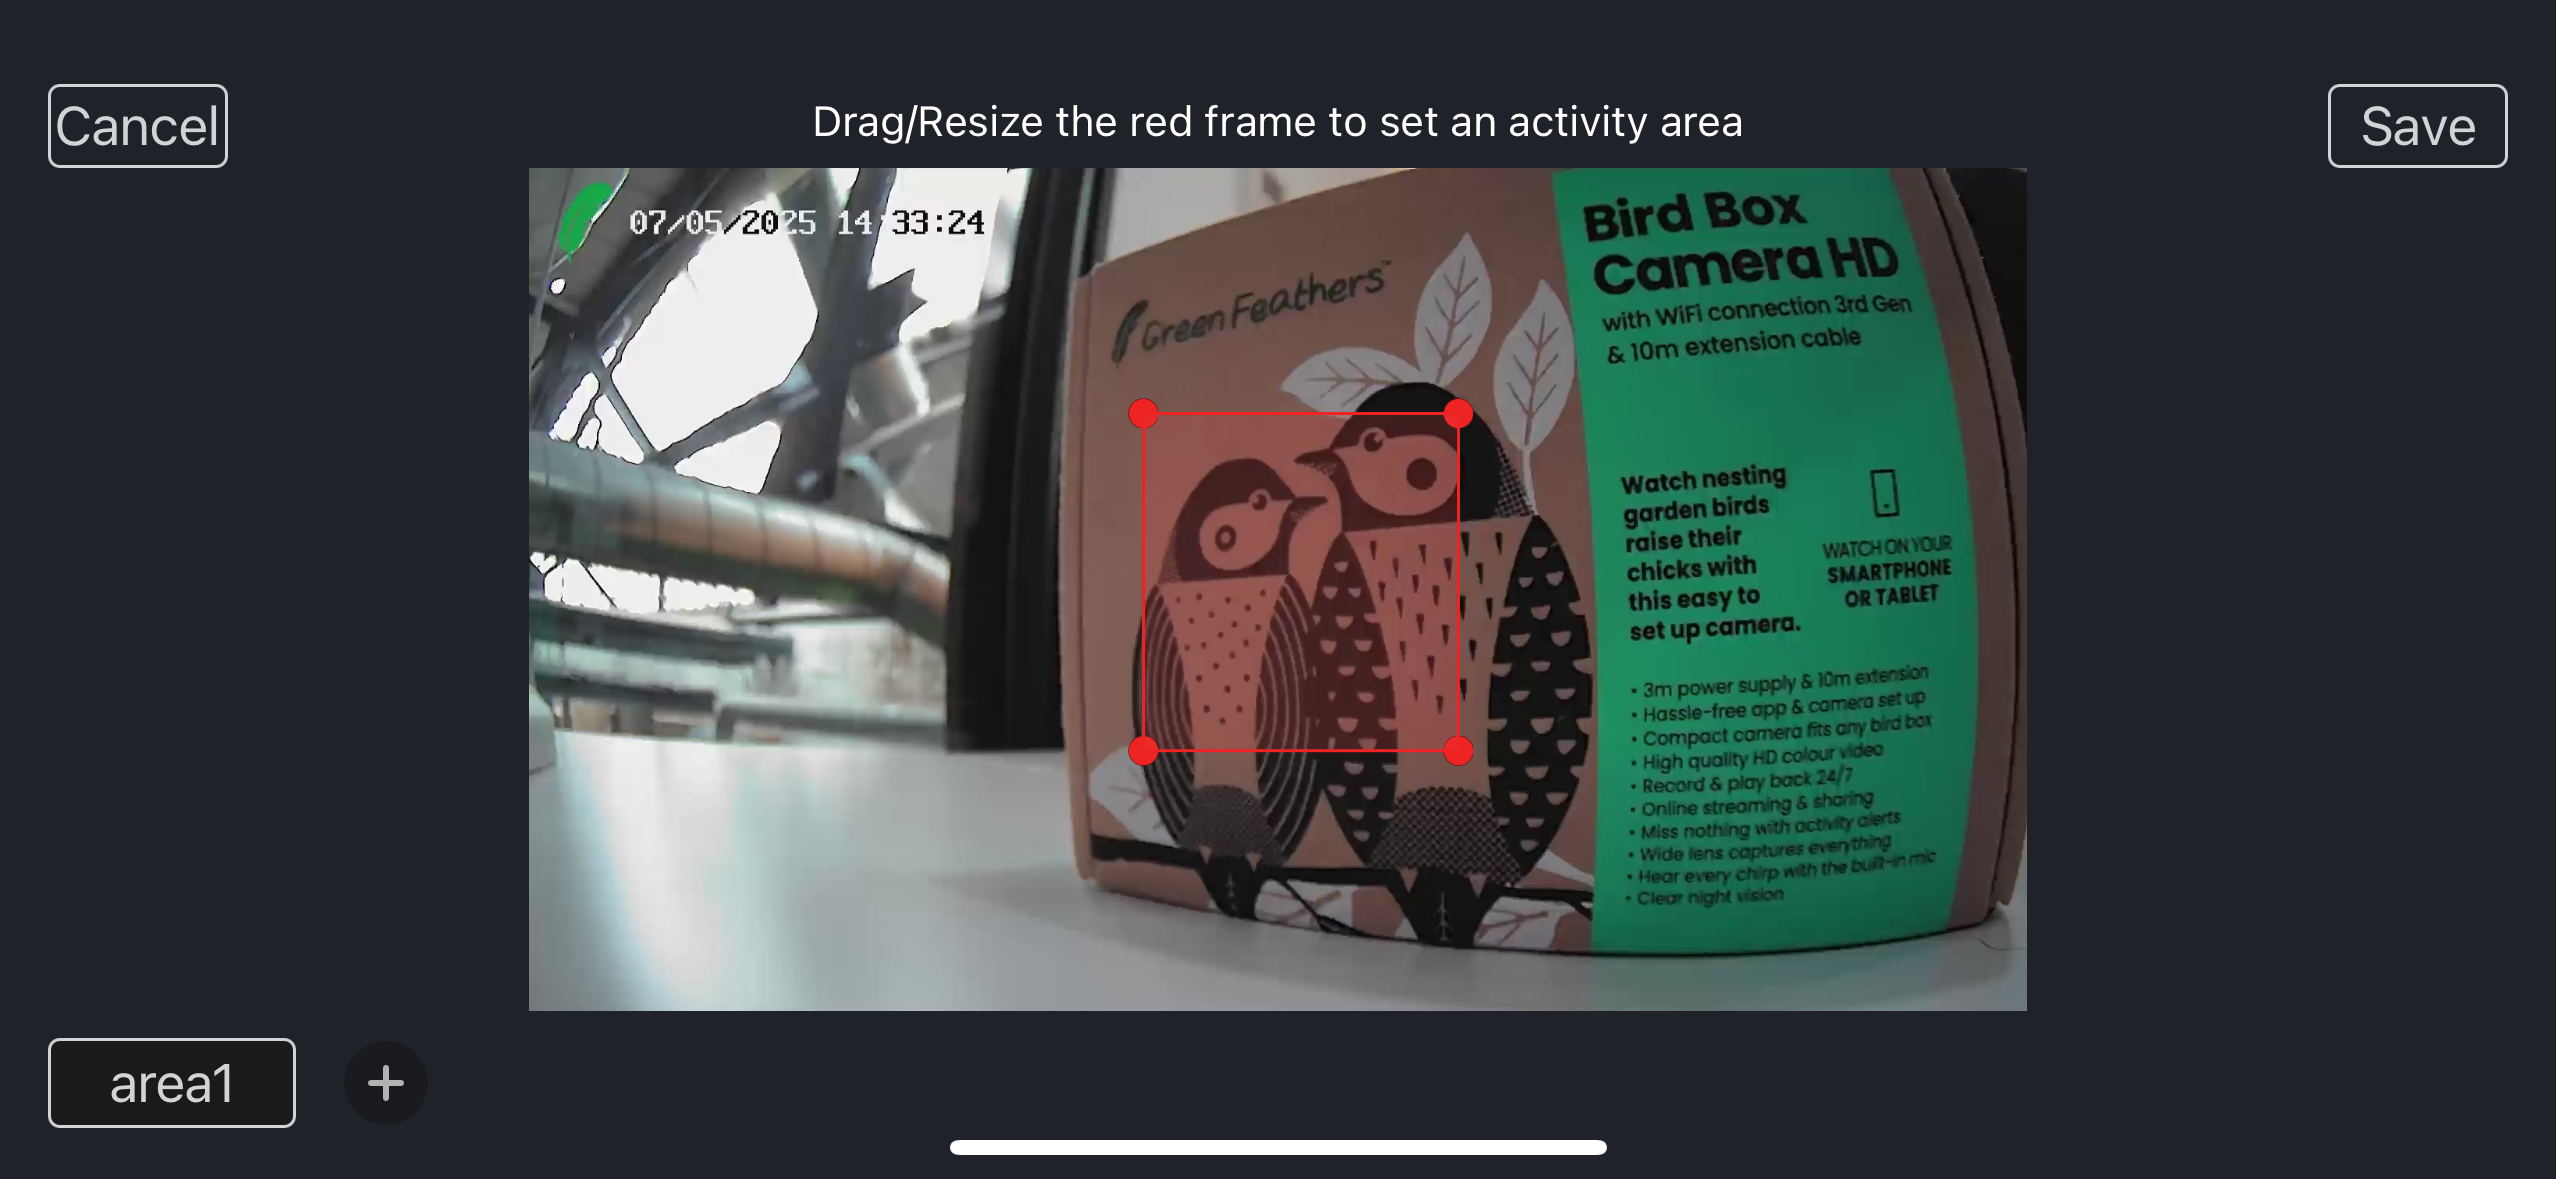 Please note: for some of our cameras, underneath the image you will see '+' to add another activity area, you can up to 4 different areas.
Human Body Filtering - As these cameras are adapted from CCTV cameras, they have functions like this. Once ticked, the Human Body Filtering option will enable the camera to only be triggered by what it thinks is a human. This is not something we recommend having set on the camera.
Sound Detection - Sound Detection enables the camera to be triggered by sound rather than motion. This setting is useful in some circumstances but can create a lot more notifications if set.
Schedule settings - Setting up a schedule is useful if you only want notifications to be between set hours.
For example, if you wanted to have the motion detection or sound detection at night time only, you could set it to do this at 11pm every day, and disable it at 6am every day. Go to Schedule settings then tap the 'Add' button:
Time
Here you can select a time to turn motion detection/human body filtering/sound detection on or off.

Repeat
If you tap on the 'Repeat' button you can choose which days you want to enable detection.

Note
If you tap on the 'Note' button you can write a note to associate with this automated schedule:
Notifications
If you set the schedule to disable notifications it will not send notifications during the specified period. This feature is useful because you could set the camera to leave the motion detection feature on, but to disable the notifications at night.
When you are finished, tap 'Save' at the top right of the screen.
Of course, there's no point in setting the detection to be turned on every day if it's never being turned off in the first place! So we need to make the counterpart to our first schedule, a second schedule to turn the detection off at a certain time.
As an example we have set it to disable detection at 3pm, and set it to run every day of the week as well. This means that our camera will enable detection at 2:50pm every day, and disable it at 3:00pm every day.
Alarm Interval - The alarm interval options are 1 minute, 3 minutes and 5 minutes. If you were to set this to 5 minutes, it means that you would only get notifications every 5 minutes rather than 1 minute if you preferred to not have as many in a short period of time.
How to view the notifications -
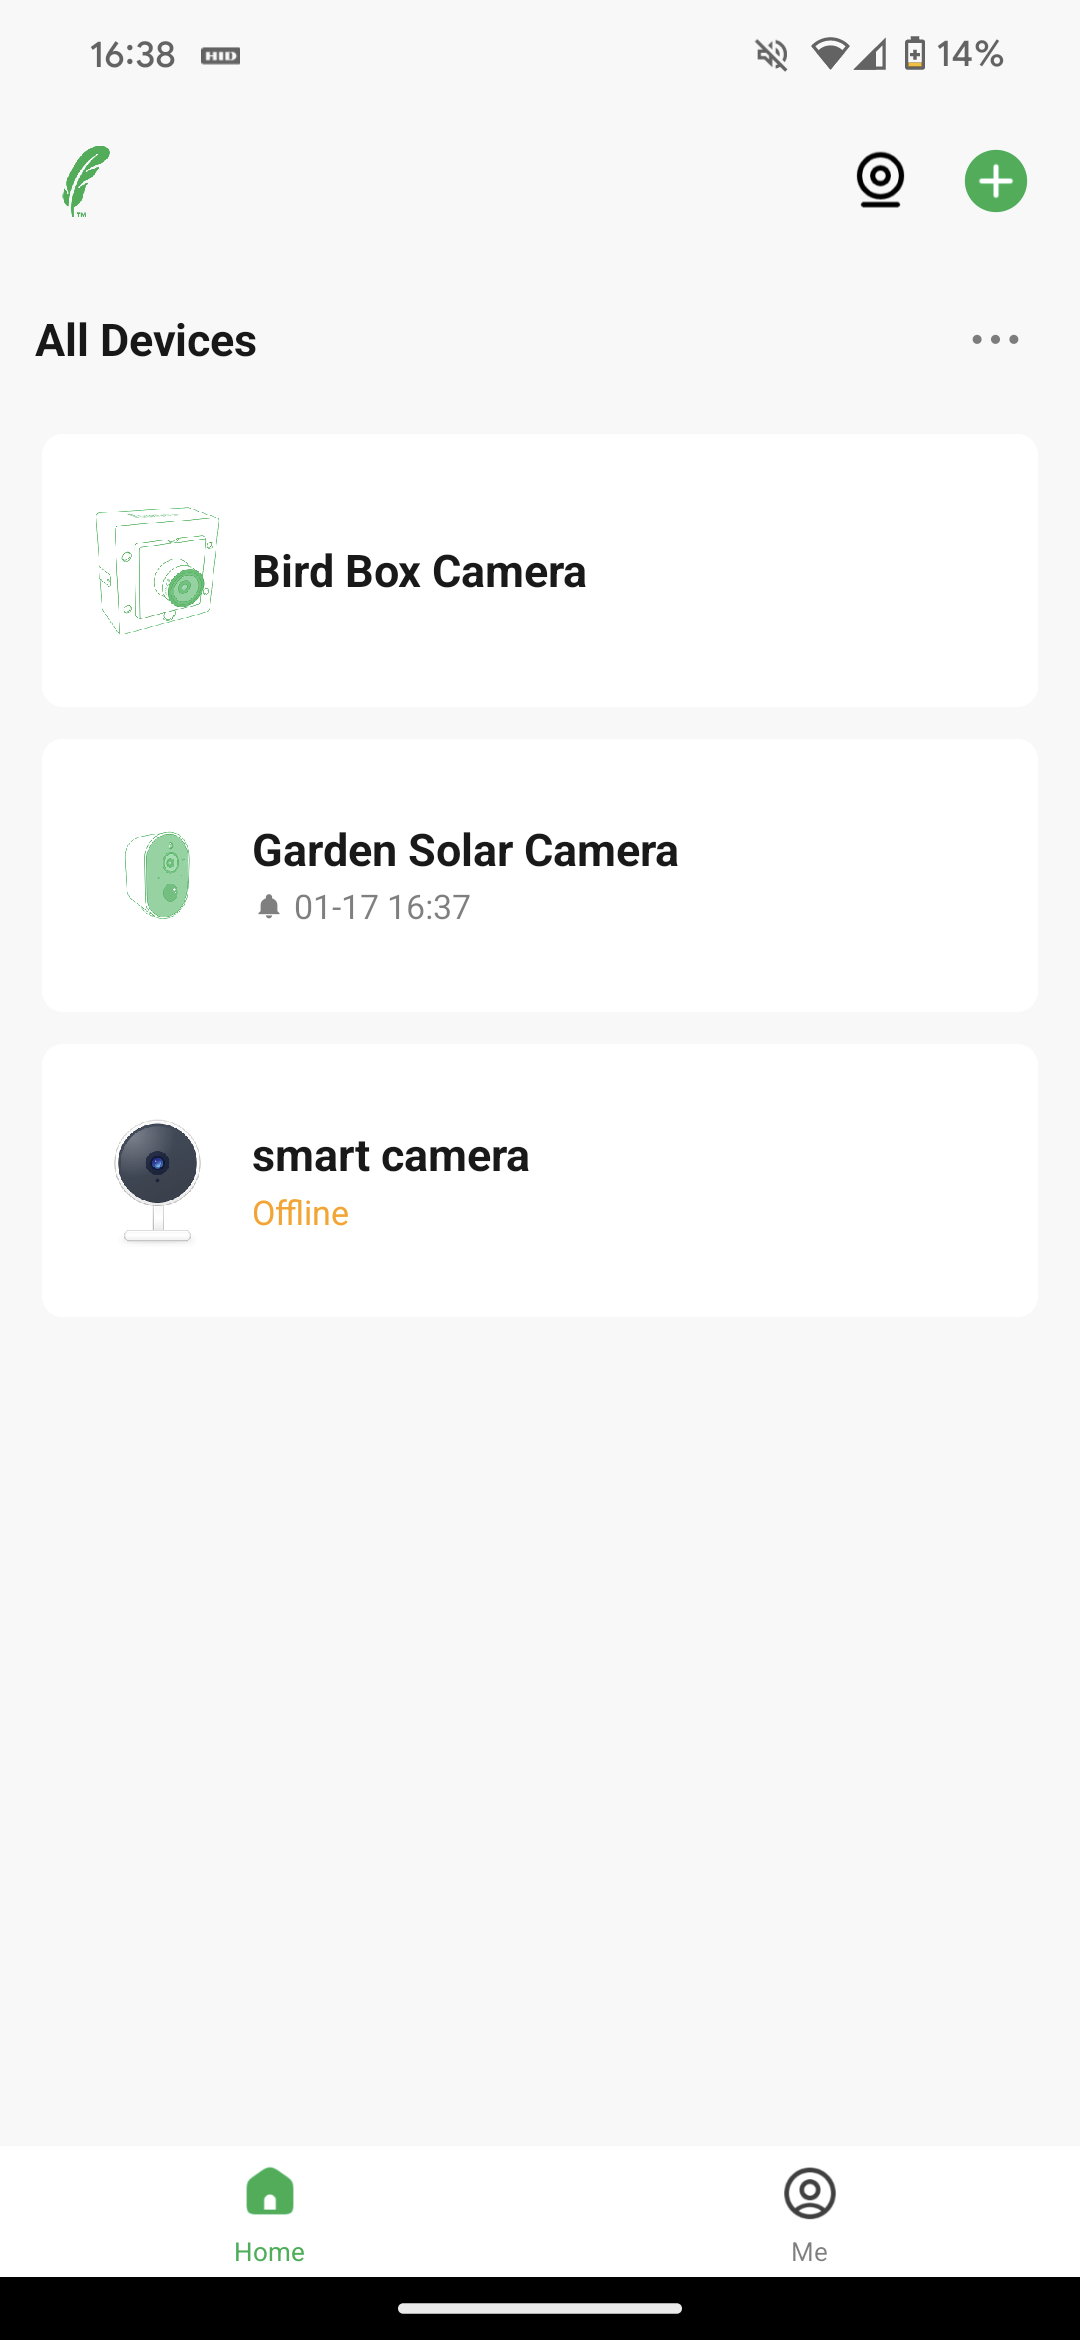
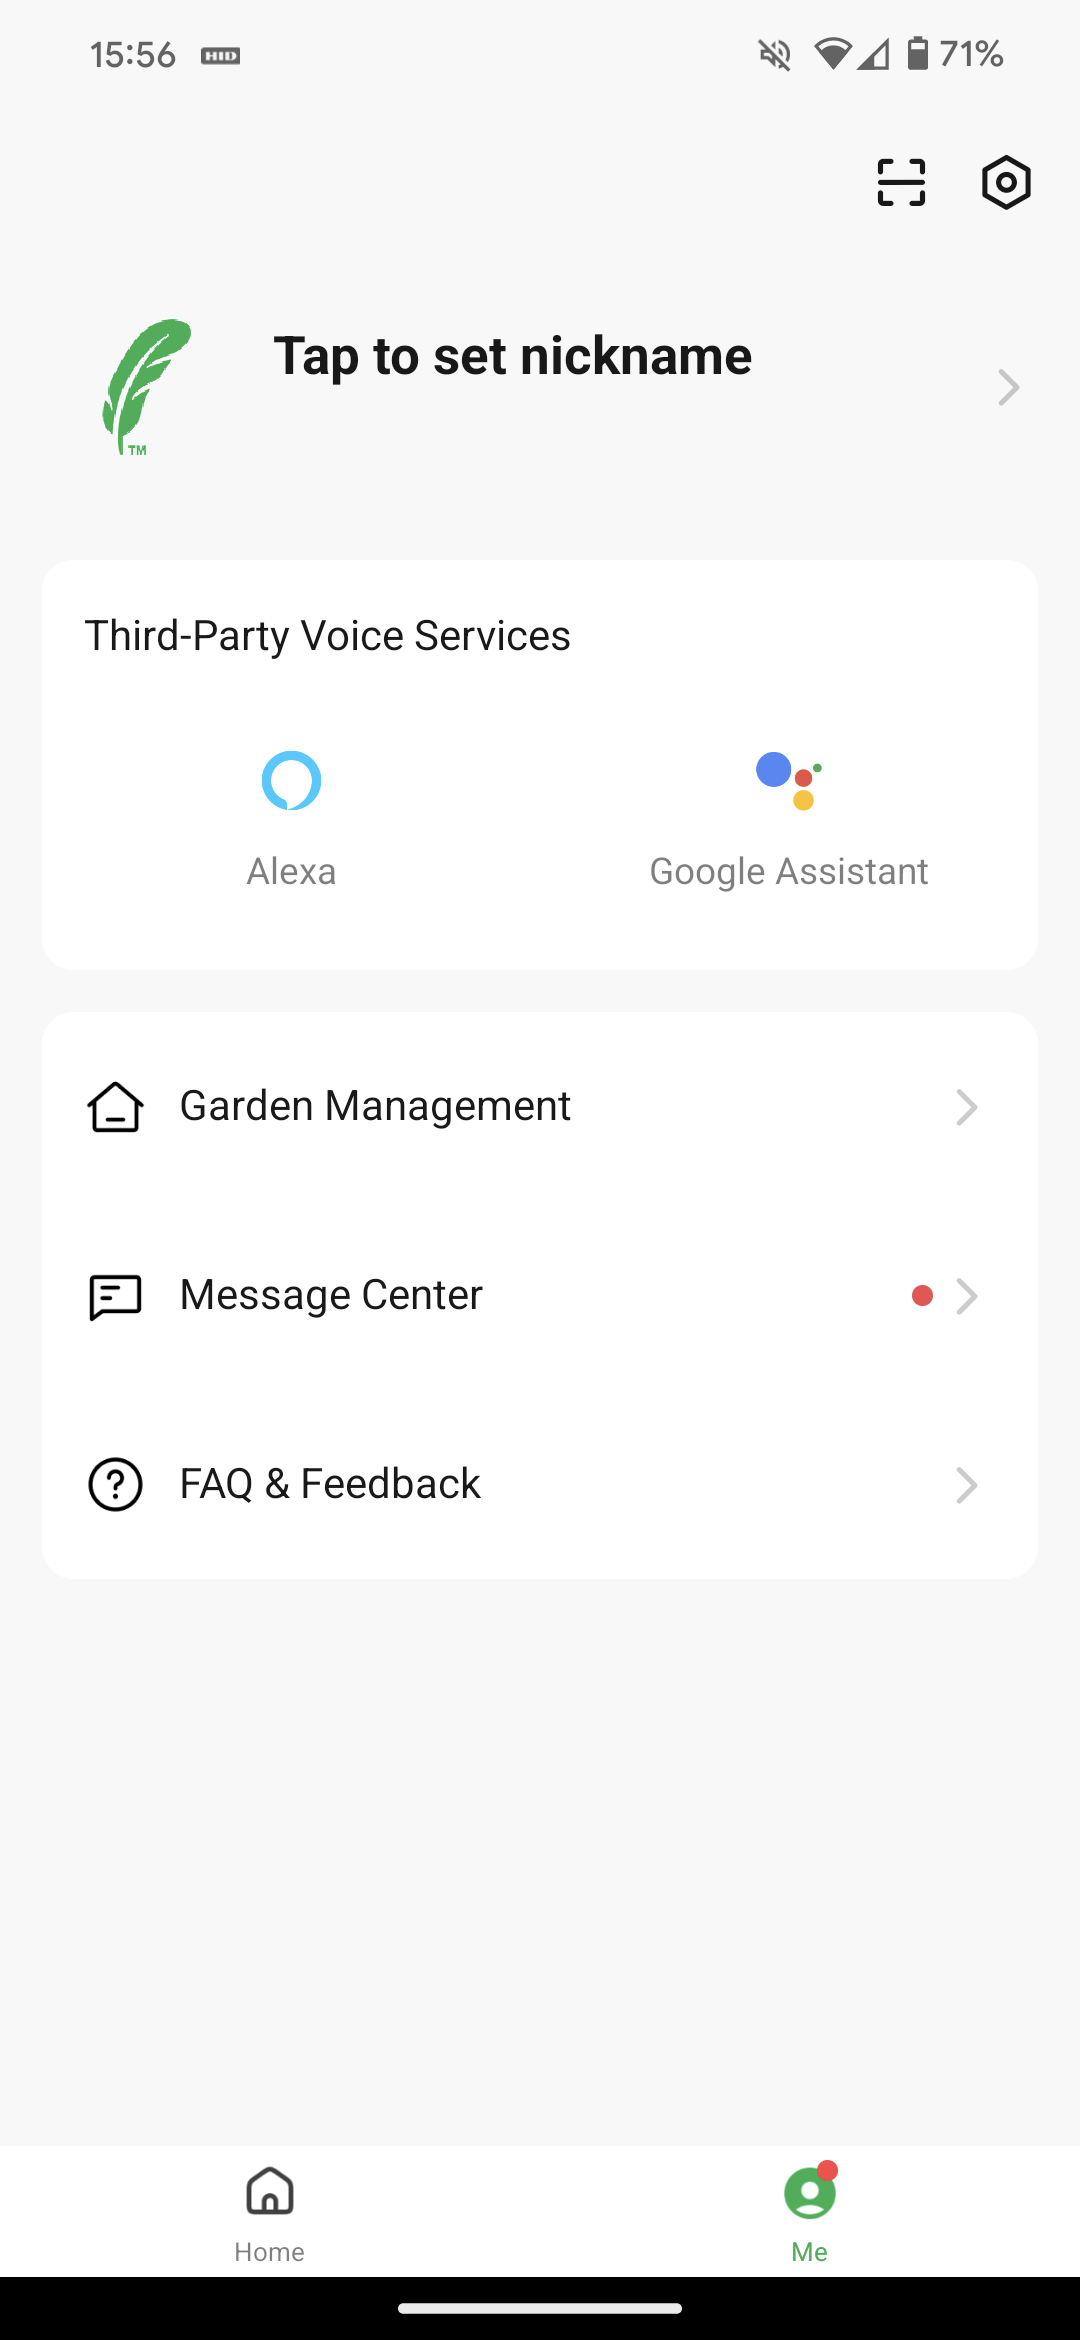
To see your motion alerts, go to the main device list page of the Green Feathers app and tap on the 'Me' button at the bottom right
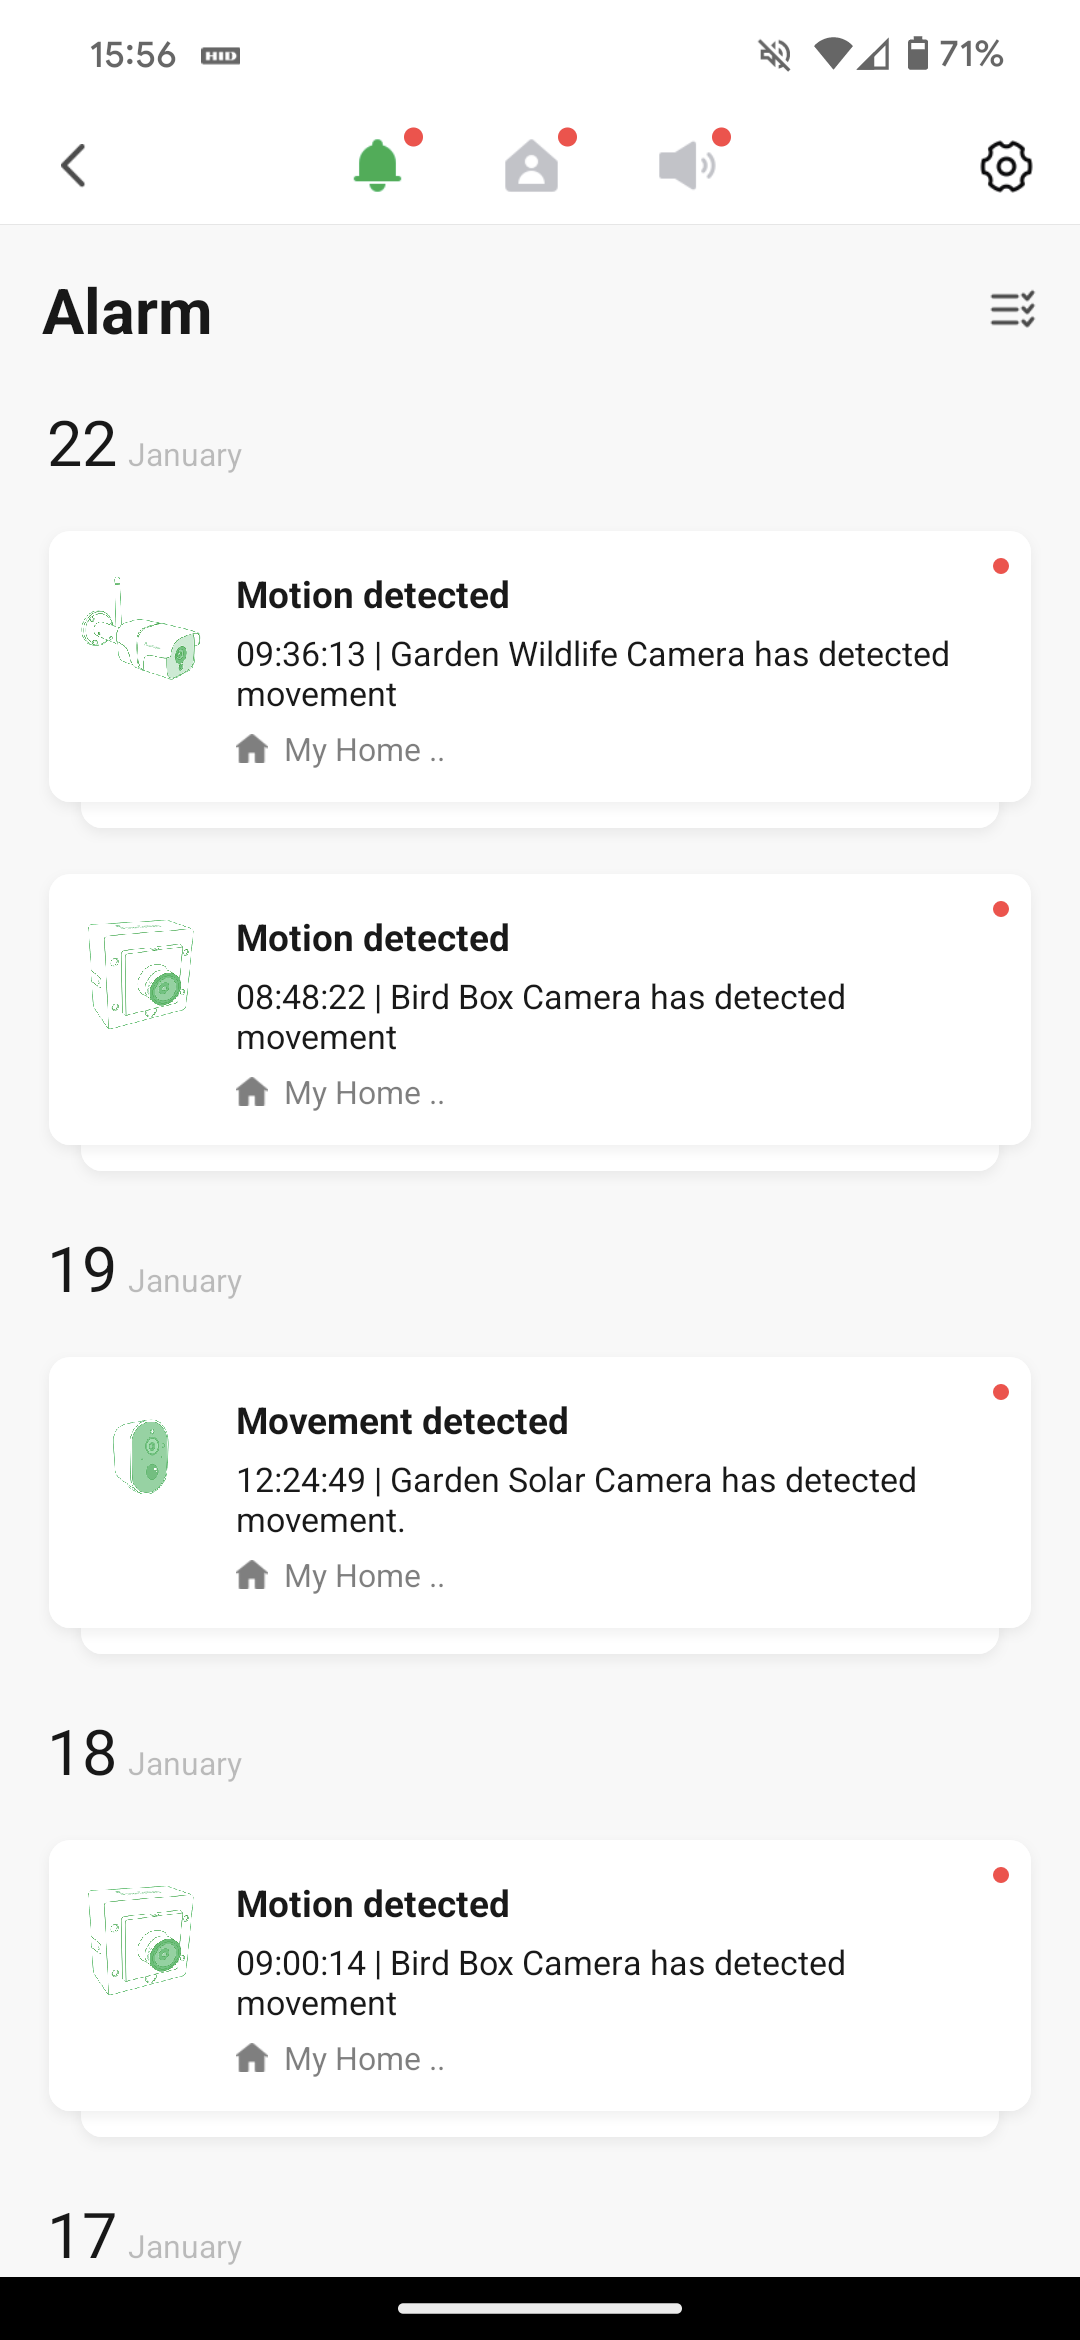
Now tap on 'Message Center'
Here you can see motion alerts and additional information
On the Recording Settings page you can see the following options
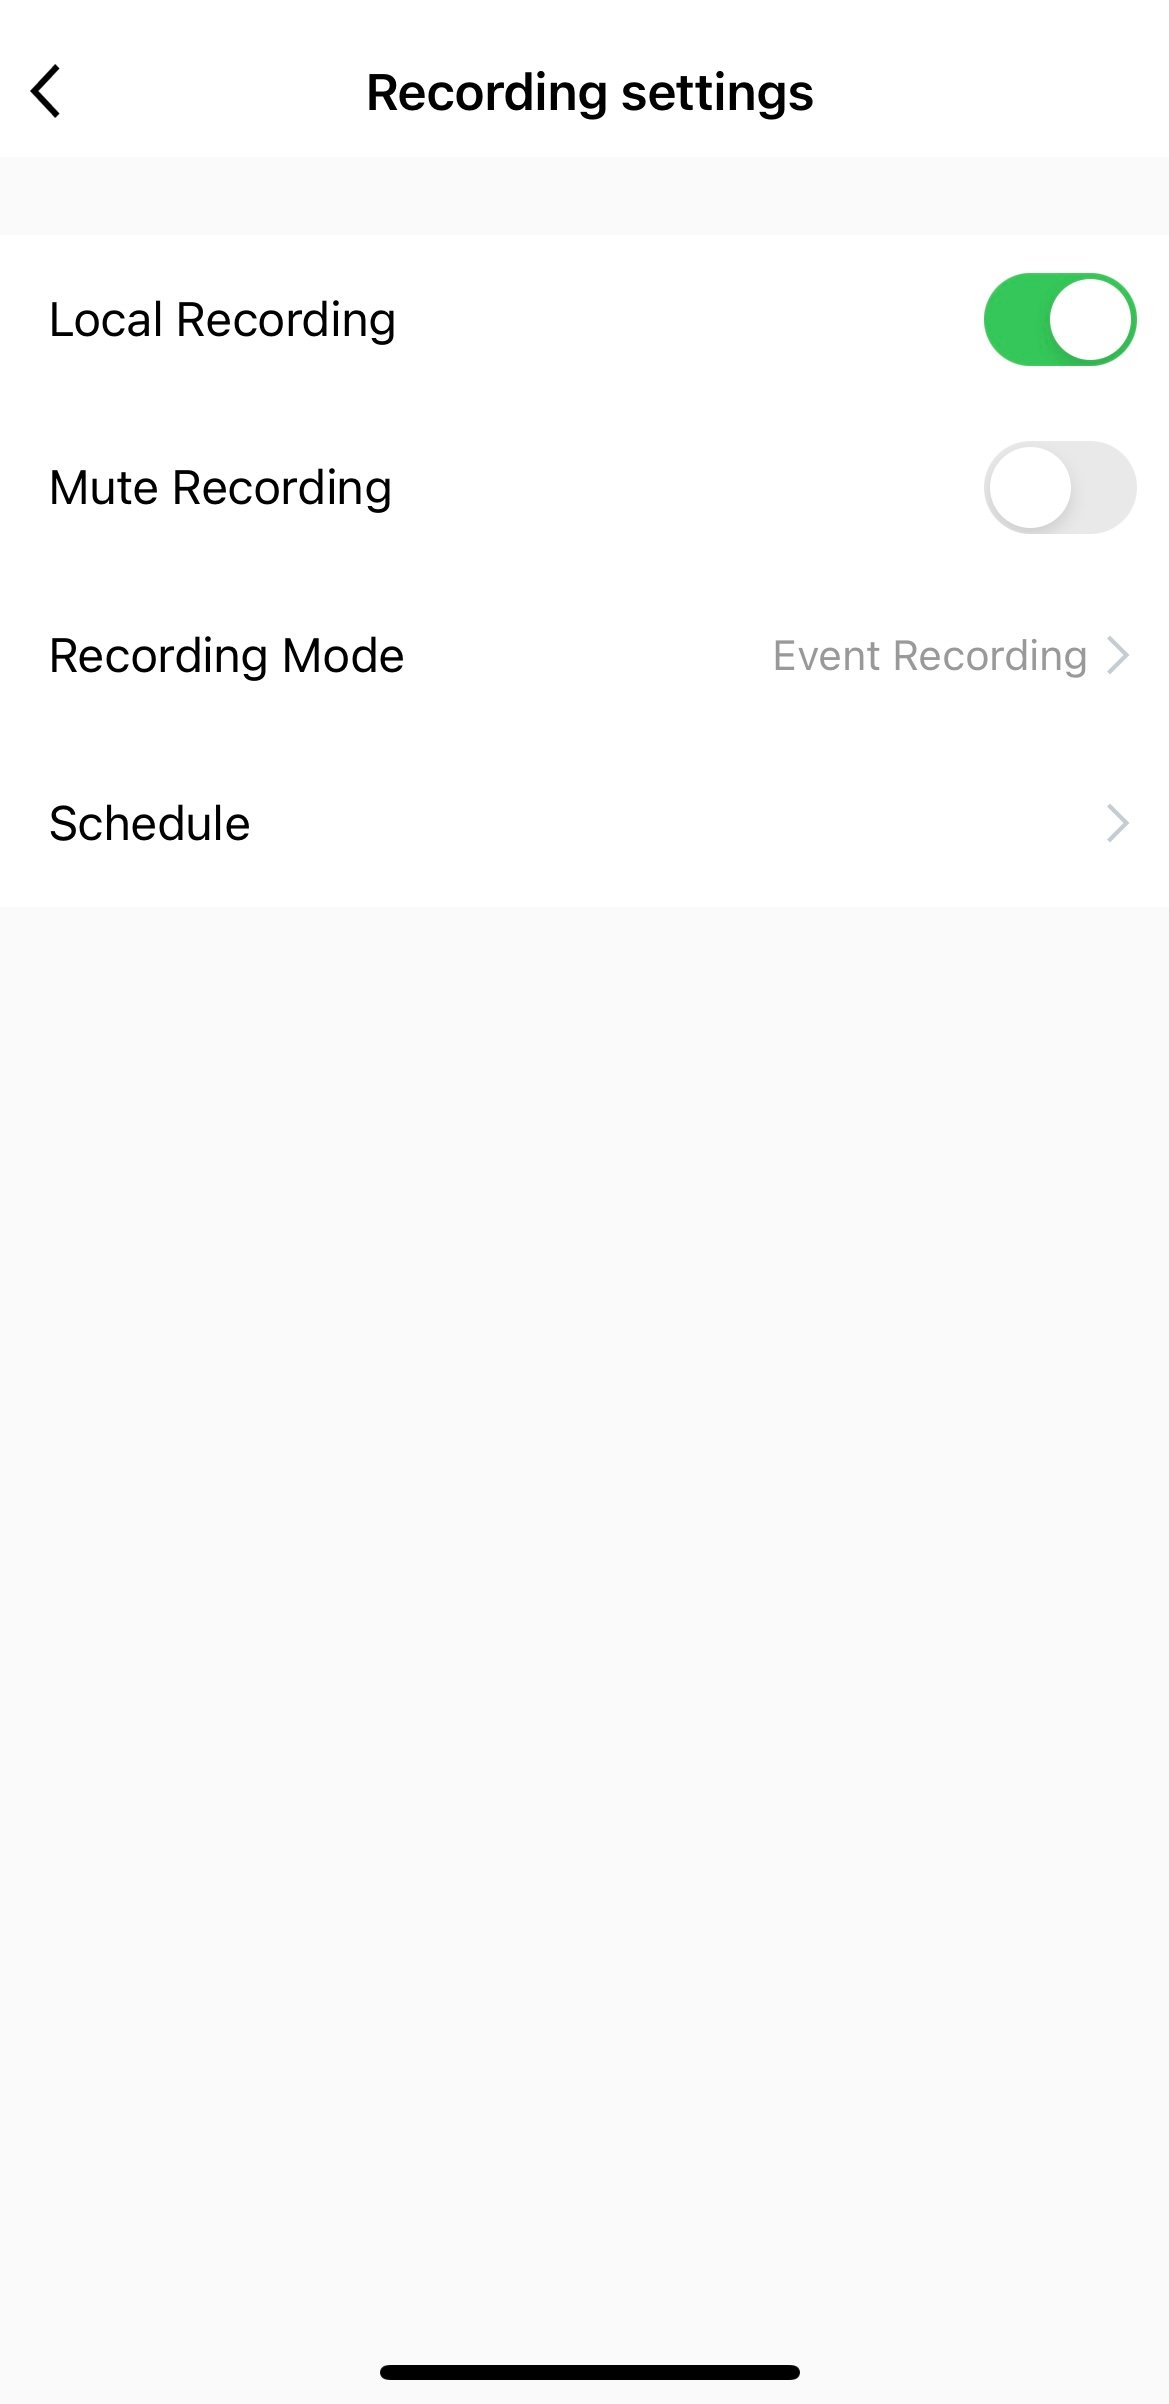
Local Recording - You want to have Local Recording ticked to enable the camera to record.
Mute Recording - Mute Recording means any recordings taken by your camera will have no sound.
Recording Mode - Recording Mode has two options, select it and it will open up to show you 'Event Recording' and 'Non-Stop'. Event recording is for motion detection triggered recording and non-stop is for continuous recording. We recommend having it on 'Event Recording' for most uses.
Schedule settings - Setting up a recording schedule is very similar to setting a detection schedule and is useful if you only want recording (whether continuously or via motion detection) to be between set hours.
For example, if you wanted to have the camera set to record at night time only, you could set it to enable motion detection at 11pm every day, and disable it at 6am every day. Go to Schedule settings then tap the 'Add' button:
Time
Here you can select a time to turn recording on or off.
Repeat
If you tap on the 'Repeat' button you can choose which days you want to enable recording.
Note
If you tap on the 'Note' button you can write a note to associate with this automated schedule:
Notifications
If you set the schedule to disable notifications it will not send notifications during the specified period. This feature is useful because you could set the camera to leave the motion detection feature on, but to disable the notifications at night.
When you are finished, tap 'Save' at the top right of the screen.
Of course, there's no point in setting the motion detection to be turned on every day if it's never being turned off in the first place! So we need to make the counterpart to our first schedule, a second schedule to turn the motion detection off at a certain time.
For information on how to view your playback and export the footage please see here
Need more help?
If you need help with anything else please check out our other guides or get in contact.