How to: Set up Recording/Motion Detection on your Wireless Camera and Screen Pack (GFTX2SC2N1, GFTX2SC2B1, GFTX2SC2R1S1)Updated a day ago
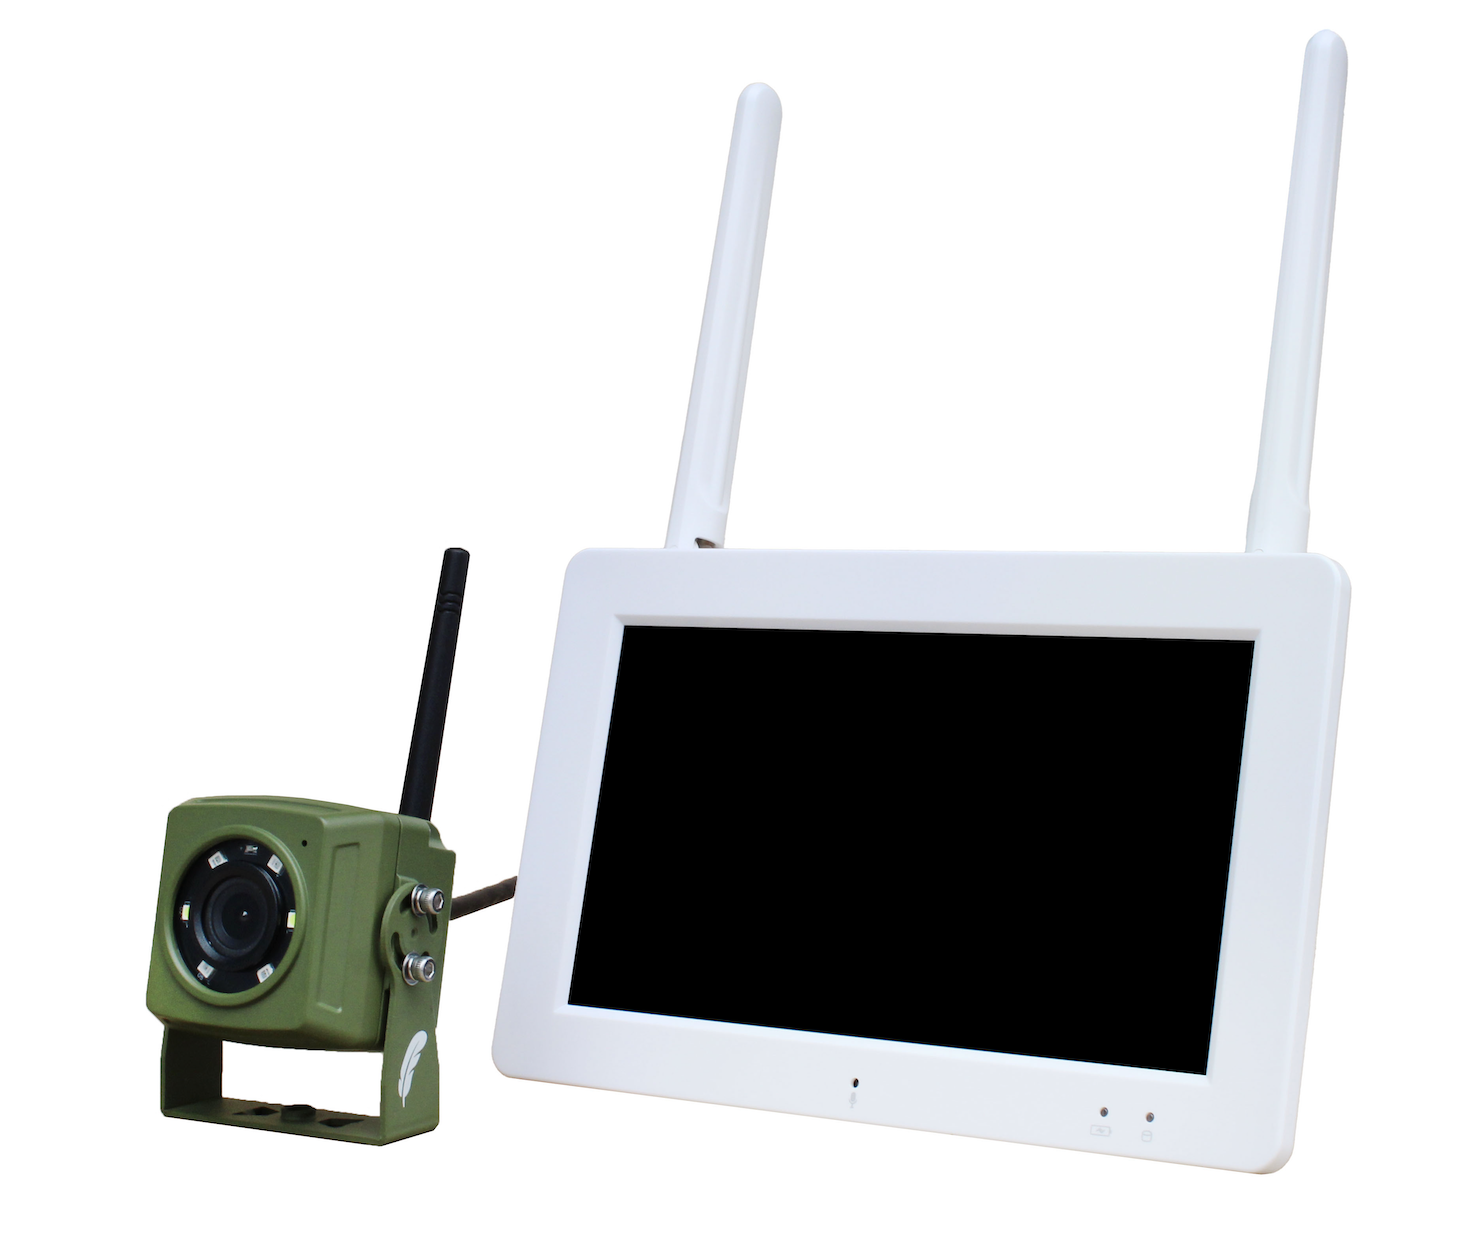
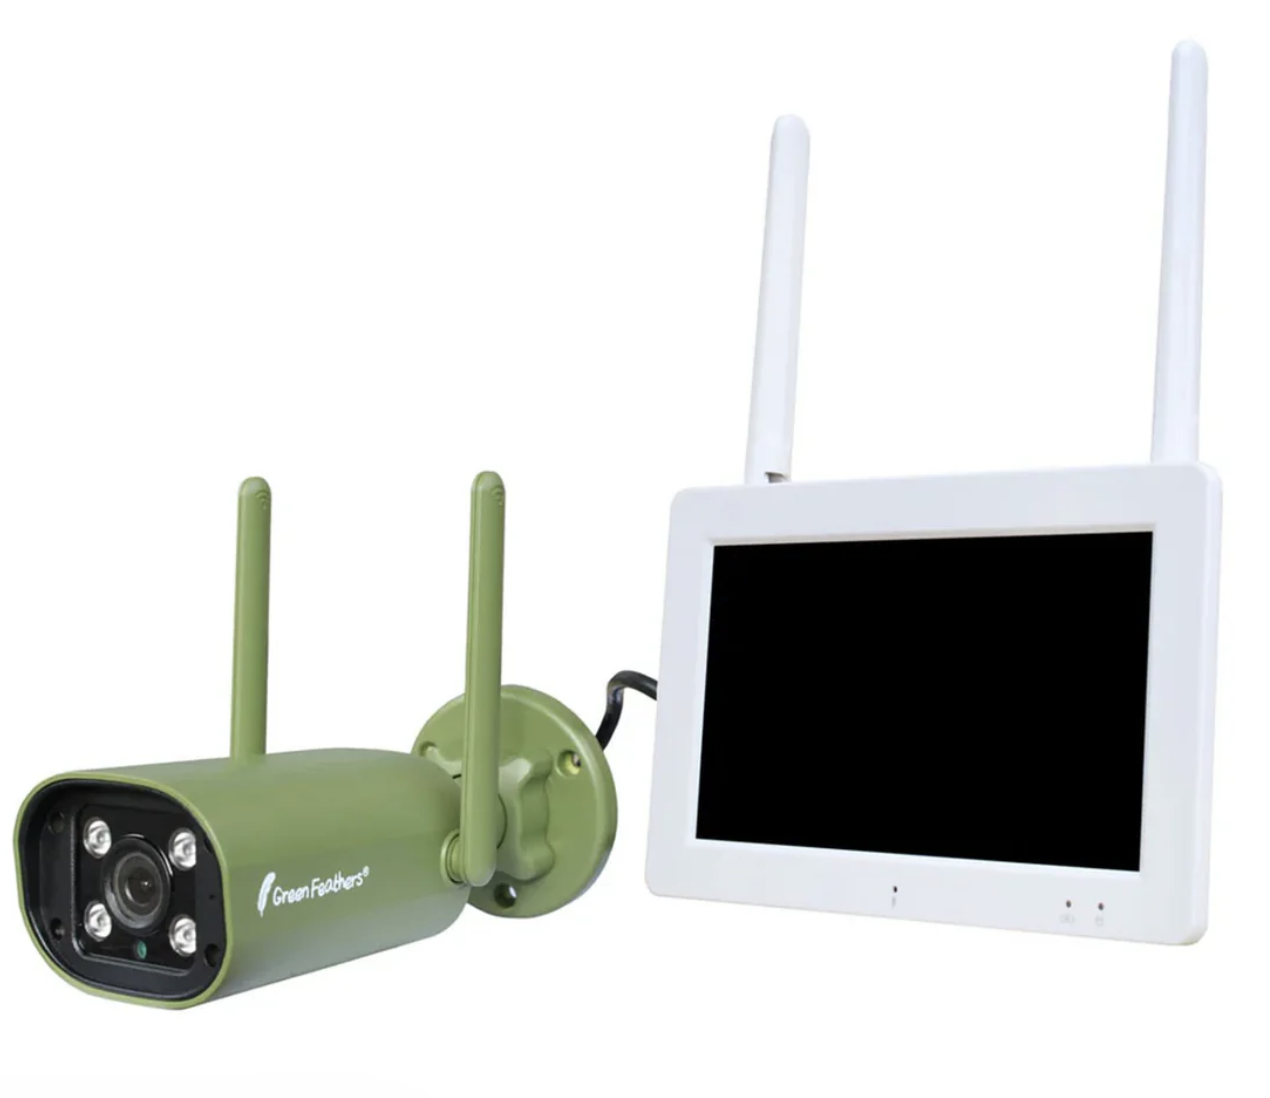
This guide will advise you on how to set up motion detection and recording for the Wireless Screen and Camera packs (GFTX2SC2N1, GFTX2SC2B1, GFTX2SC2R1S1) pictured below. If you are unsure of which camera you have please check here.
 |  |

Before you Begin
If you have only just opened the box for the first time or have reset the system and are starting from the beginning we recommend looking at our initial setup guide here. This will make sure you have a live video feed on the screen from the camera and also are able to view it on the mobile app if you set this up.
Make sure you have an SD card inserted in the screen. The SD card slot is just above the on/off switch on the side of the screen.
How to configure motion detection and recording -
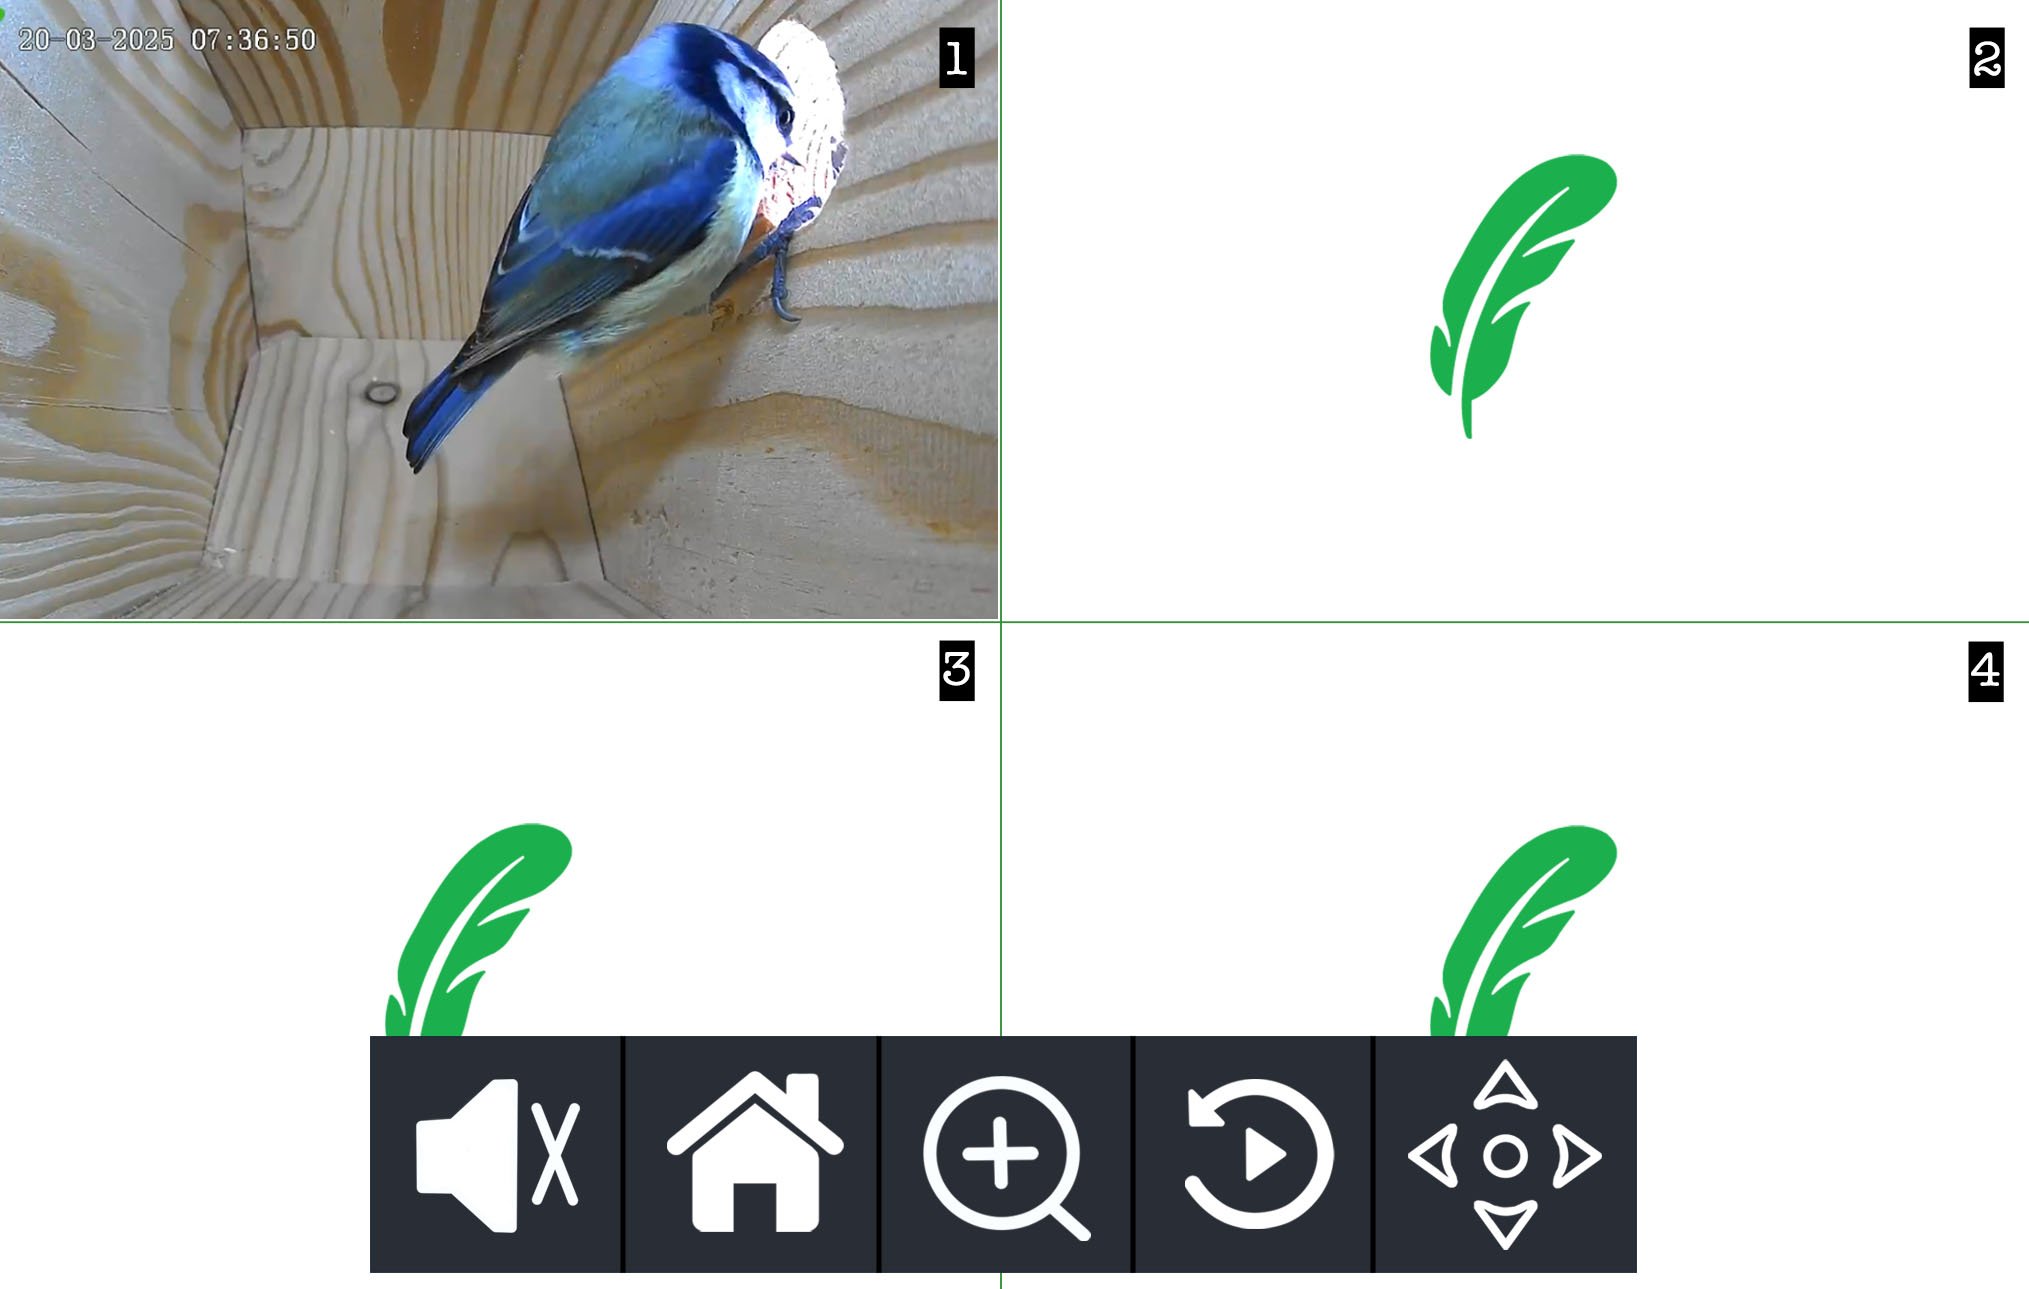
Tap on the live view screen to bring up the menu bar along the bottom and tap the home icon to bring up the main menu.
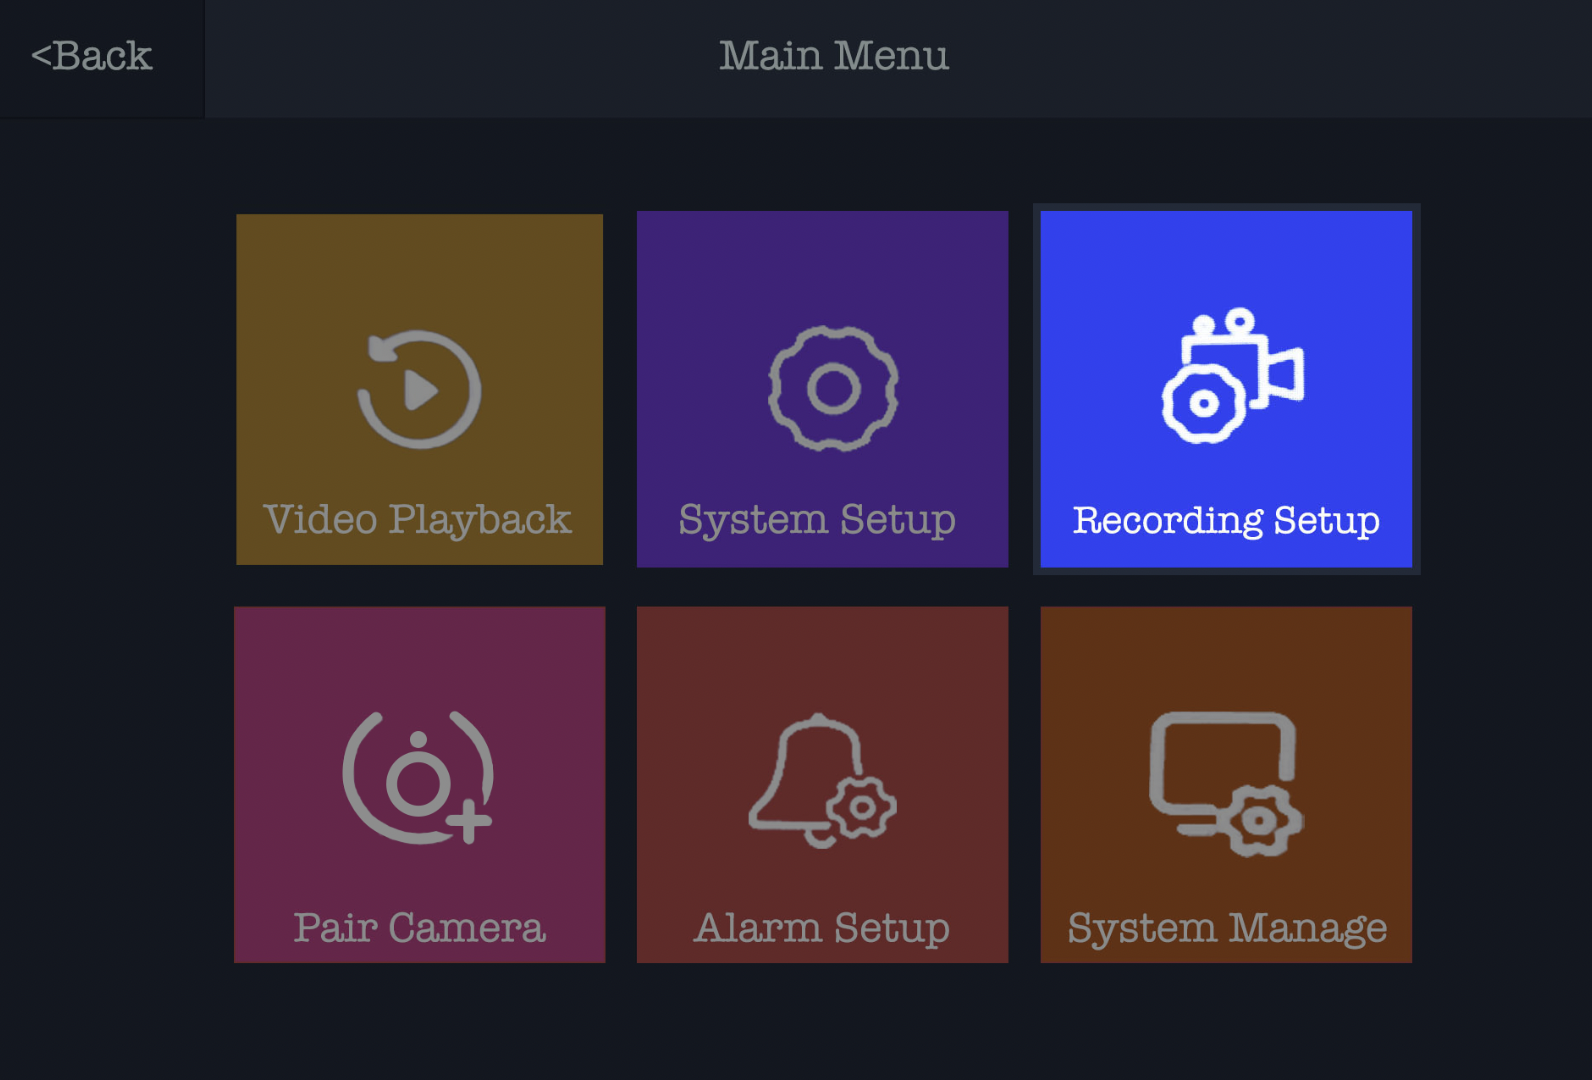
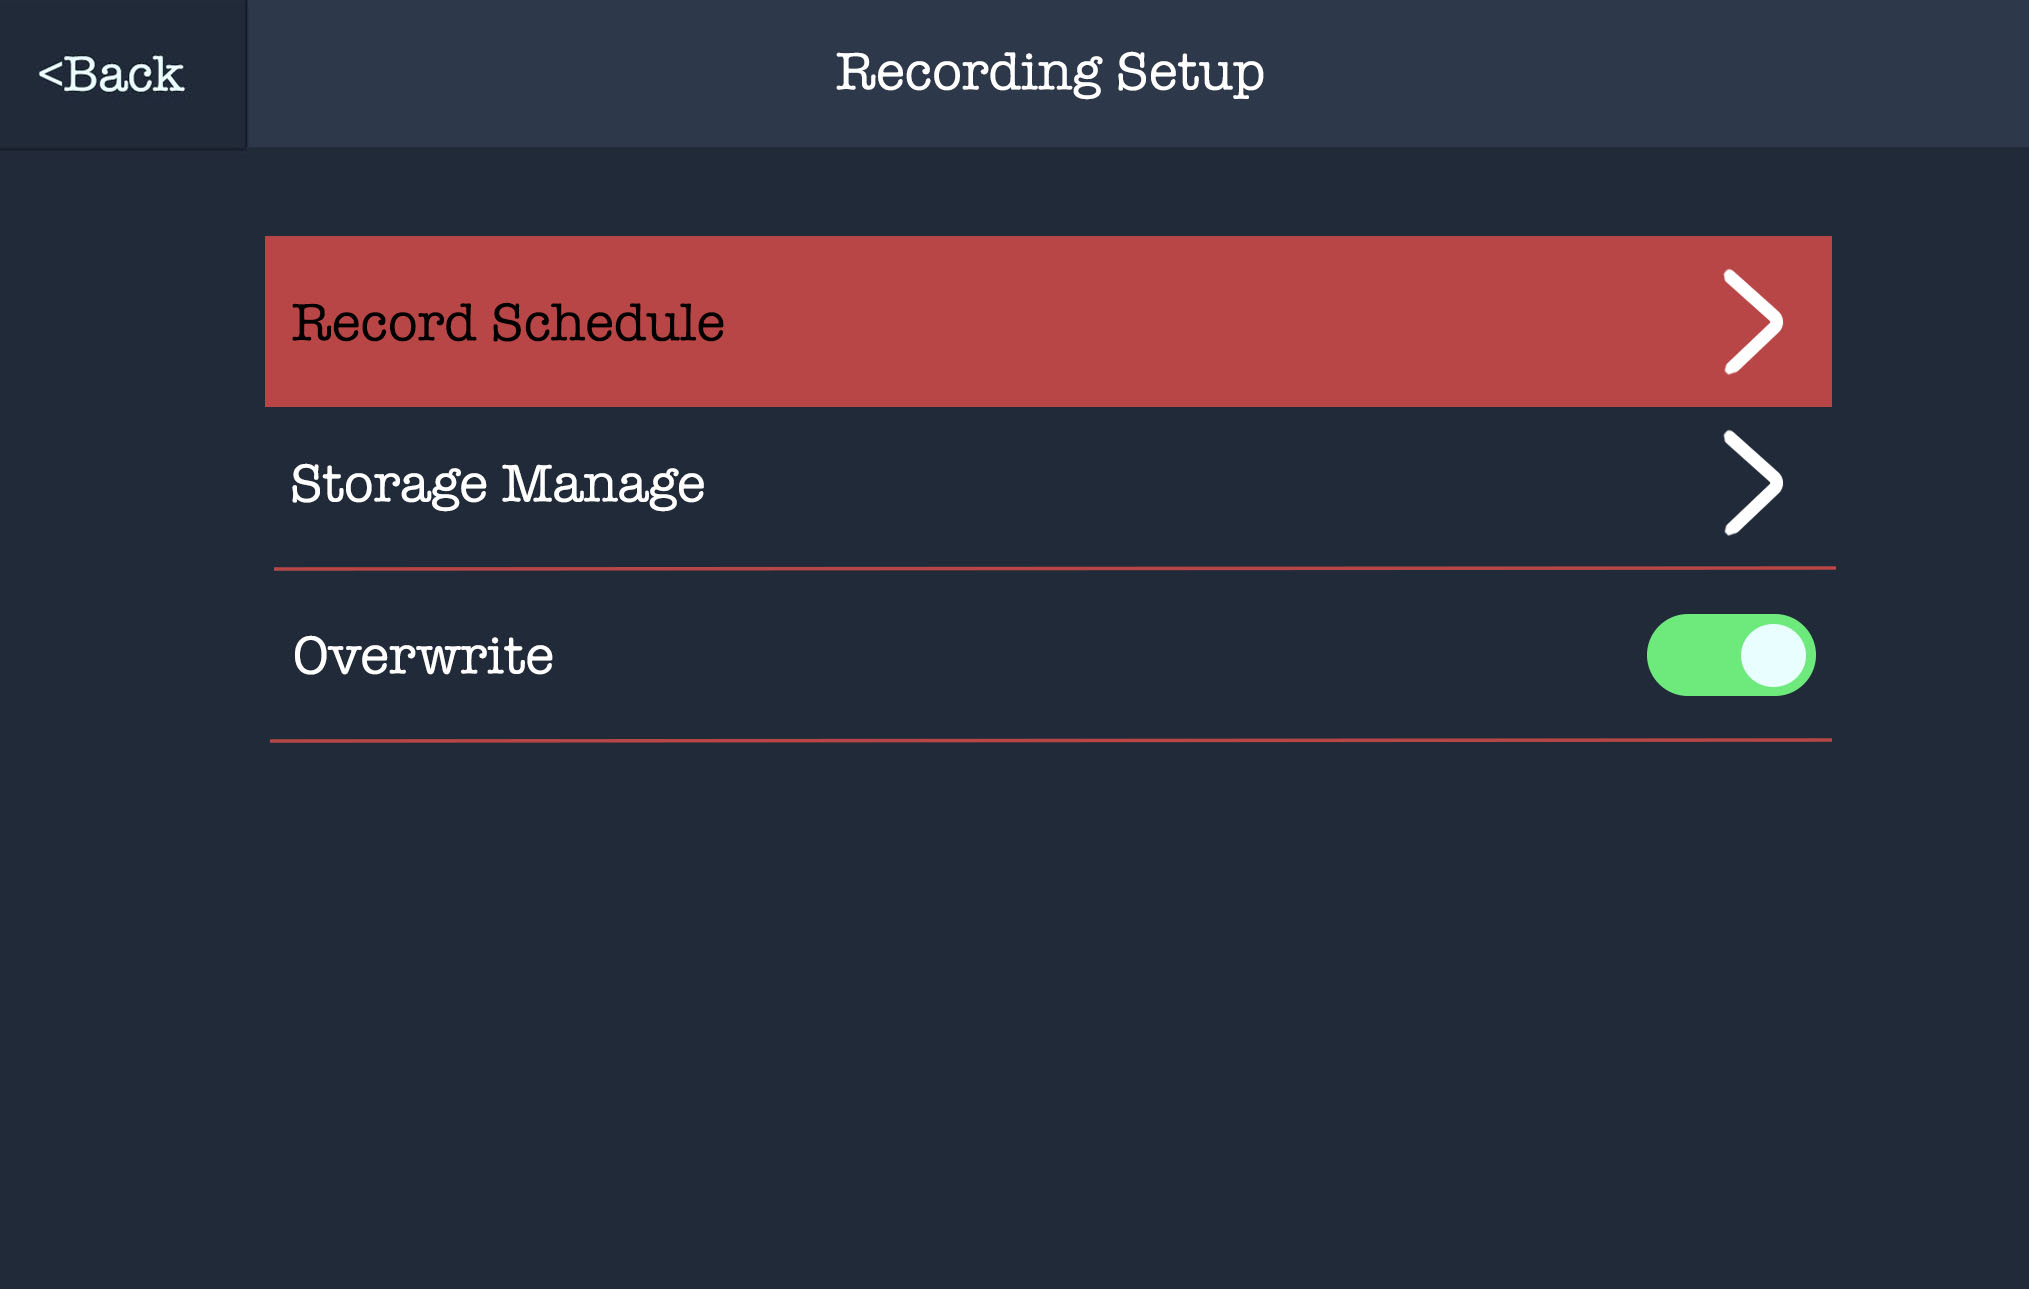
Now that you're on the Main Menu, tap on the Recording Setup option (top right blue icon).
If this is your first time configuring the recording settings we would recommend first formatting the SD card. You can do this by selecting 'Storage Manage' option and click on 'Format', this will erase anything on the SD card and make sure the format is correct. Once done press the back button (top left) and now select the 'Record Schedule' option.
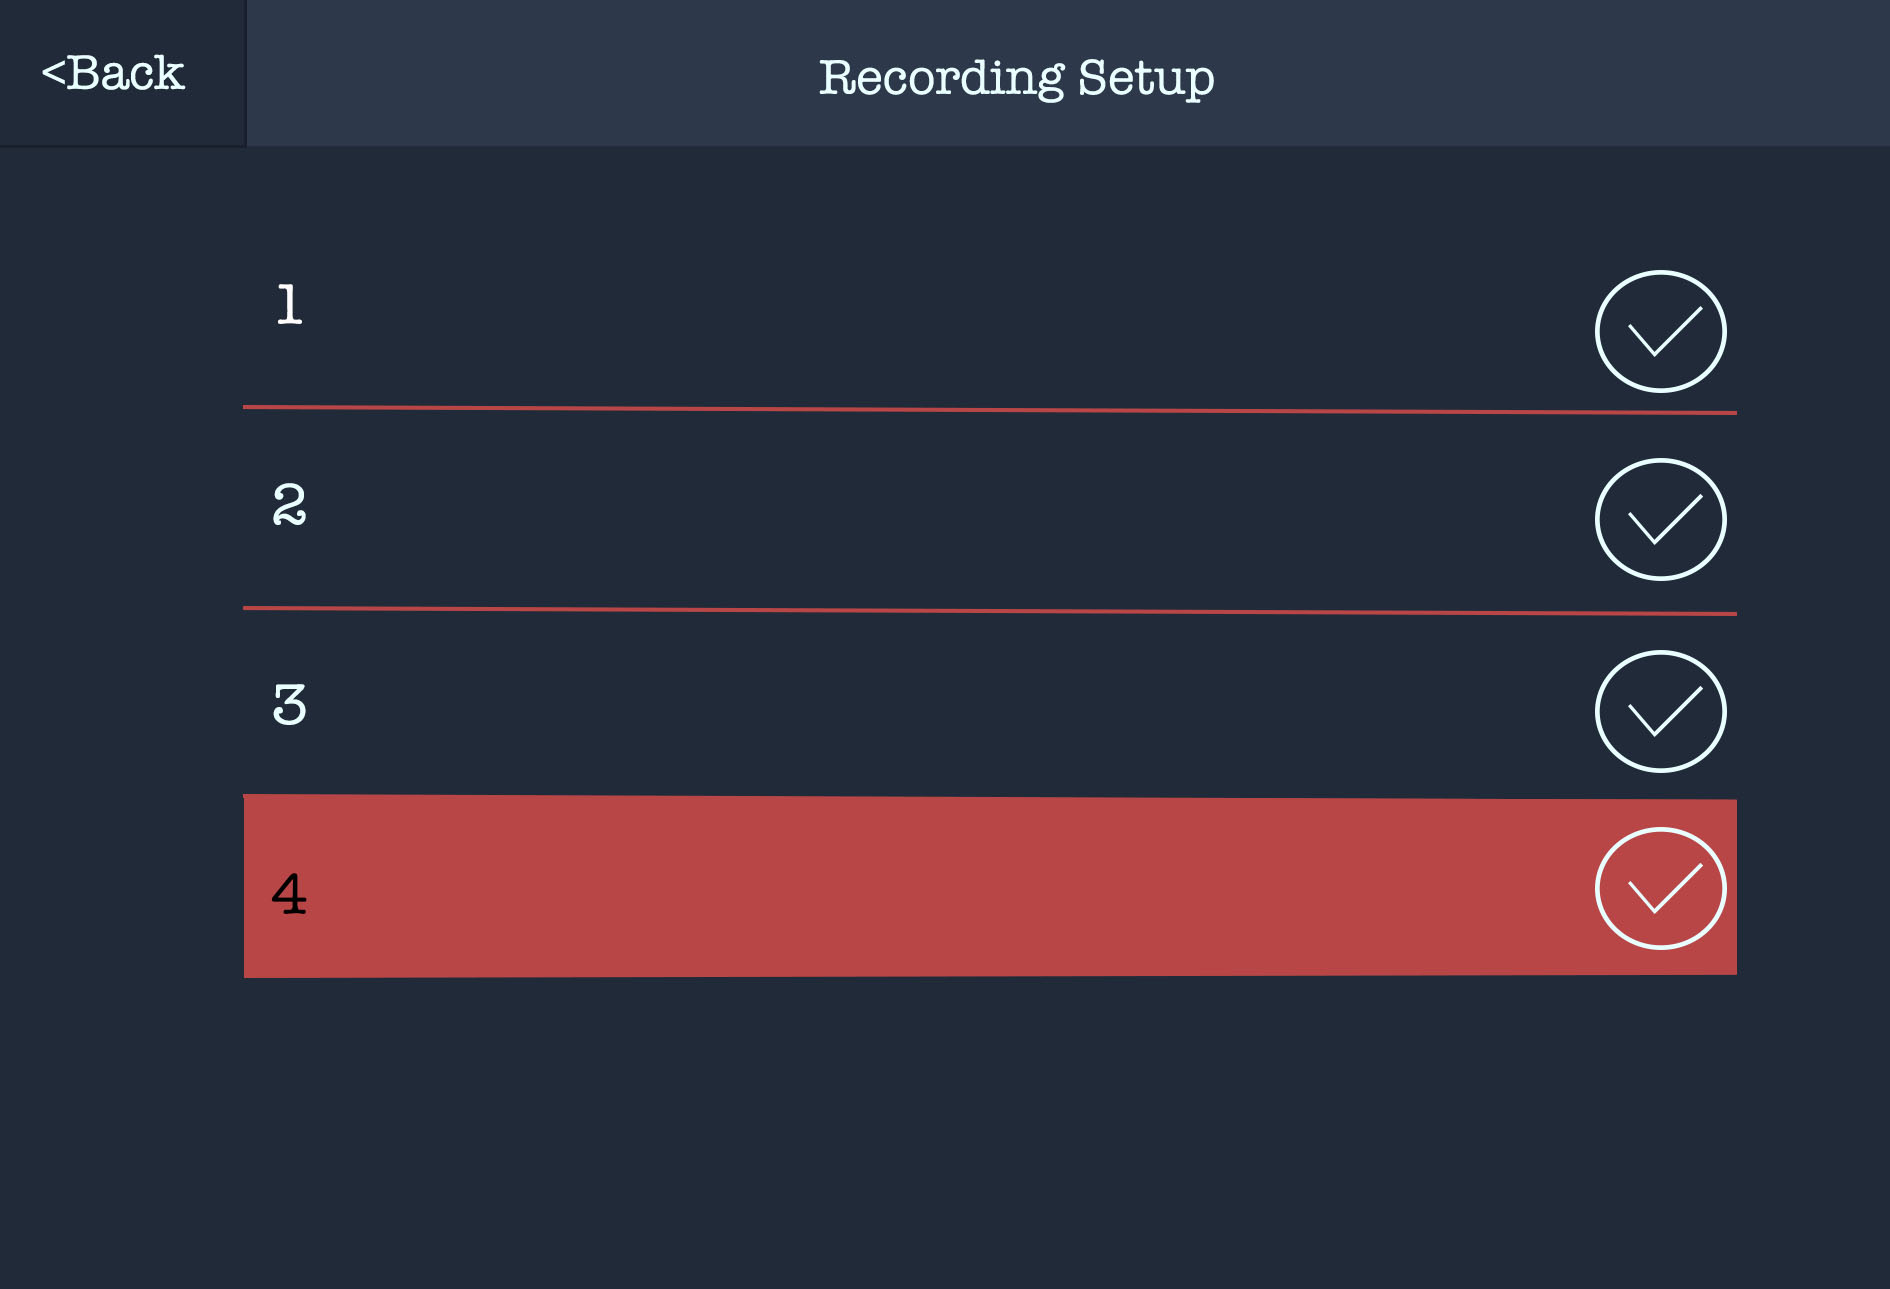
You will now be presented with the screen below, giving you the option to setup 4 different schedules. This is helpful as you may wish to set up one schedule from 9:00 - 12:00 constant recording to get that early morning action. Then have a separate schedule from 12:00 - 17:00 on motion detection.

For this example select schedule 1 and we will go through configuring recording. Tap the enable option at the top, this will go from grey to green when ticked.

Now Select the channel option to choose which cameras you want motion detection enabled on by tapping on the channel option. If you only have 1 camera then select channel 1. To know which camera is which when you are on the live camera view you can see a number in the top right of each window.
The weekday option allows you to select which days of the week you want it to record on, most people will want it to record every day so tap on this option and make sure each day has a tick by it. You will want to go onto page 2 at the bottom for the rest of the week.

By default the time option is set to 00:00 - 23:59 which means it is looking to record throughout the entire day. If you wish to alter this you can tap on this box and alter the time frame it is looking at.
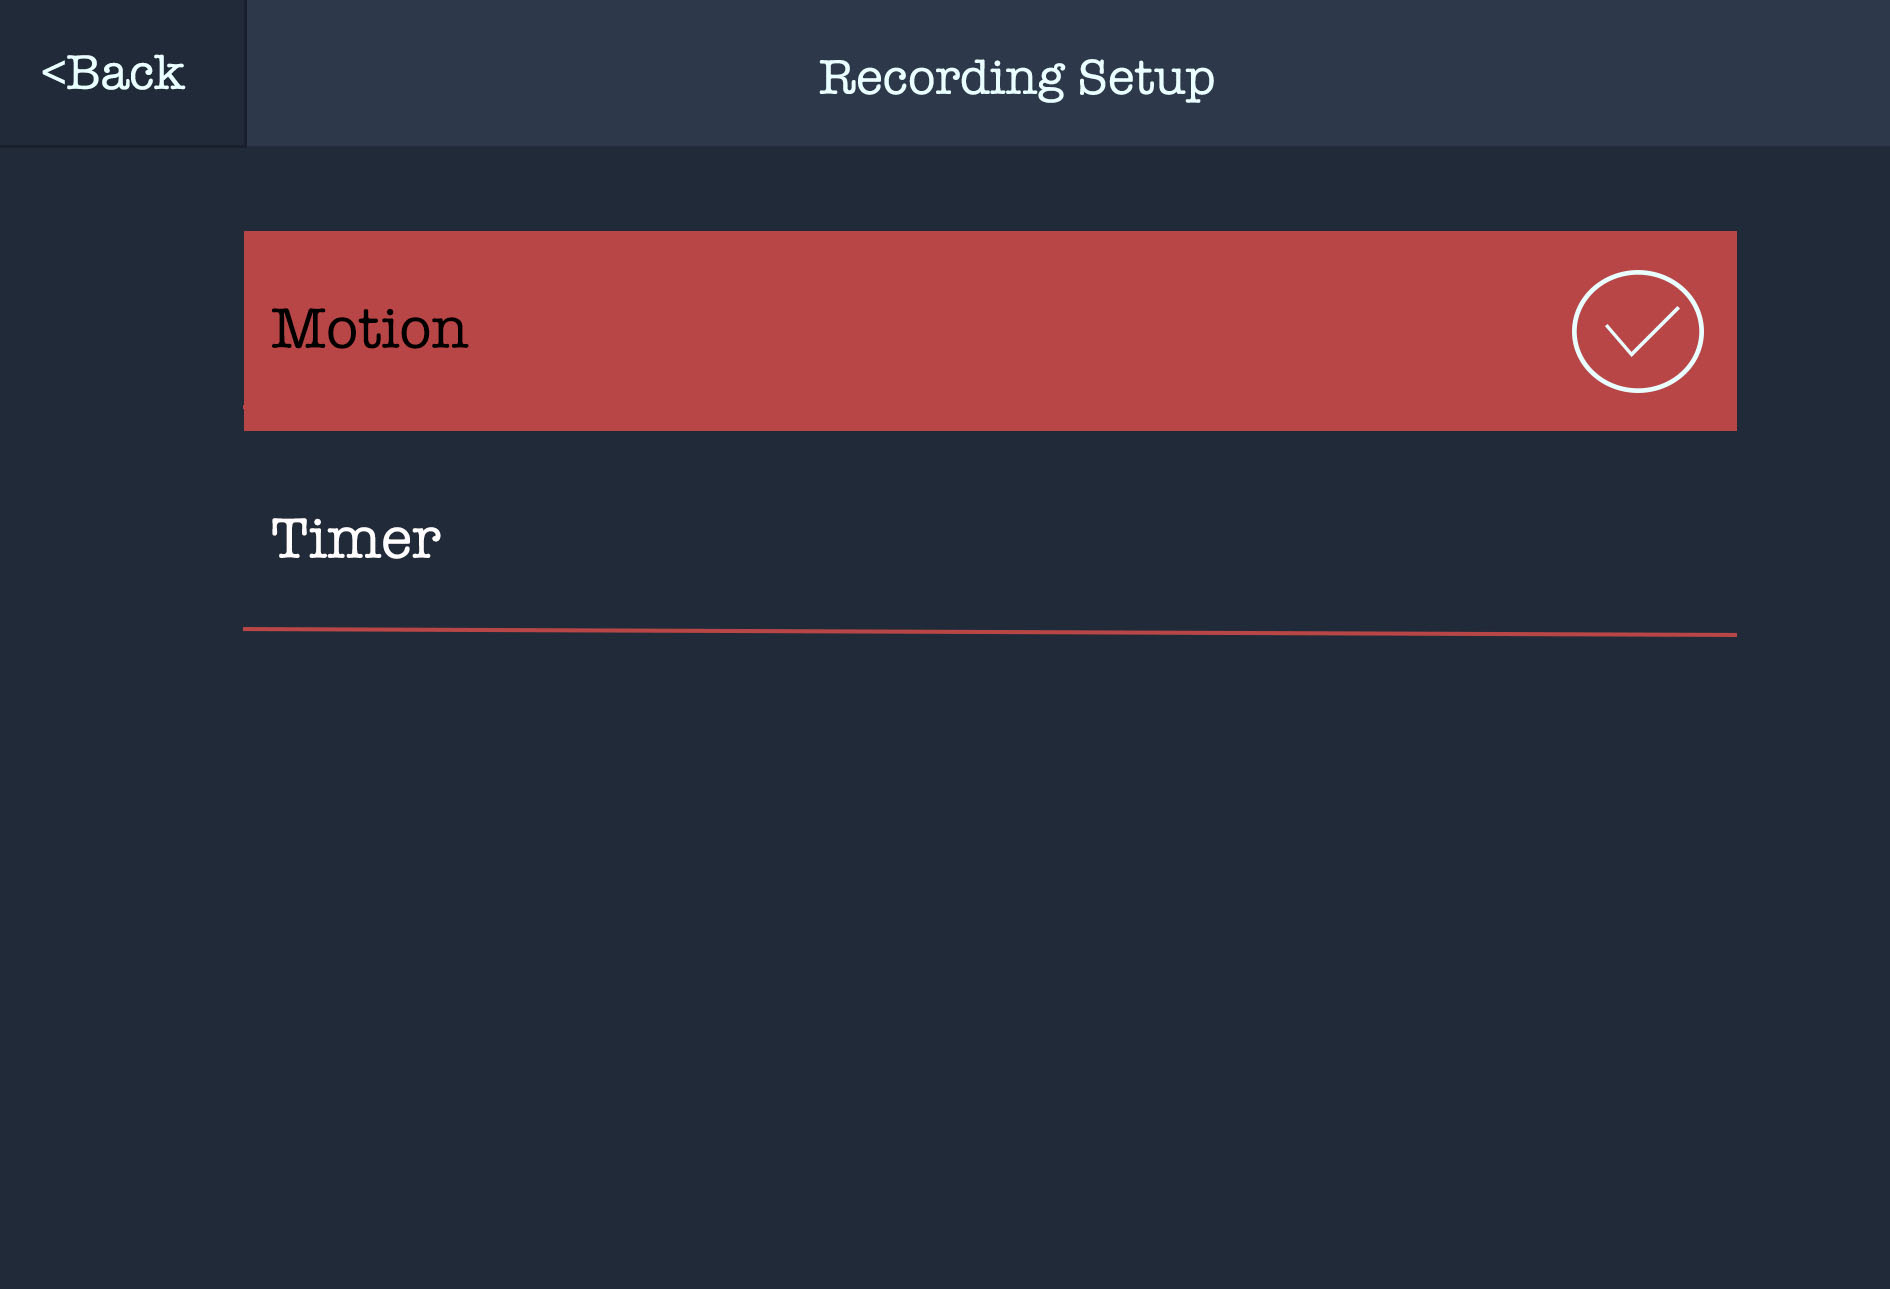
Finally the type option is what type of recording it is looking at, motion is if the camera detects motion where as timer will record for the entire time period you have it set to. This is the time option which we just set so by default it would be recording 24 hours a day.
That is all done! You can go back and customise any of these options as and when you please. If you require some information on all of the options available on the screen itself, have a look here.
Need more help?
If you need help with anything else please check out our other guides or get in contact.