Wireless Camera and Screen packs settings and features overview (GFTX2SC2N1/GFTX2SC2B1/GFTX2SC2R1S1)Updated 13 days ago
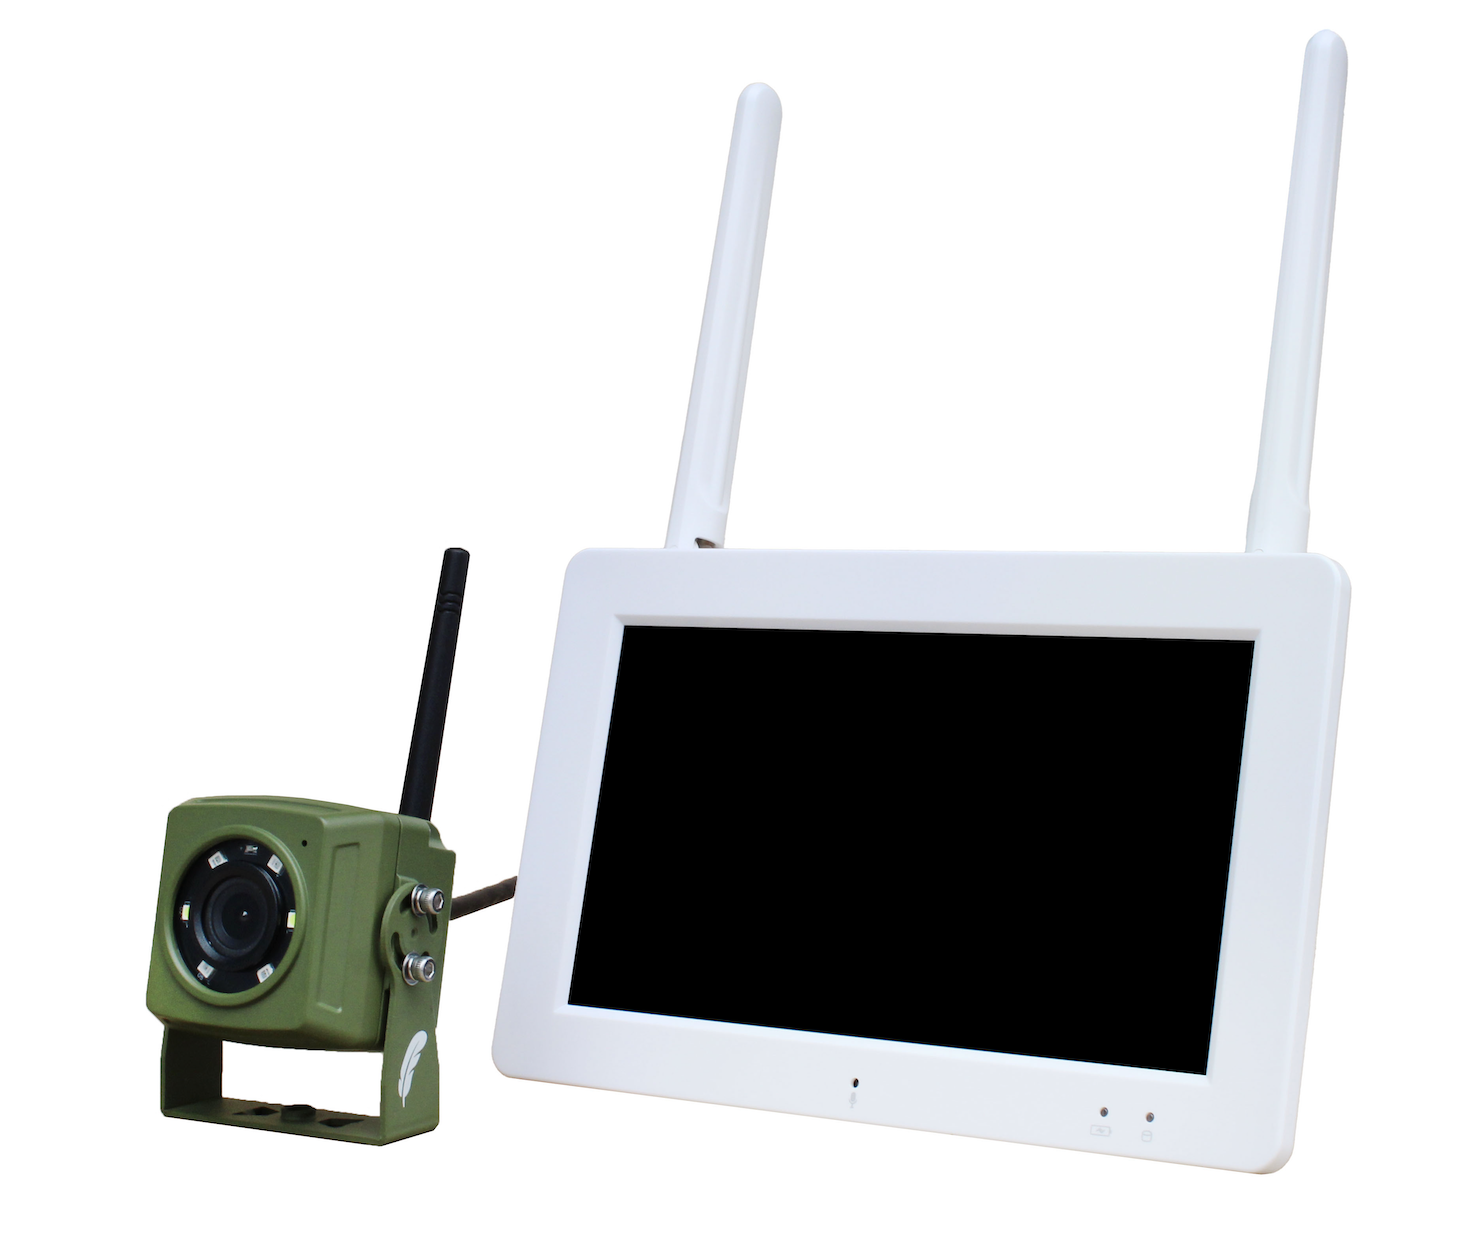
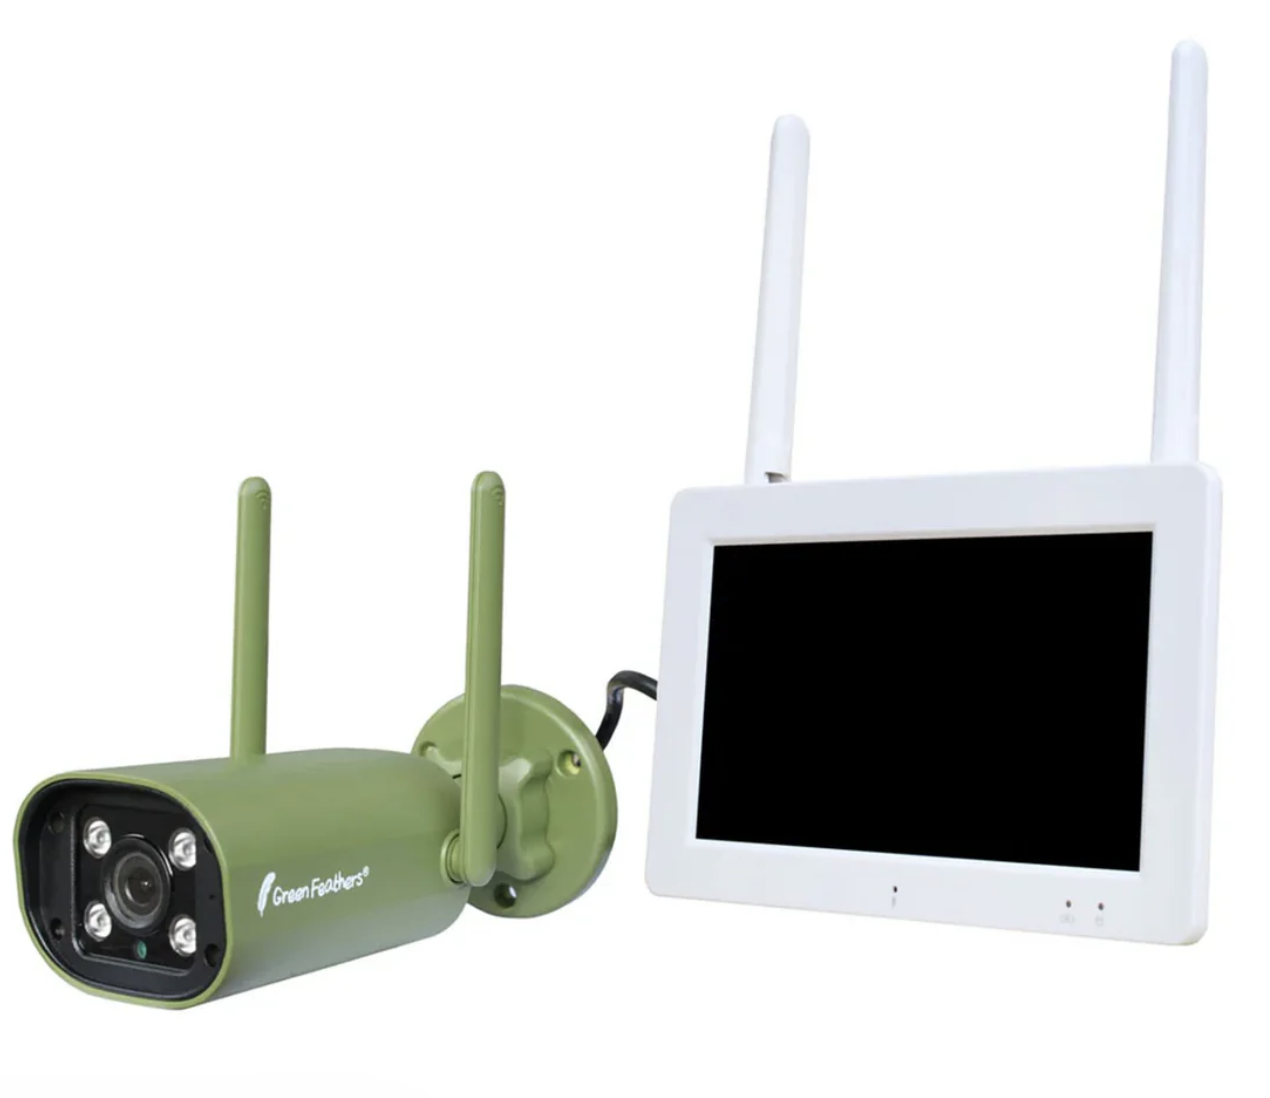
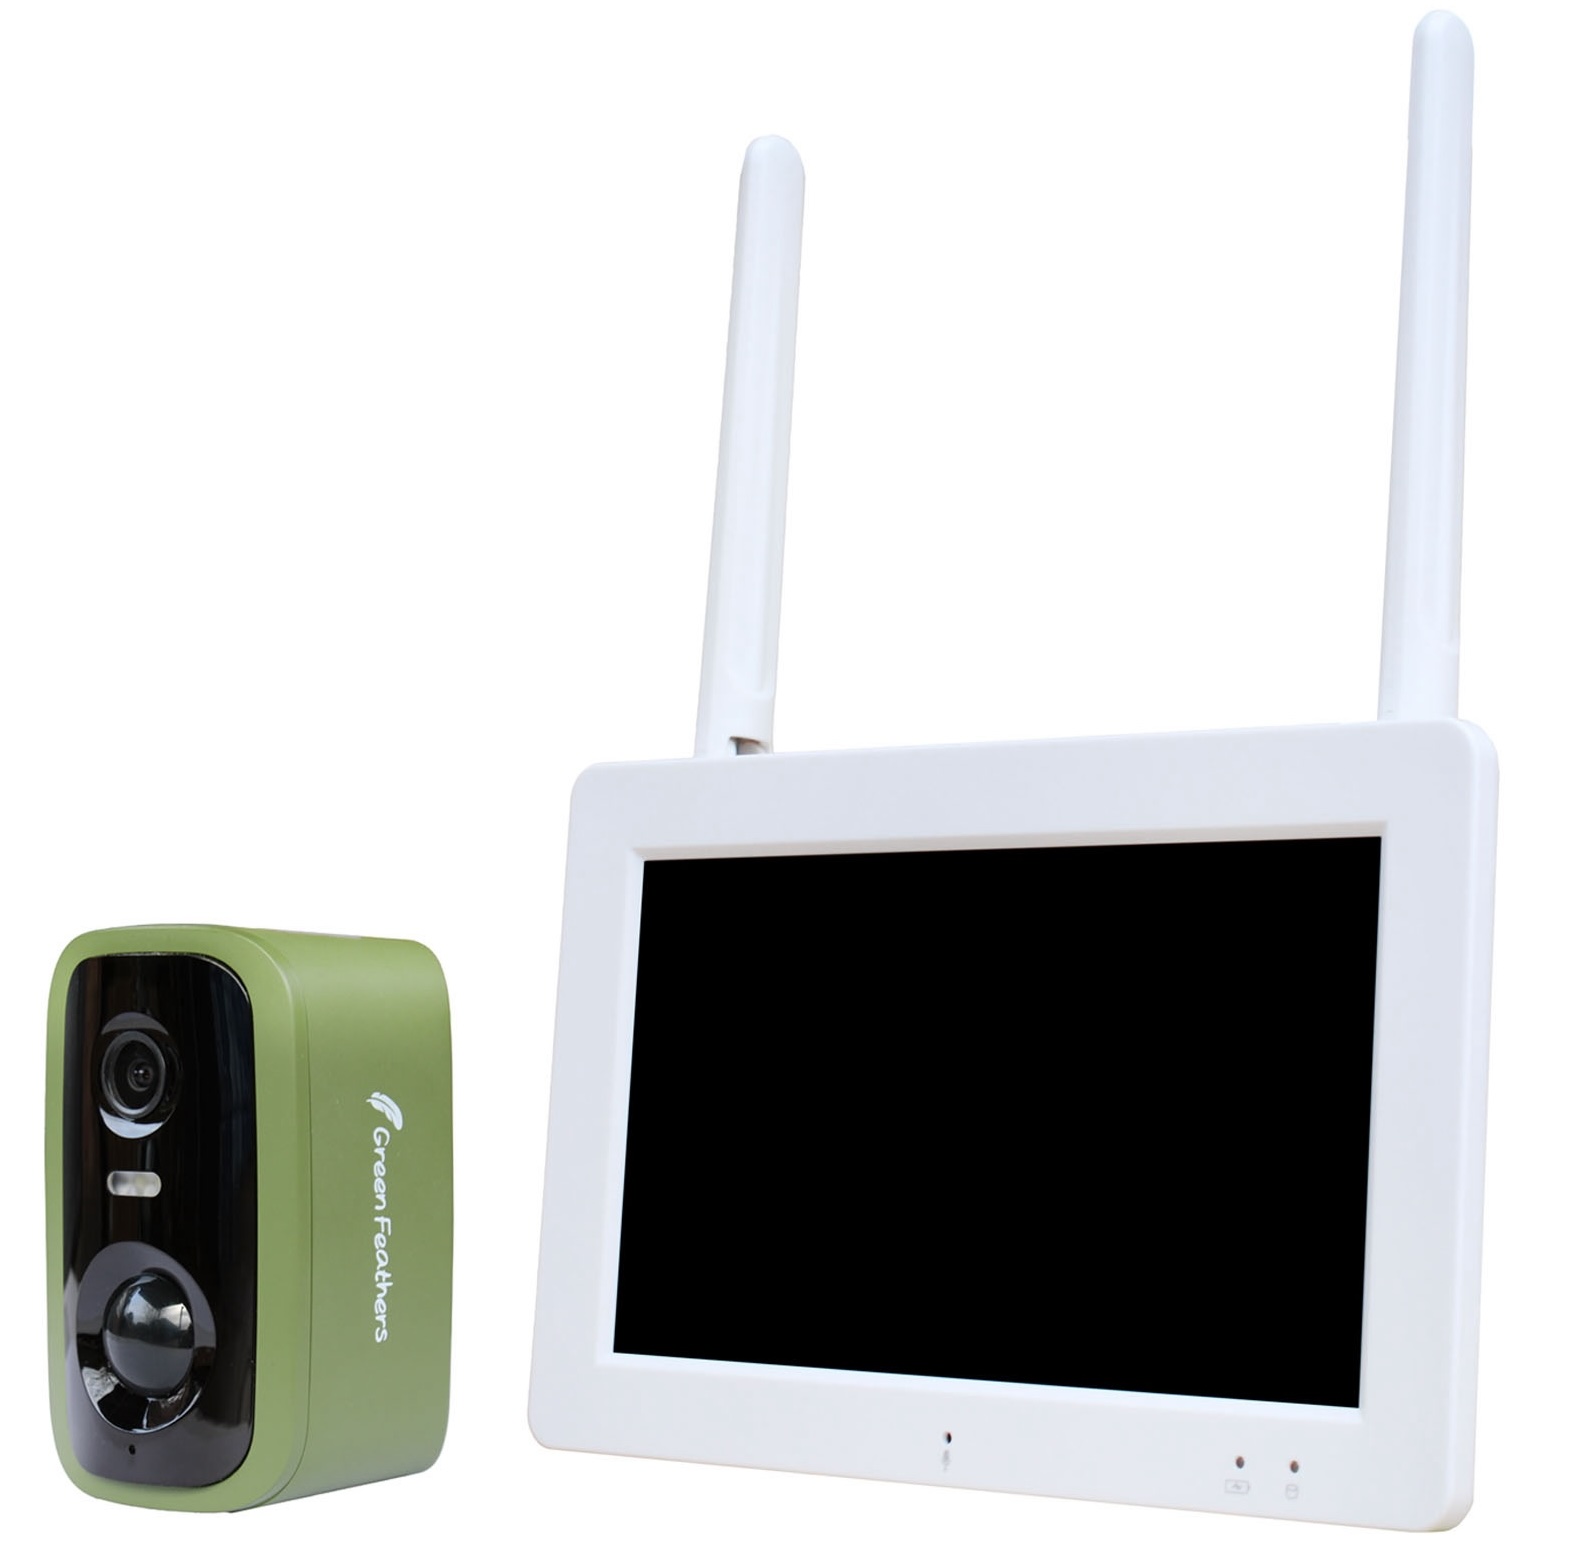
This guide will give you an overview of the settings and features for the Wireless Screen and Camera packs (GFTX2SC2N17/GFTX2SC2B1/GFTX2SC2R1S1) pictured below. If you are unsure of which camera you have please check here.
 |  |
 | |
Let's begin
Once you have the screen and camera connected you will have the live view page which looks like this: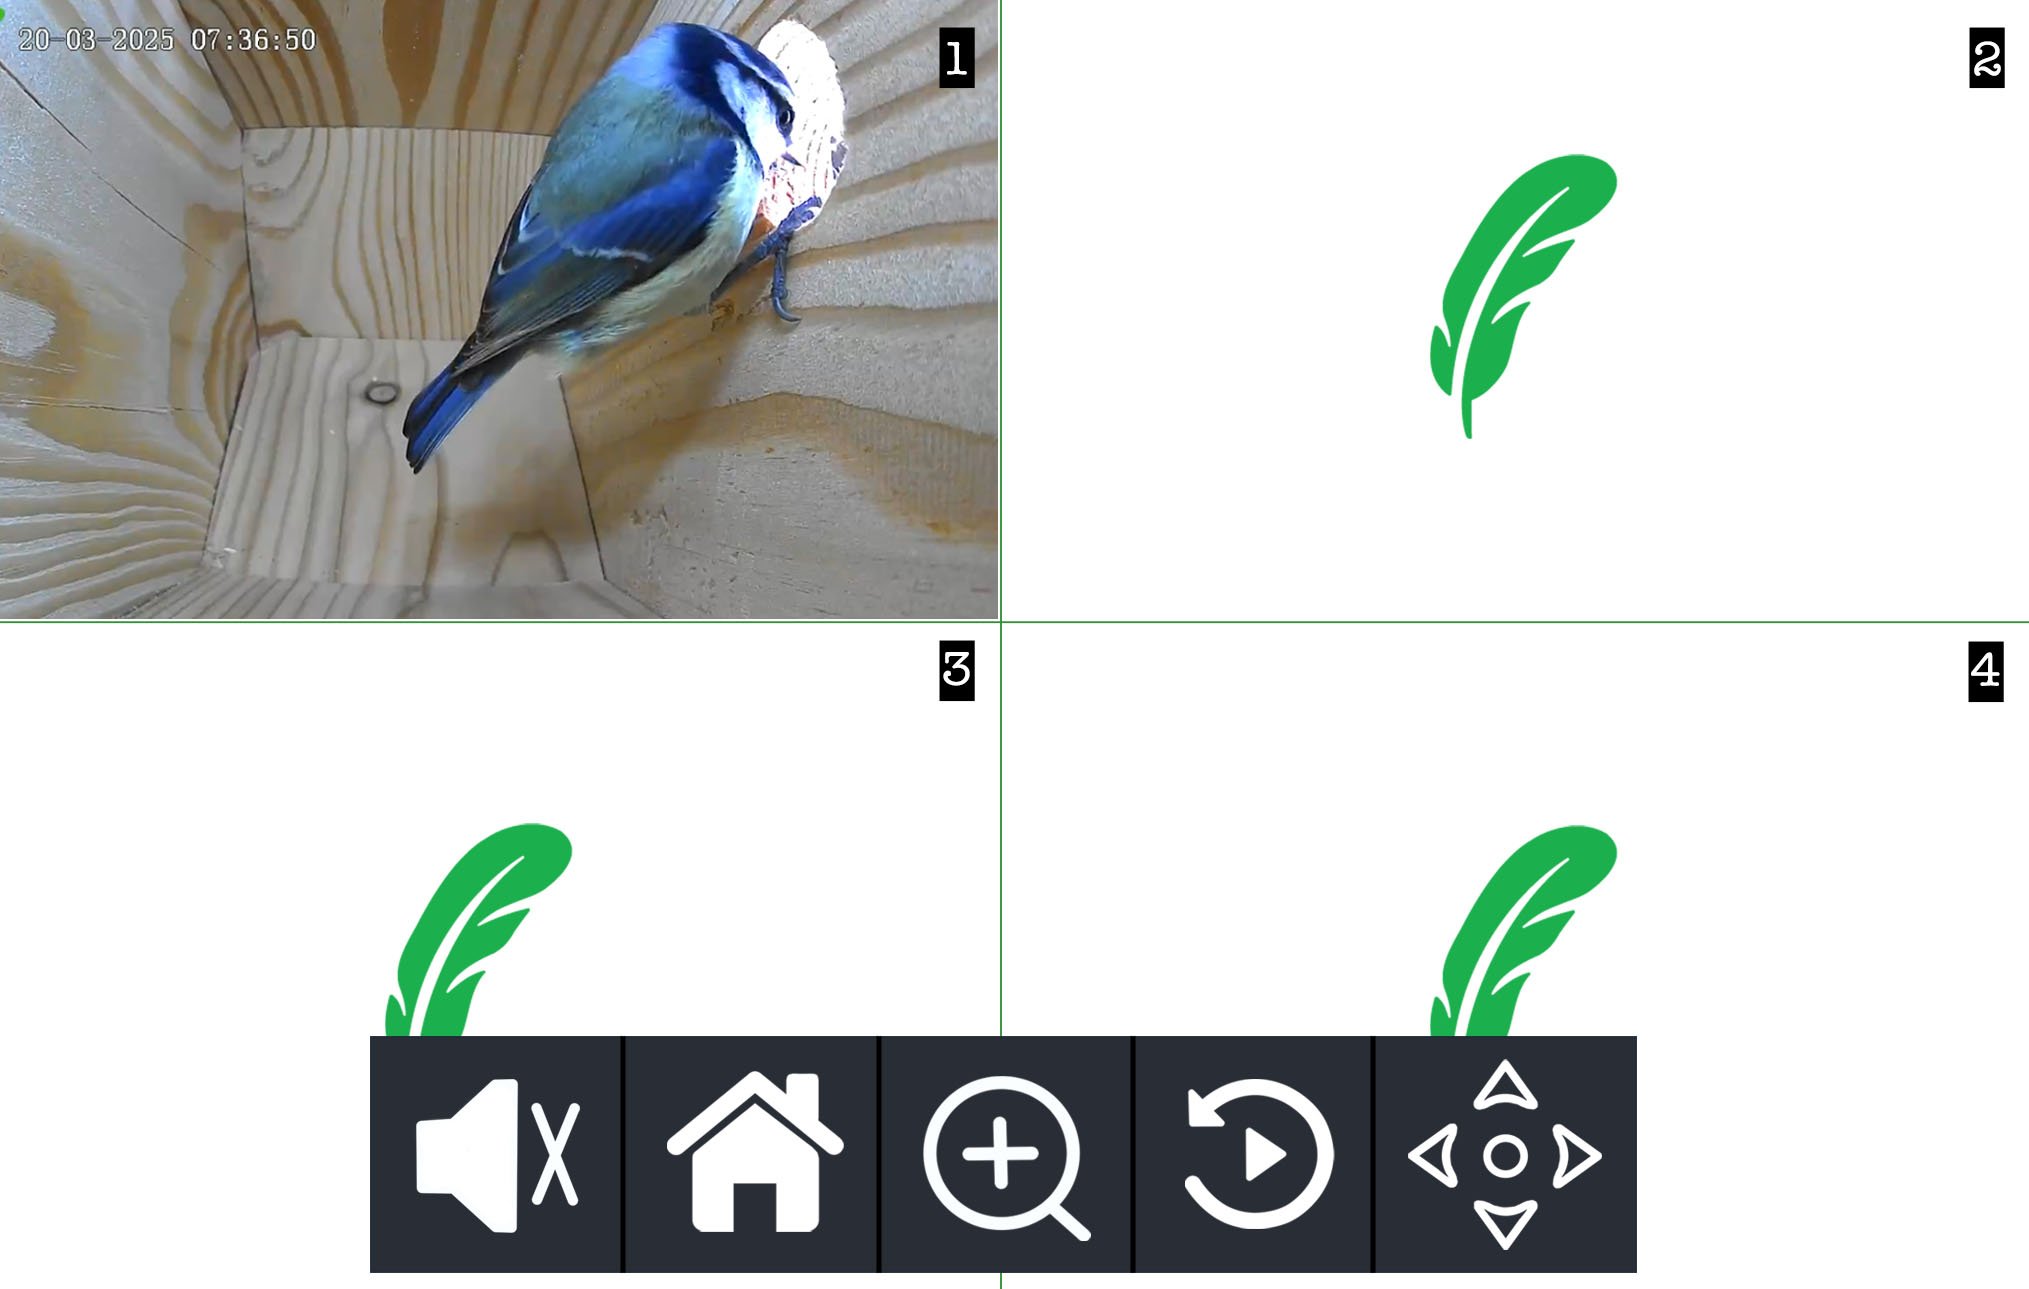
Please note: If you cannot see the tool bar, you can tap the screen once to make it appear. If you also have multiple cameras connected, you will see more video feeds on this page. To expand the image, you can double tap on the channel you want to view full screen. To minimise the screen and get back to the four channels, double tap the screen again.
Toolbar -
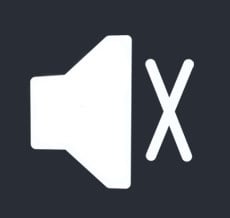
Mute/Volume - This button will change the volume level of the camera you have selected.
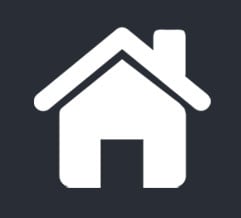
Home - This will take you to the Main Menu (see below for more information on this) home
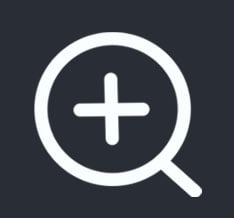 Zoom - Tap to enter zoom mode, you can then tap the screen to zoom into a section, tap once again to zoom out. Press zoom out icon in the top left will exit.
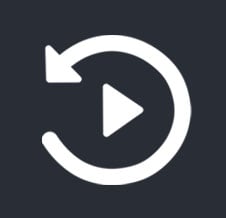 Playback - This will take you to the playback page where you will be able to view the recordings for the camera selected. (see below for more information on this)
Toggle - Our cameras are modified CCTV systems to be suitable with wildlife/birds so this feature is not compatible with our cameras.
You may also see the following symbols pop up in each camera window on the live feed -

Human Detection - This symbol will pop up on the live feed window when a human is detected.
 Motion Detection - This symbol will appear when motion is detected on the live feed of that camera.

Connectivity - This symbol will be constant on the screen's live feed window when the camera is connected.
Main Menu -
Start off by selecting the 'Home' button on the live feed page (see above). Here you will find the Main Menu. We will go through the following icons one by one.
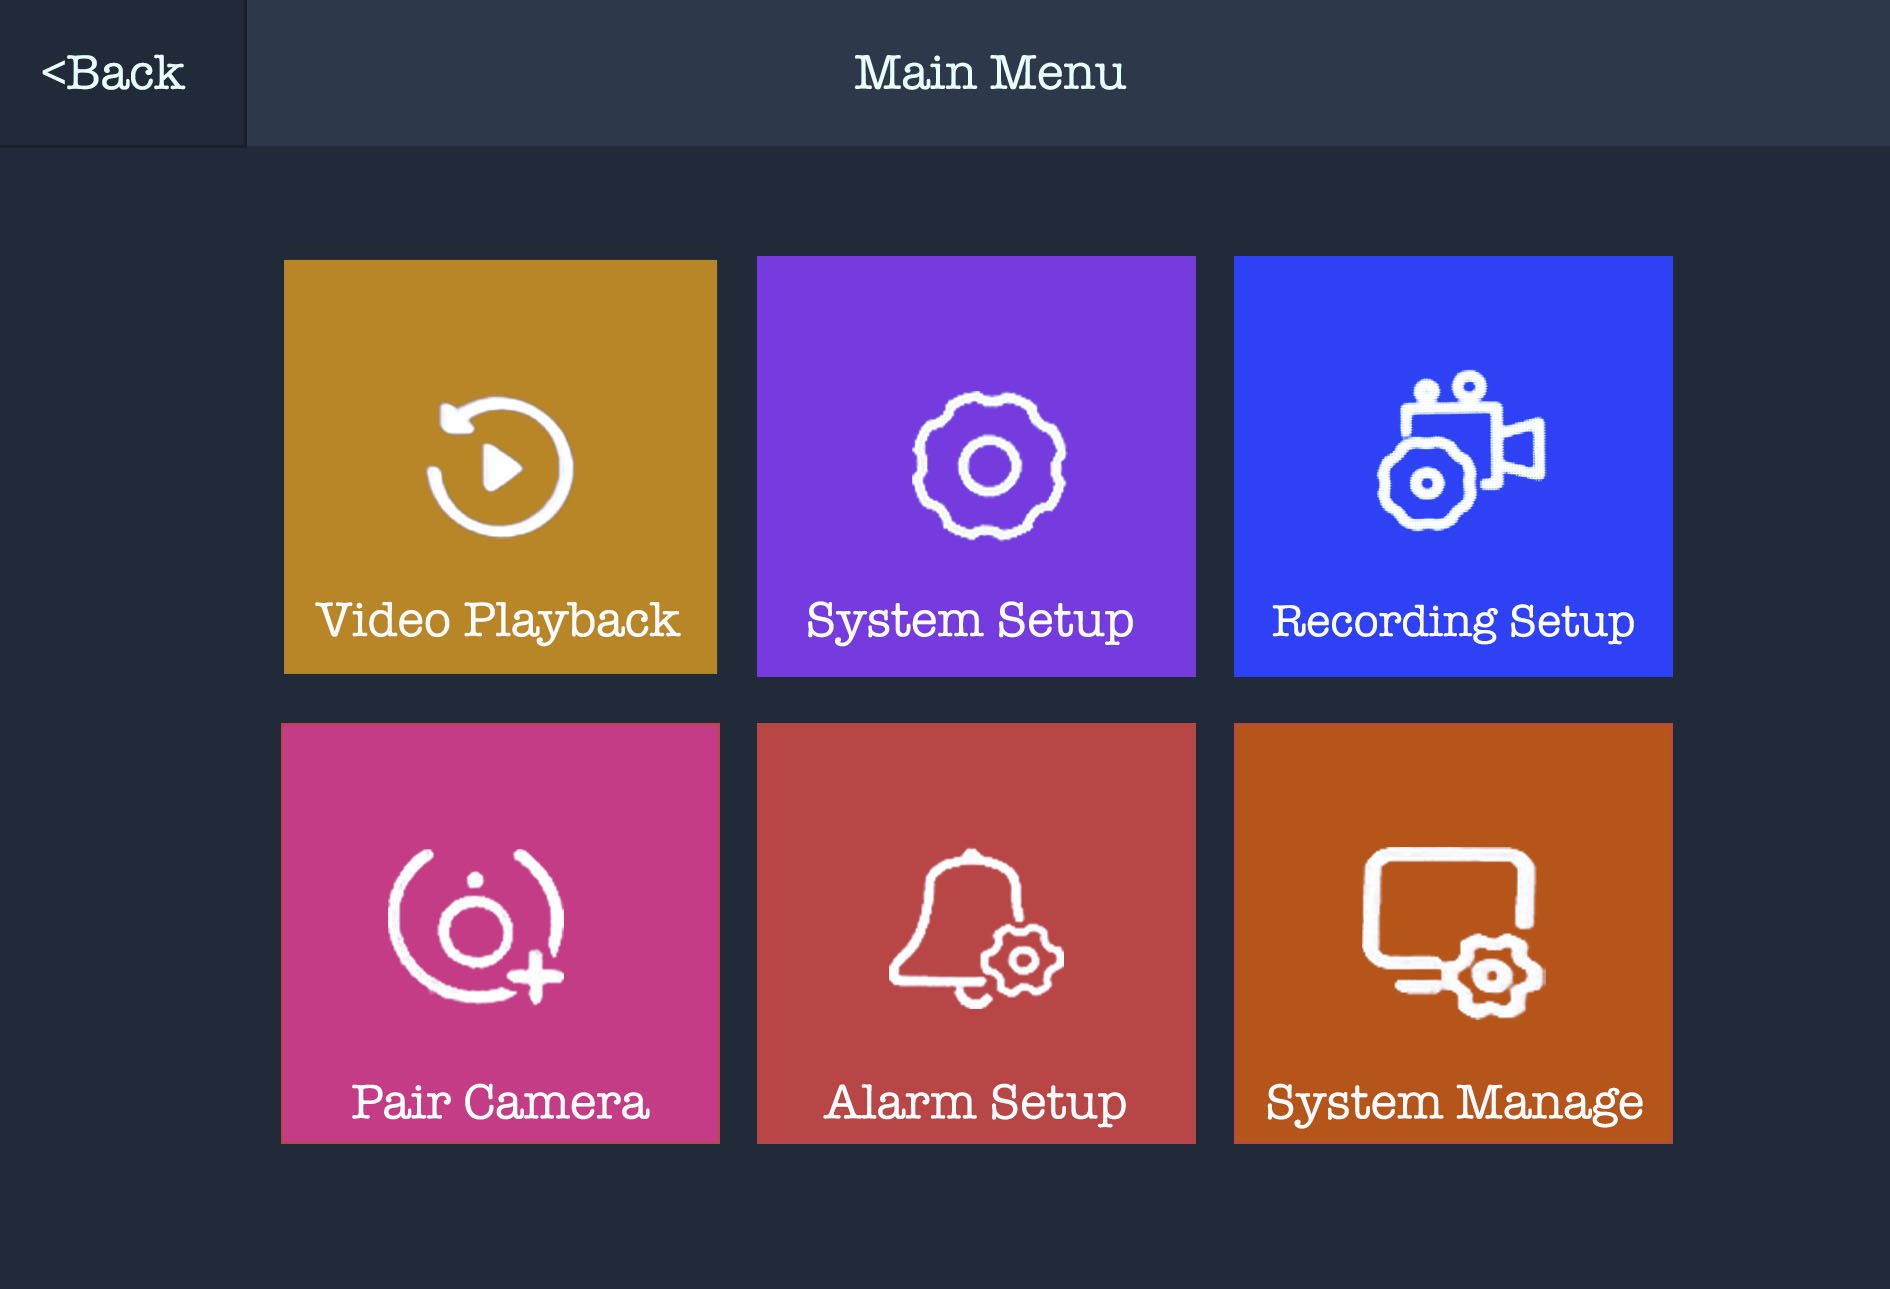
Video Playback -
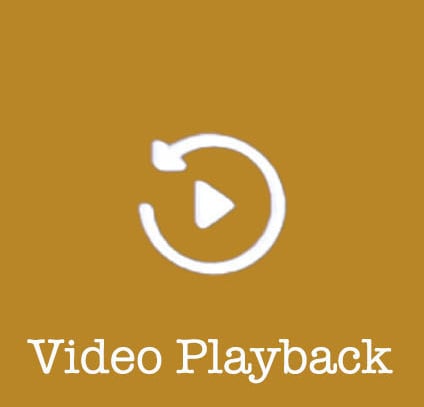
Select the yellow icon in the top left, labelled 'Video Playback'. This will take you to the following screen: 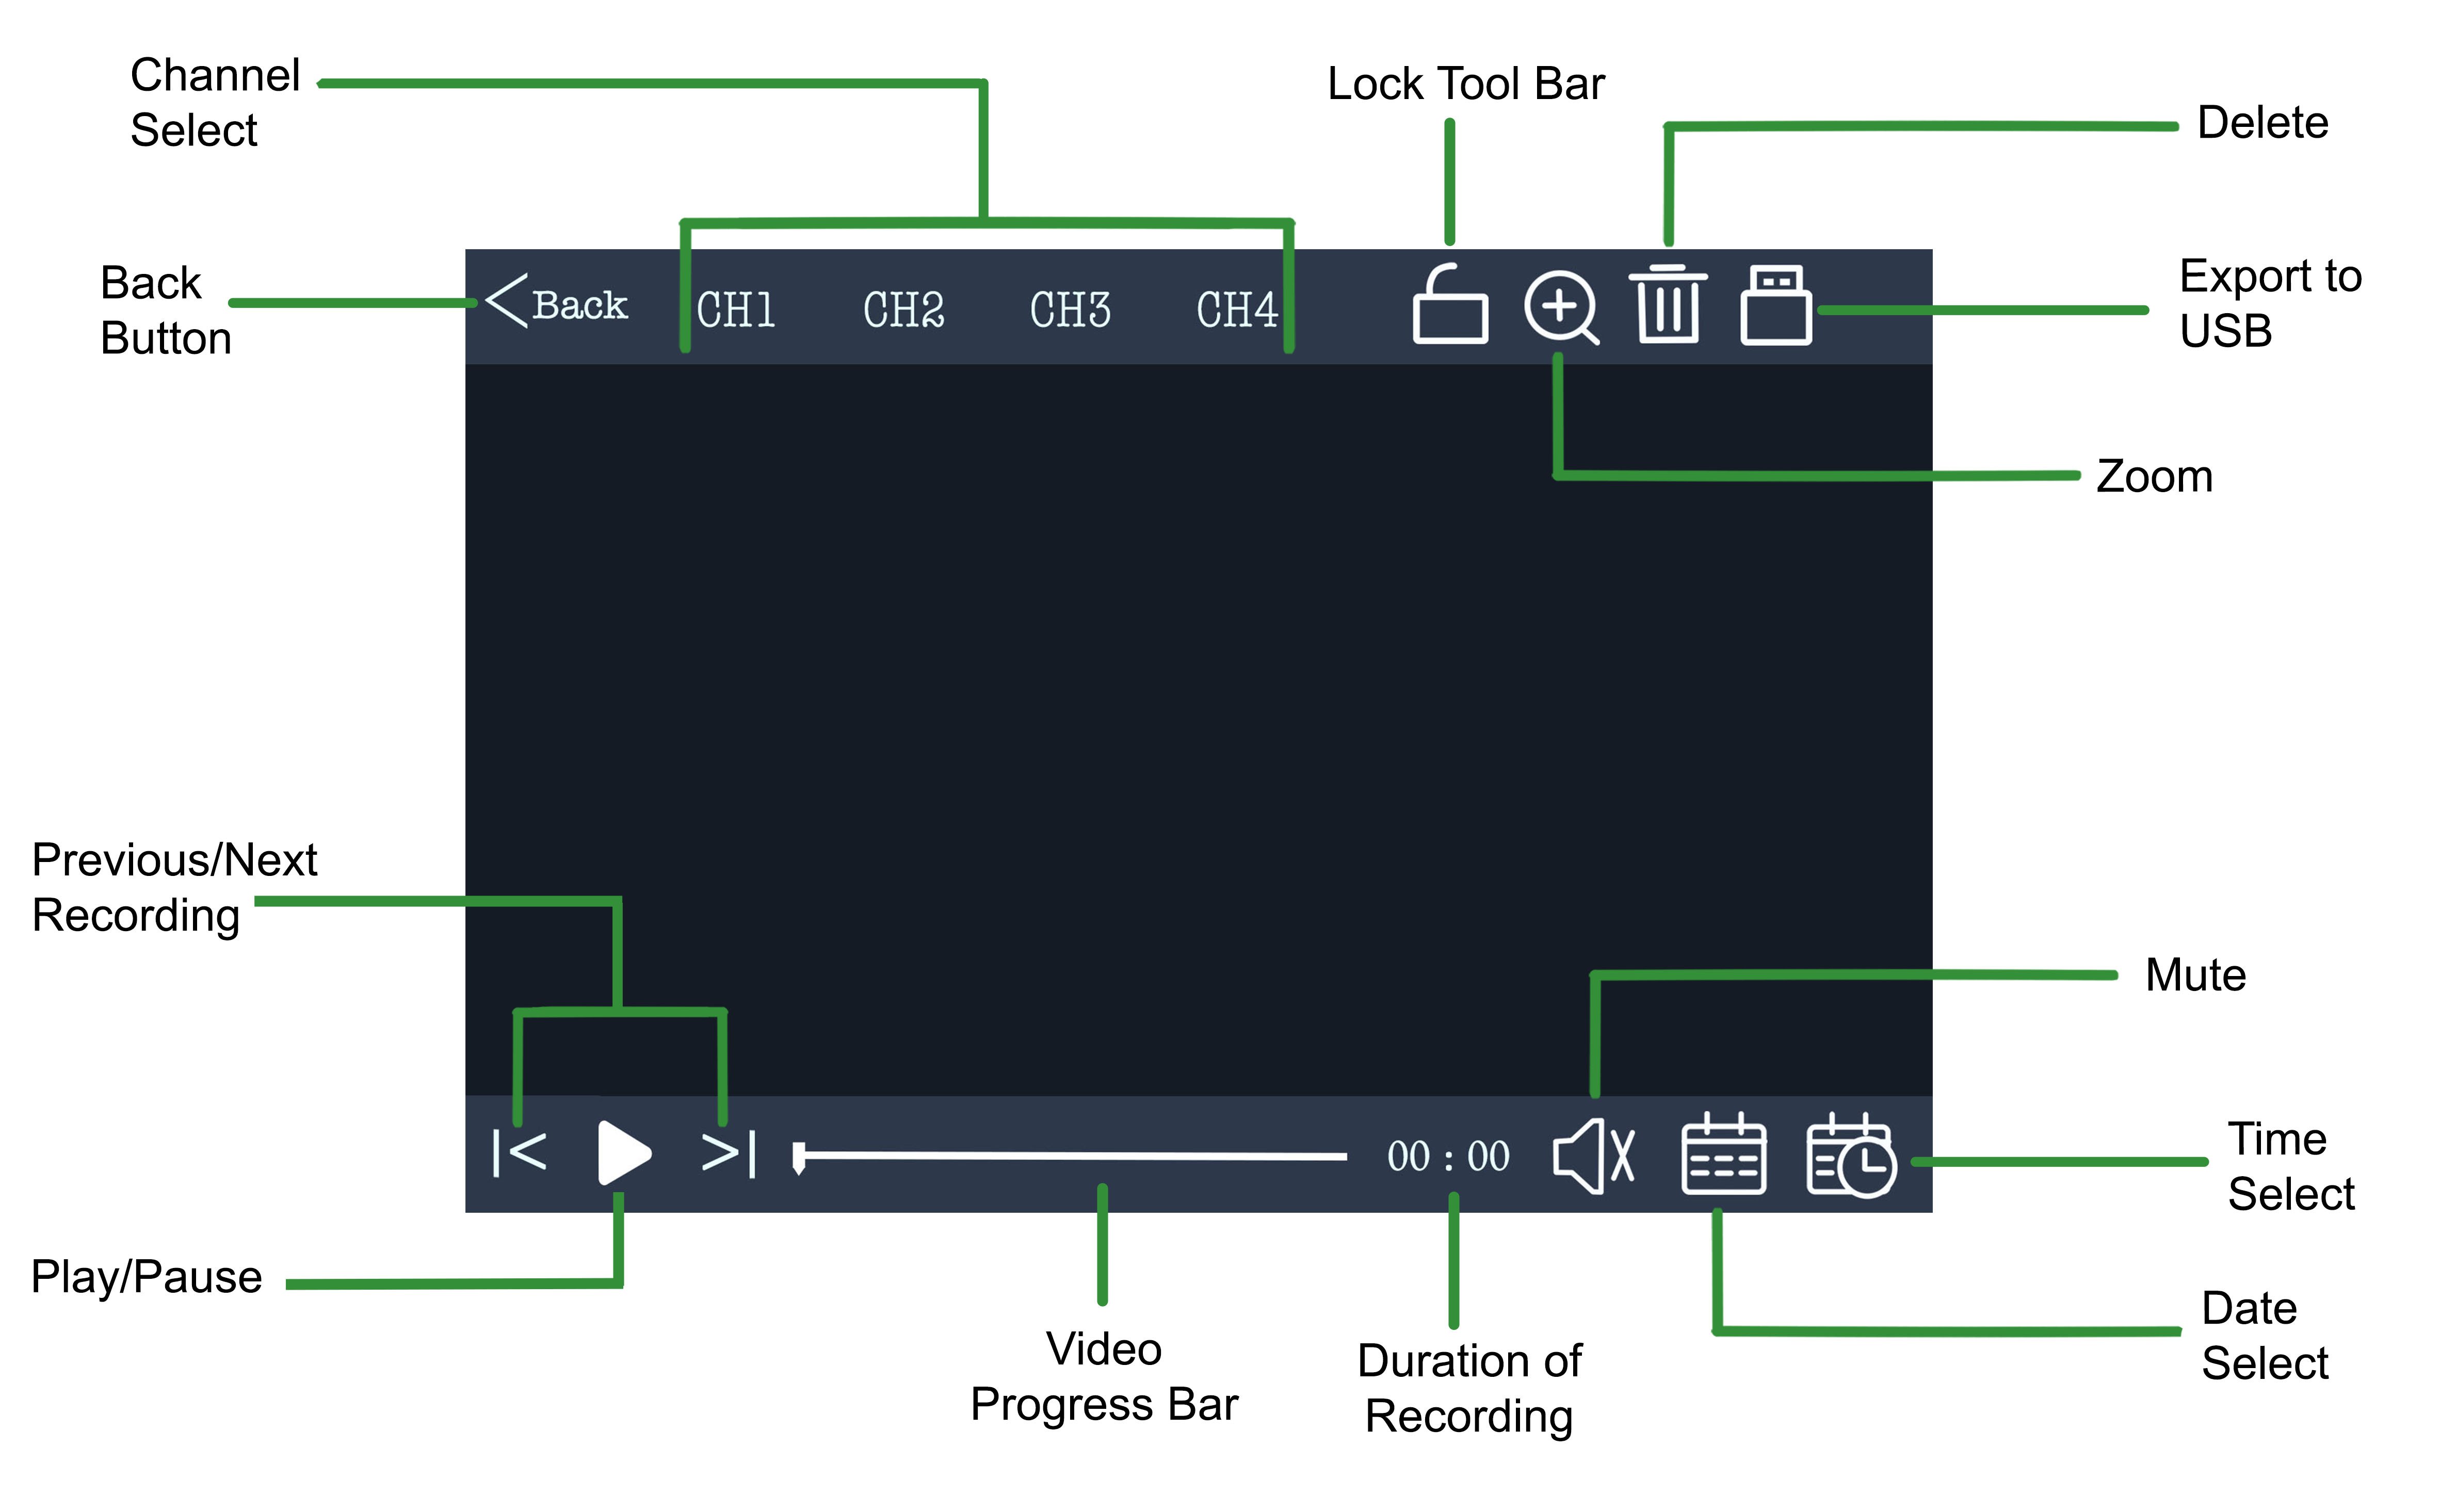 The playback section will allow you to view any videos that have been recorded to the Micro SD card. If you do not have an SD card inserted into the screen, you won't see any playback here.
| Channel Select - This section shows you the different channels, if you have multiple cameras you can select between them here to view the playback. Back Button - This takes you back to the Main Menu Lock Tool Bar - This button will lock the tool bar so it does not time out, if you do not want to see the tool bar when you're watching recordings, make sure it's unlocked. Delete - This will allow you to delete the current recording you are viewing. Export to USB - If you insert a USB memory stick, you can export the current recording to the memory stick. Zoom - This will enlarge the image. | Previous/Next Recording - Choosing the back button will go to the previous recording and then selecting the forward button will choose the following recording in time order for that day. Mute - The mute button will mute any playback you are watching. Play/Pause - This is the play and pause button for the recordings. Video Progress Bar - You can select different bits in the recording here, pause/play and also see the duration. Duration of Recording - This will show you how long the recording is. Date Select - Date select allows you to select a day of your choice and view the playback for that day. Time Select - The time select button allows you to choose recordings by time for the day selected. |
System Setup -
Select the purple icon in the middle on the top row, labelled 'System Setup'. This will take you to the following screen:
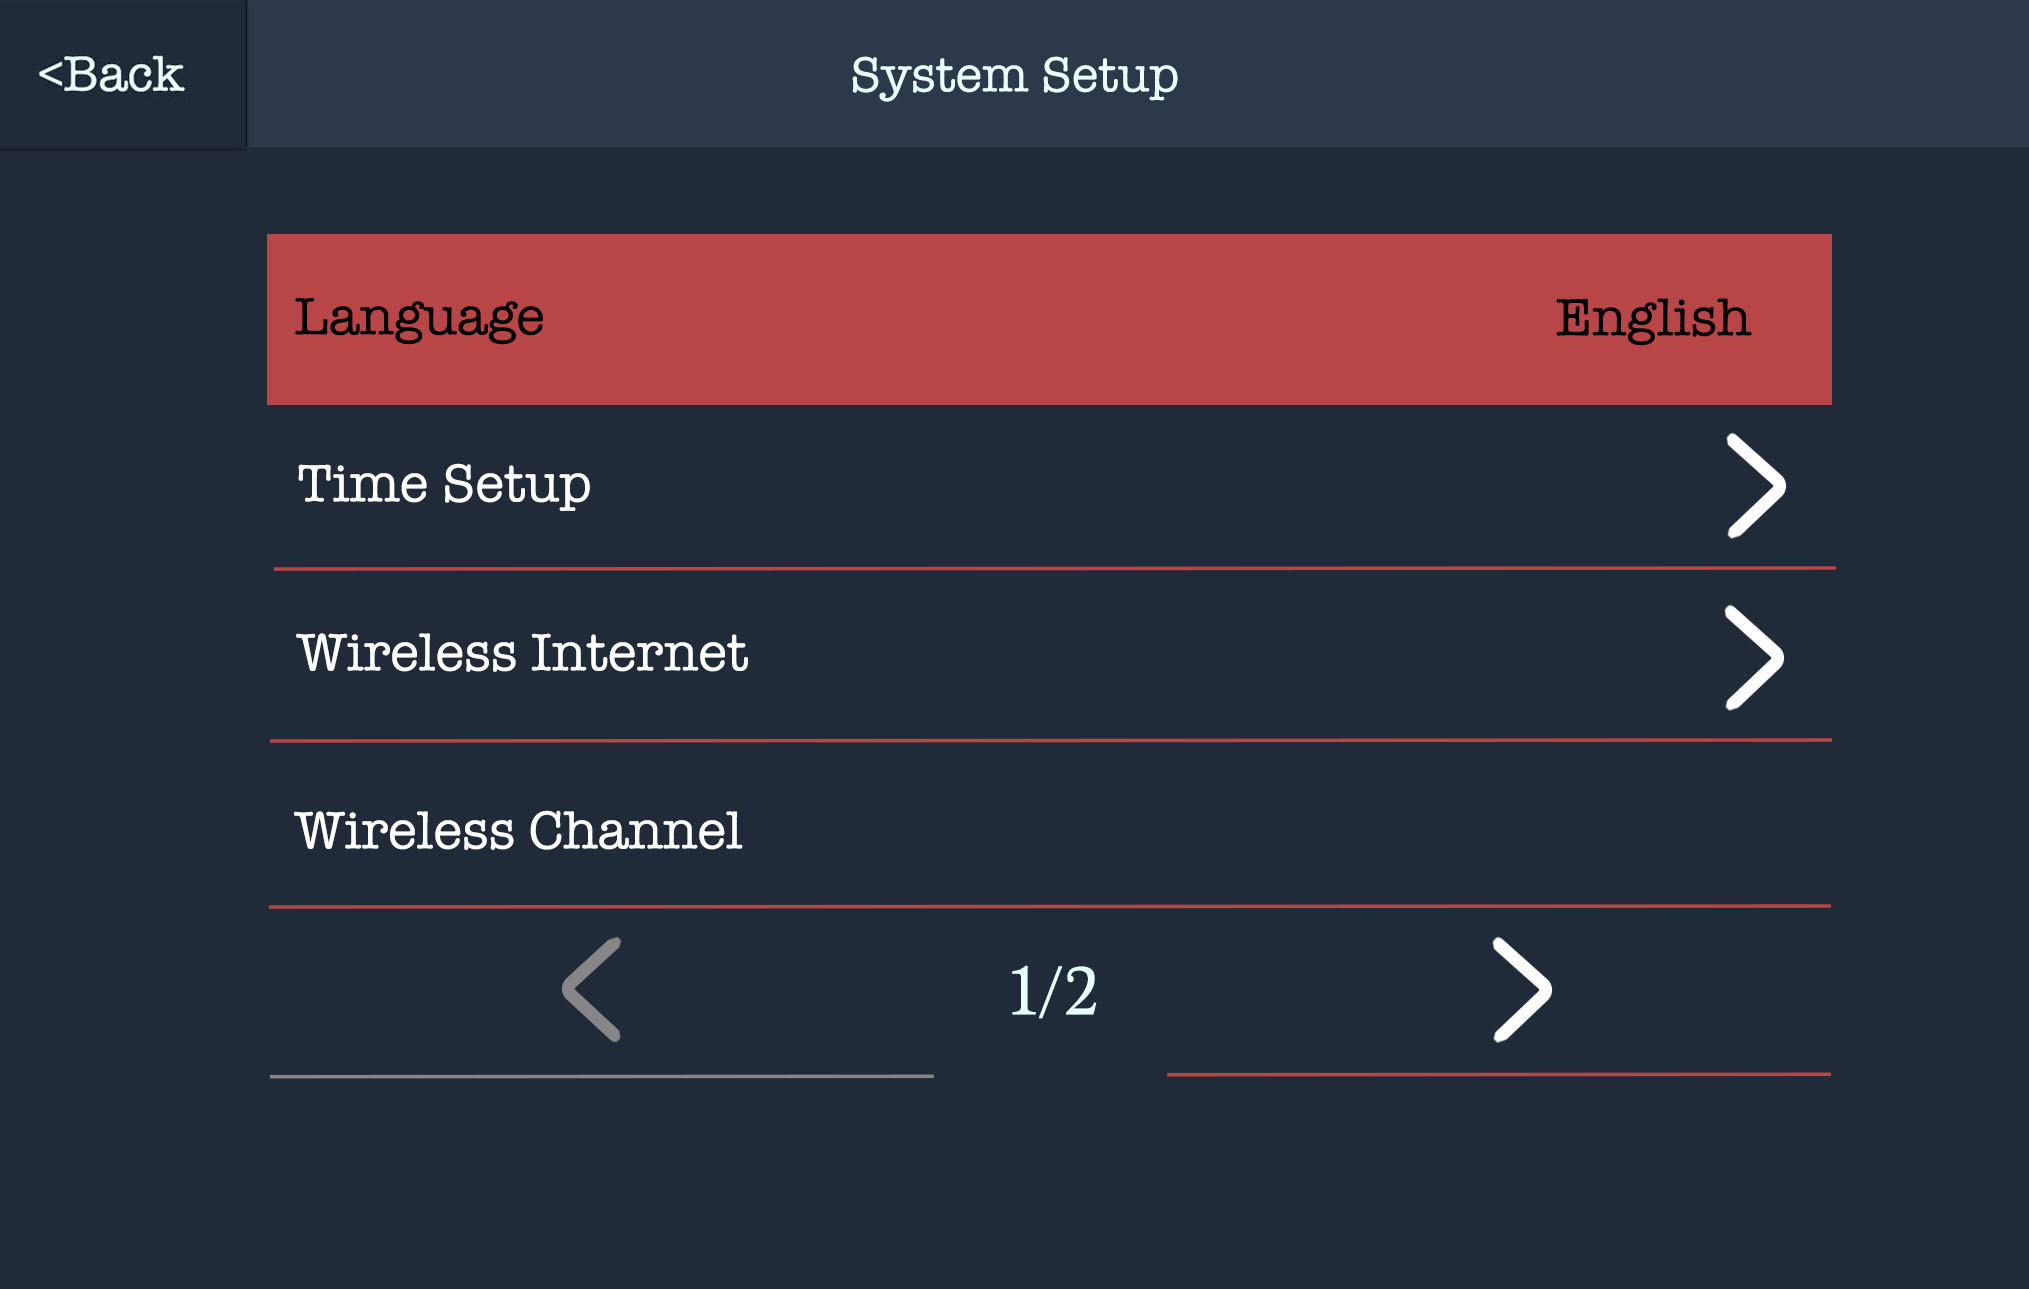 | 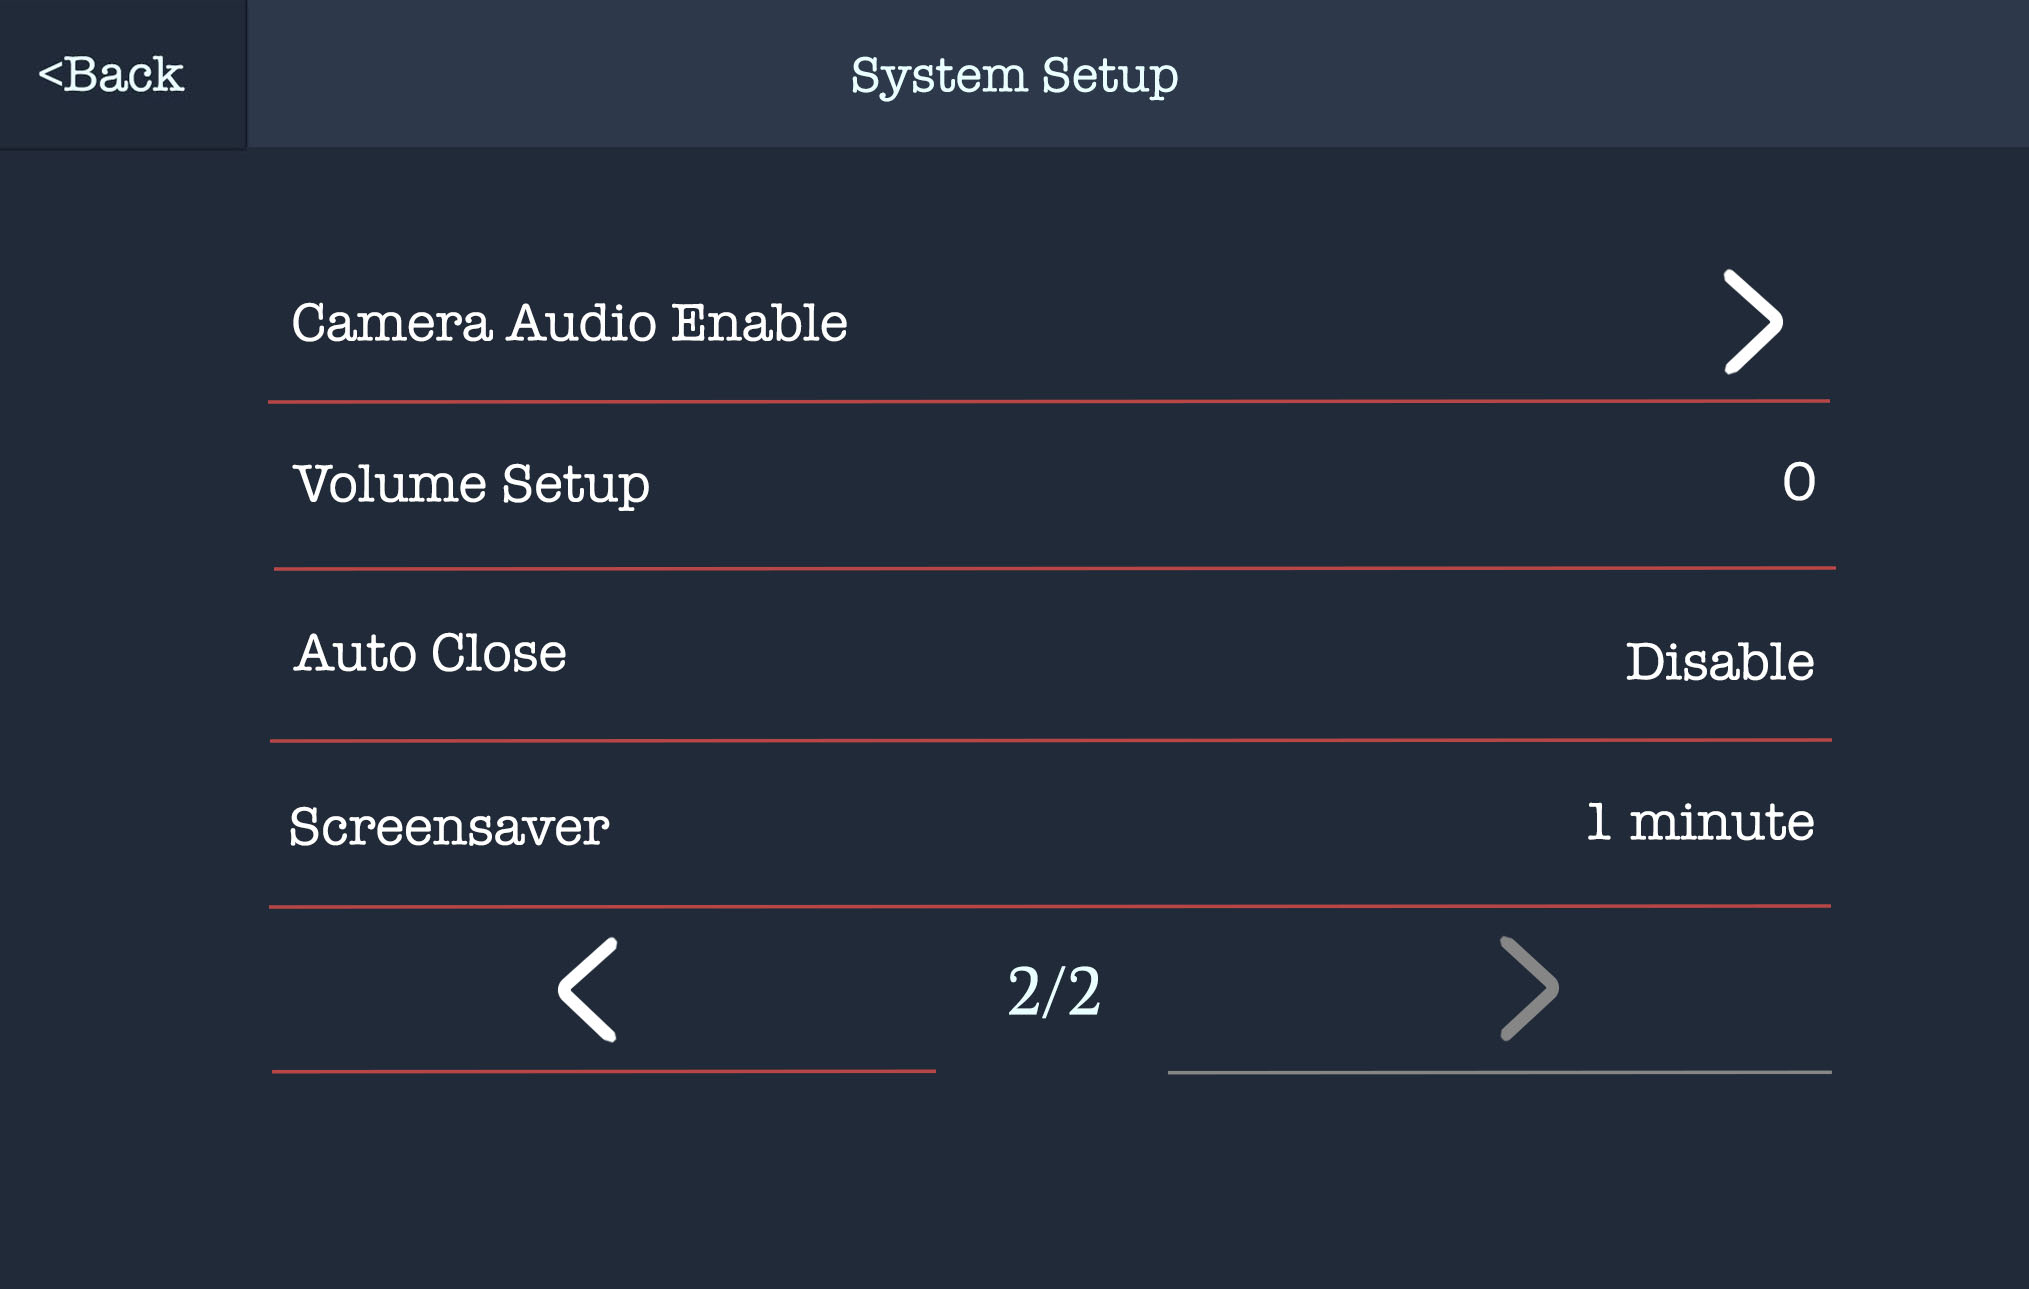 |
The System Setup page will show you the basic set up that you have currently with the cameras/screen. We will briefly go over these one by one, page 1 is on the left and page 2 is on the right.
Page 1/2 | Page 2/2 |
| Language - This allows you to change the language of the screen. Time Setup - By selecting this one, it will take you to a page that shows you the way your time/date is set up, here you can change the server, time zone and also decide wether to sync the time or not. Wireless Internet - This section provides info on the current network settings. Here you can see which network you are connected to and change the network to another available one if you'd prefer. Within 'Network Setup' it shows DHCP is enabled, this means it is automatically assigning IP addresses and other network parameters, if you need to you can disable this and edit them, but we recommend leaving this as it is. Wireless Channel - This one is auto set and does not need changing. It relates to the current wireless channel of your Wi-Fi network. | Camera Audio Enable -Allows you to mute the cameras individually. This mutes the sound on the live view and recordings. Volume Setup - This allows you to change the volume levels on the live feed, by selecting 0, it will always be muted until you press the speaker button the live view. If you set it to 3, it will always start off at the loudest settings on the live view. We recommend having it set to 0 so you can change it when required instead of it always making noise. Auto Close - This relates to the screen and how long it is open for. If you set it to 30 seconds for example, the screen will switch off after 30 settings with no screensaver. Screensaver - The screensaver mode is much like the Auto Close function, but instead of a blank screen appearing after your chosen time, you can set the screensaver to appear which shows you the time and date. |
Recording Setup -
Select the blue icon in the top right, labelled 'Recording Setup'. This will take you to the following screen:
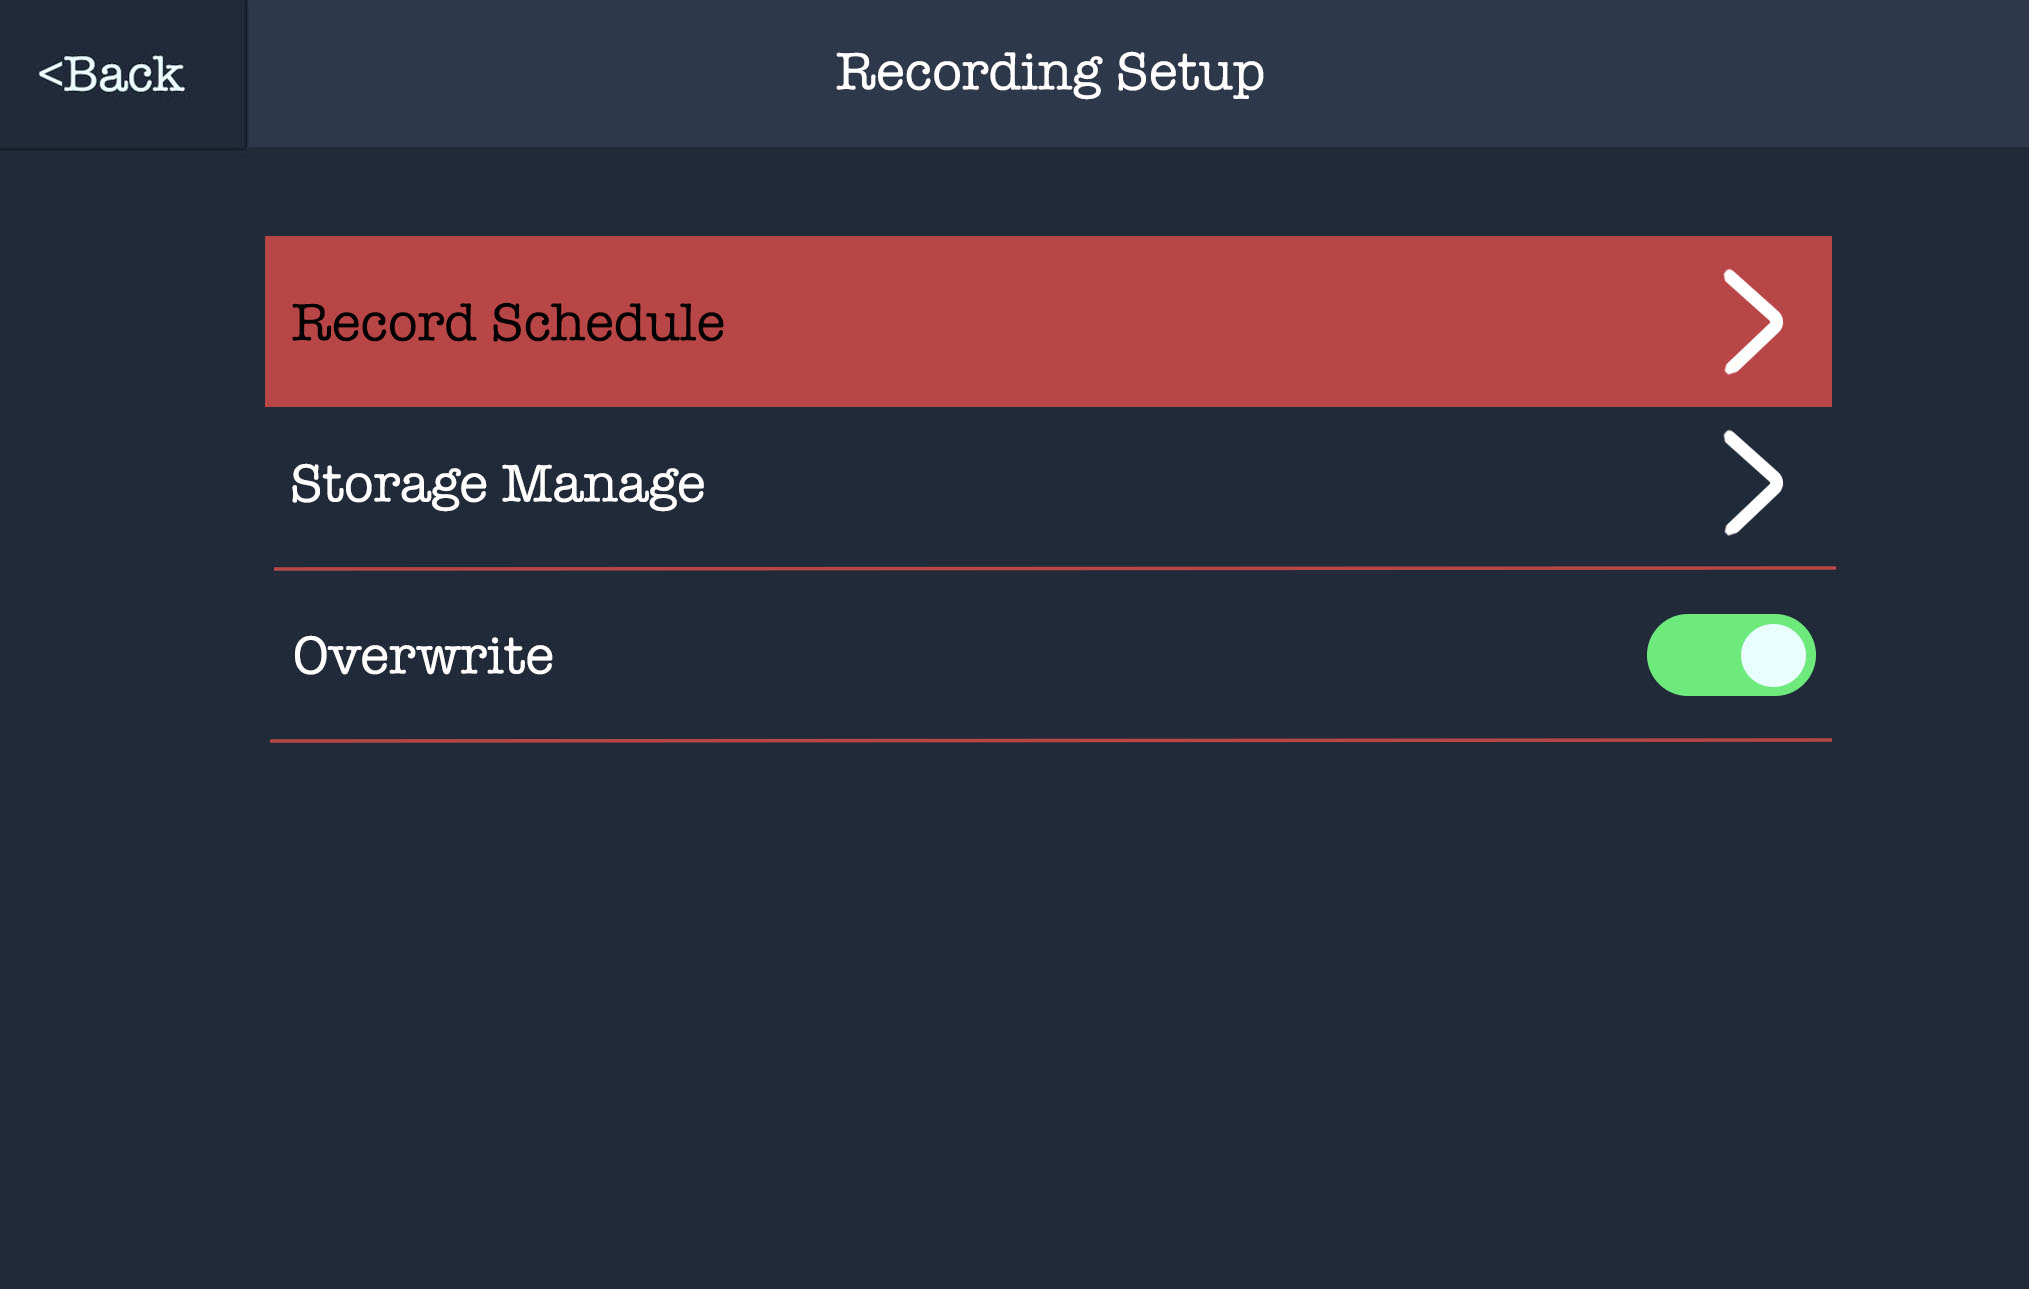
Record Schedule - This will take you to the schedule page, this is where you can set up the motion detection and recording, we go into more detail on that in this guide here.
Storage Manage - Selecting storage manage will show you all the info on the SD card you have inserted in the screen, if you do not have an SD card inserted, you will not be able to view this page. You will also have the option to format the card in this section.
Overwrite - By enabling overwrite, this means that any older footage will be replaced by newer recordings as the SD card fills up. If you disable this, you will need to format the SD card when it gets full.
Pair Camera -
Select the pink icon icon in the bottom left, labelled 'Pair Camera'. This will take you to the following screen: 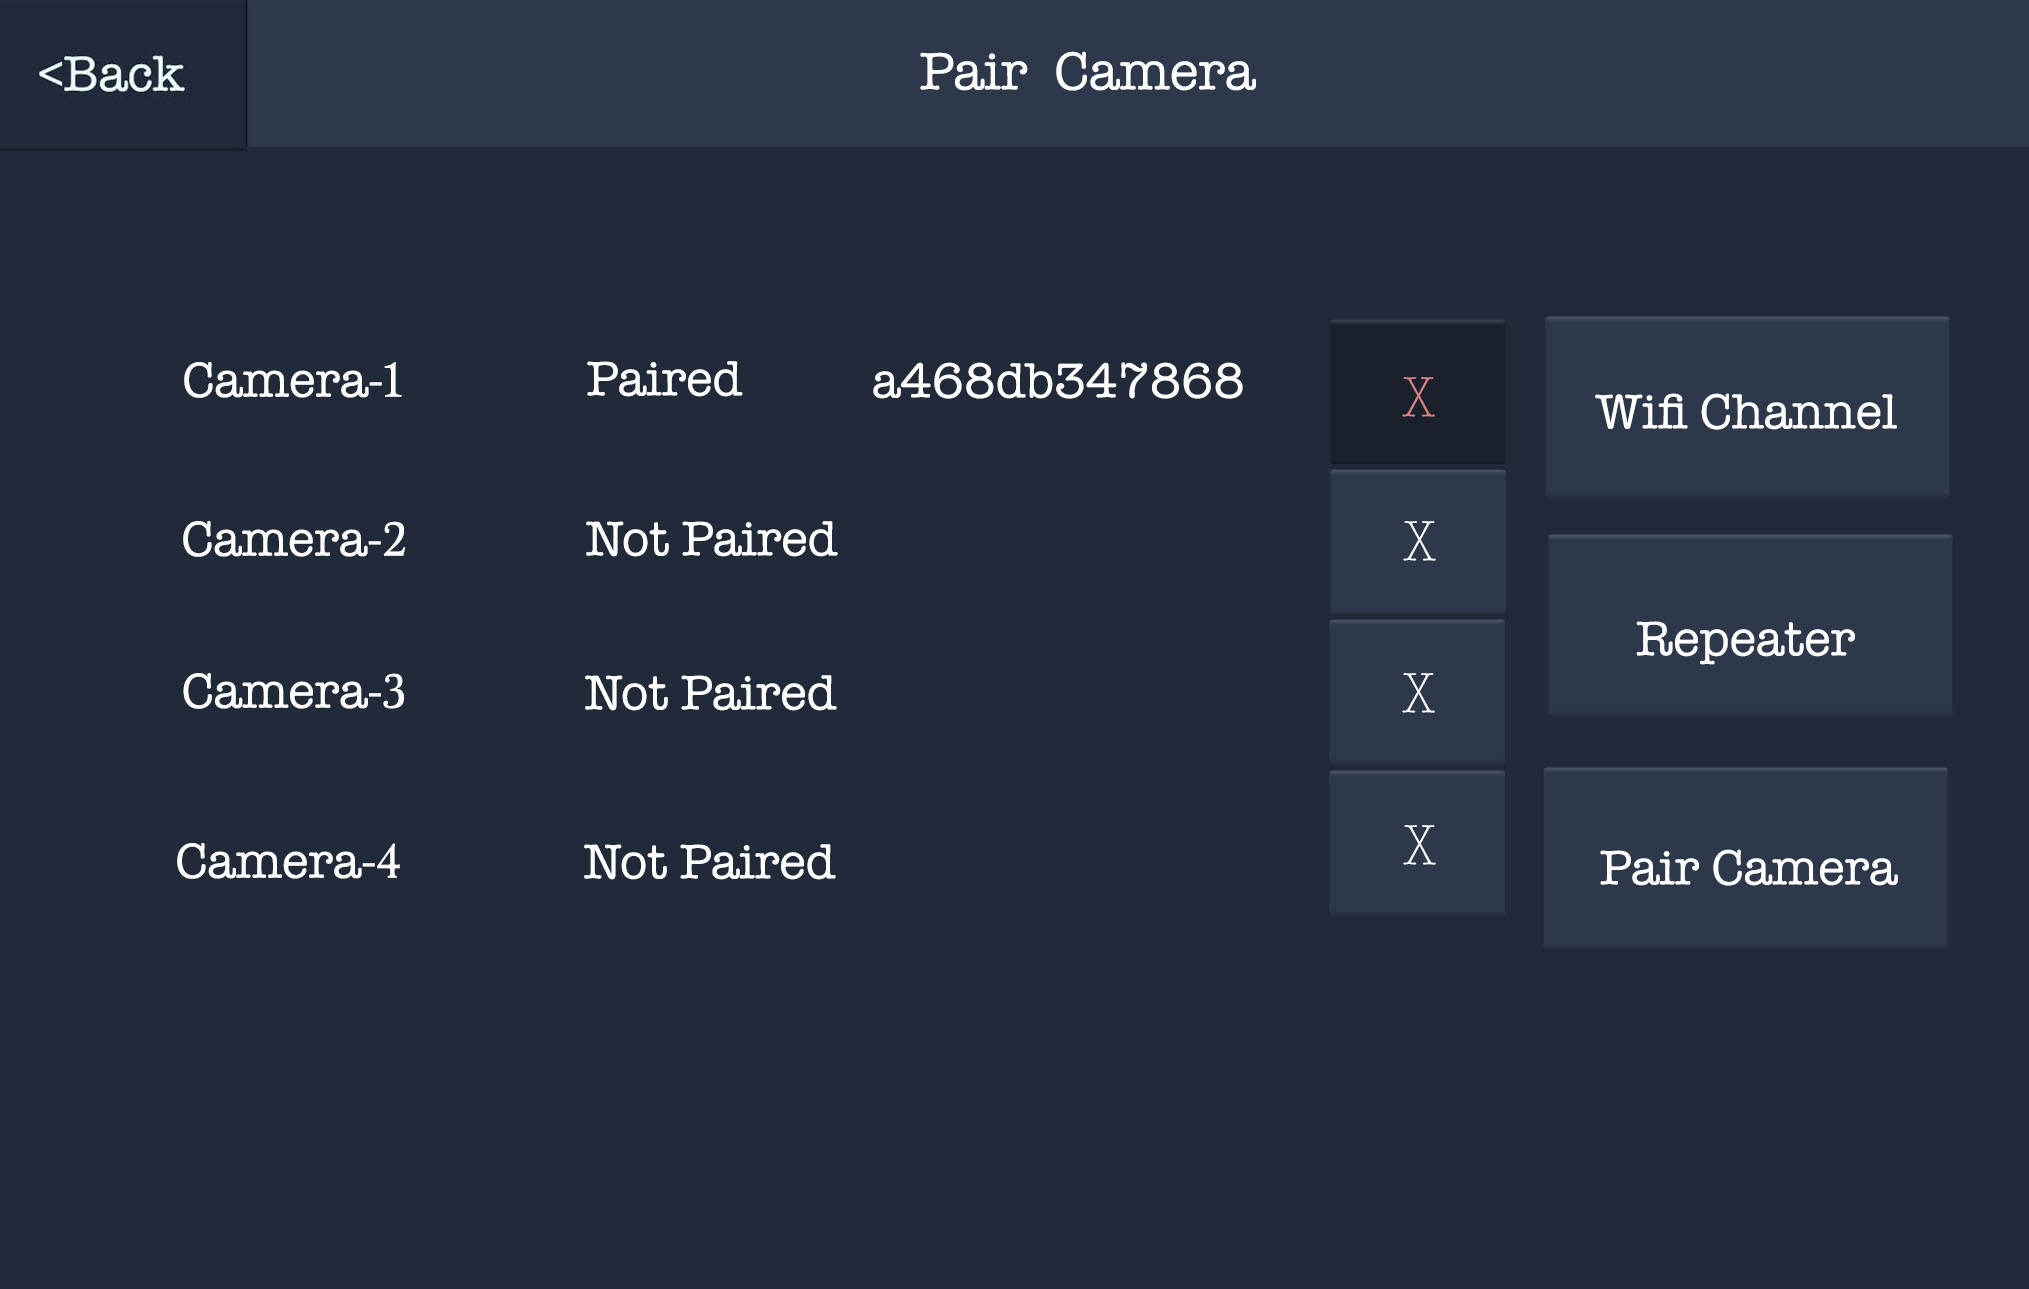
Here you will be able to see the cameras you have paired. We have one connected here as an example. The little 'X' next to the corresponding camera is the delete button and will remove the camera.
Wifi Channel - This shows you the information for the WiFi connection signal between the screen and the camera.
Repeater - This section does not apply to this pack as we do not sell repeaters or extenders with it.
Pair Camera - This is the pair button, when you are adding extra cameras to your system you will need to use this to pair the camera and the screen.
Alarm Setup -
Select the red icon at the bottom in the middle, labelled 'Alarm Setup'. This will take you to the following screen:
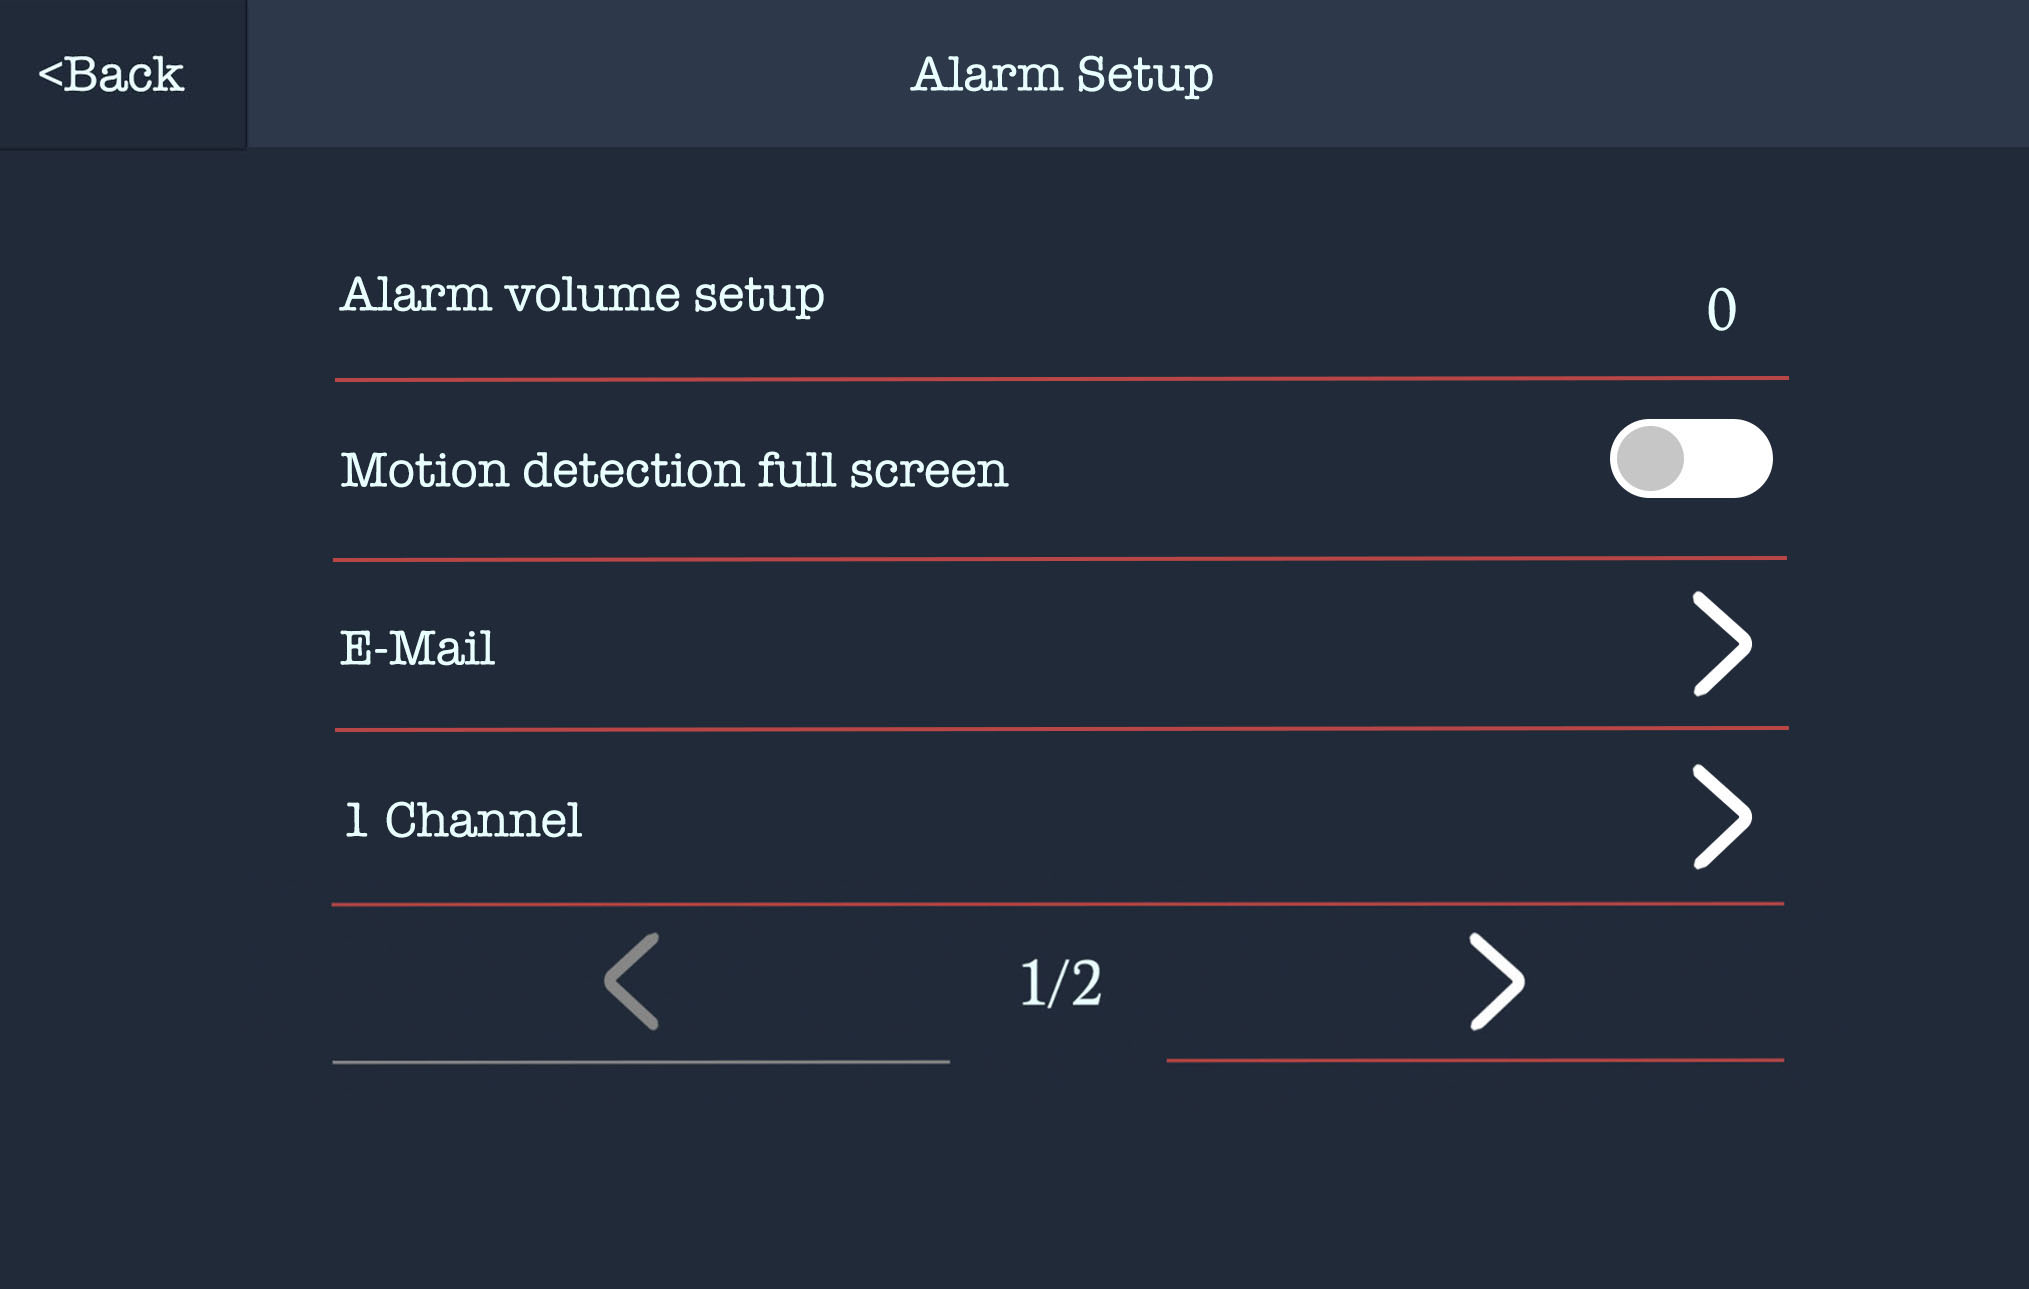 |  |
Alarm volume setup - Here you can enable your screen to alert you to movement with an audible alarm emitted from the screen. We don't recommend having this set as it can be triggered very often.
Motion detection full screen - Enabling this means that any camera that detects motion will automatically go to full screen once you're back on the live view page of the screen.
E-Mail - This allows you to input an email to get alerts for motion detection. This is not something we recommend doing as it can alert very often and ends up filling up your emails with alerts!
1/2/3/4 Channel - Select the corresponding channel to your camera(s) and you will see the following screens/options:

Motion - Enabling this means that you will see this symbol on your live feed page when motion is detected. Depending on which camera you have enabled it on.
Smart Detection - This gives you option of 'Human body' and 'Body region' as mentioned previously in this guide, these cameras are based on CCTV systems so they do include options like these. Having 'Human body' enabled, means you will see this symbol on the live feed page. Depending on which camera you have enabled it on.
APP Alarm - This relates to the app, if you have the camera connected to the app, this will enable/disable the motion detection on the app. We always recommend double checking the settings in both the app and the screen and sometimes this option will require you to come out of the page on both the screen and the app in order to enable the settings after ticking this option.
Mail Notice - This again relates to an email notification of motion detection, we do not recommend using this setting as it can send a lot of alerts to your email.
Click the next arrow at the bottom of this screen to go to page 2/3 and you will see this page:
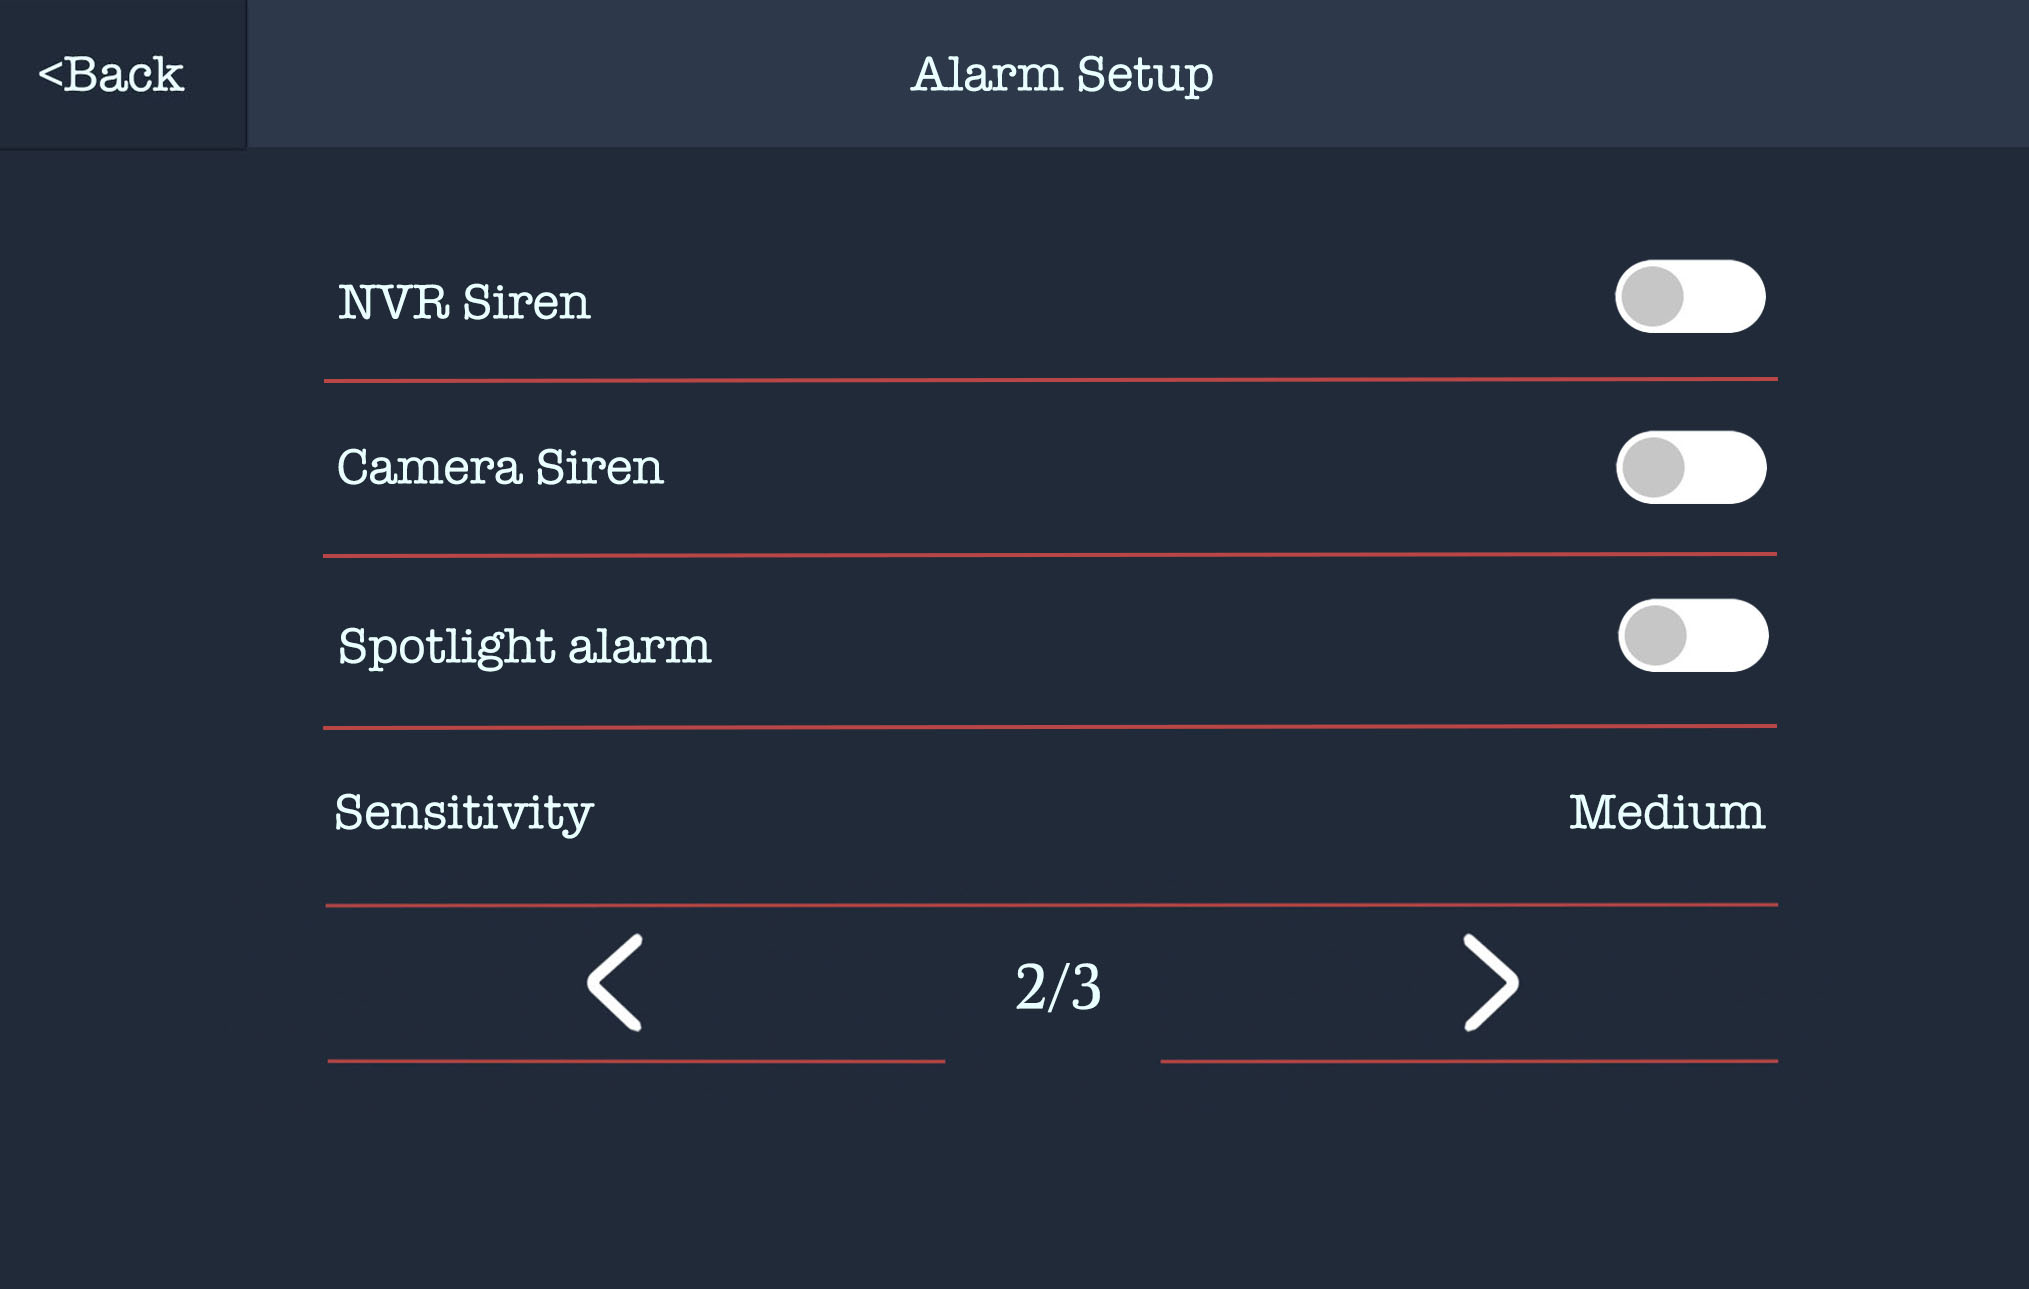
NVR Siren - This is another function relating to CCTV systems, we recommend leaving this one off. It essentially enables an alarm to be emitted from the screen.
Camera Siren - This is again is another function relating to CCTV systems, we recommend leaving this one off. It essentially enables an alarm to be emitted from the camera (this has been permanently disabled from the camera end during our design and manufacturing process).
Spotlight Alarm - Another function relating to CCTV systems, we recommend leaving this one off. It essentially enables a spotlight to be emitted from the camera (this has been permanently disabled from the camera end during the design and manufacturing process).
Sensitivity - This relates to the motion detection sensitivity. If you set it to high, it will be the most sensitive and low will be the lowest. We recommend having this set to 'Medium' but please do change it to your preference.
Click the next arrow at the bottom of this screen to go to page 3/3 and you will see this page:
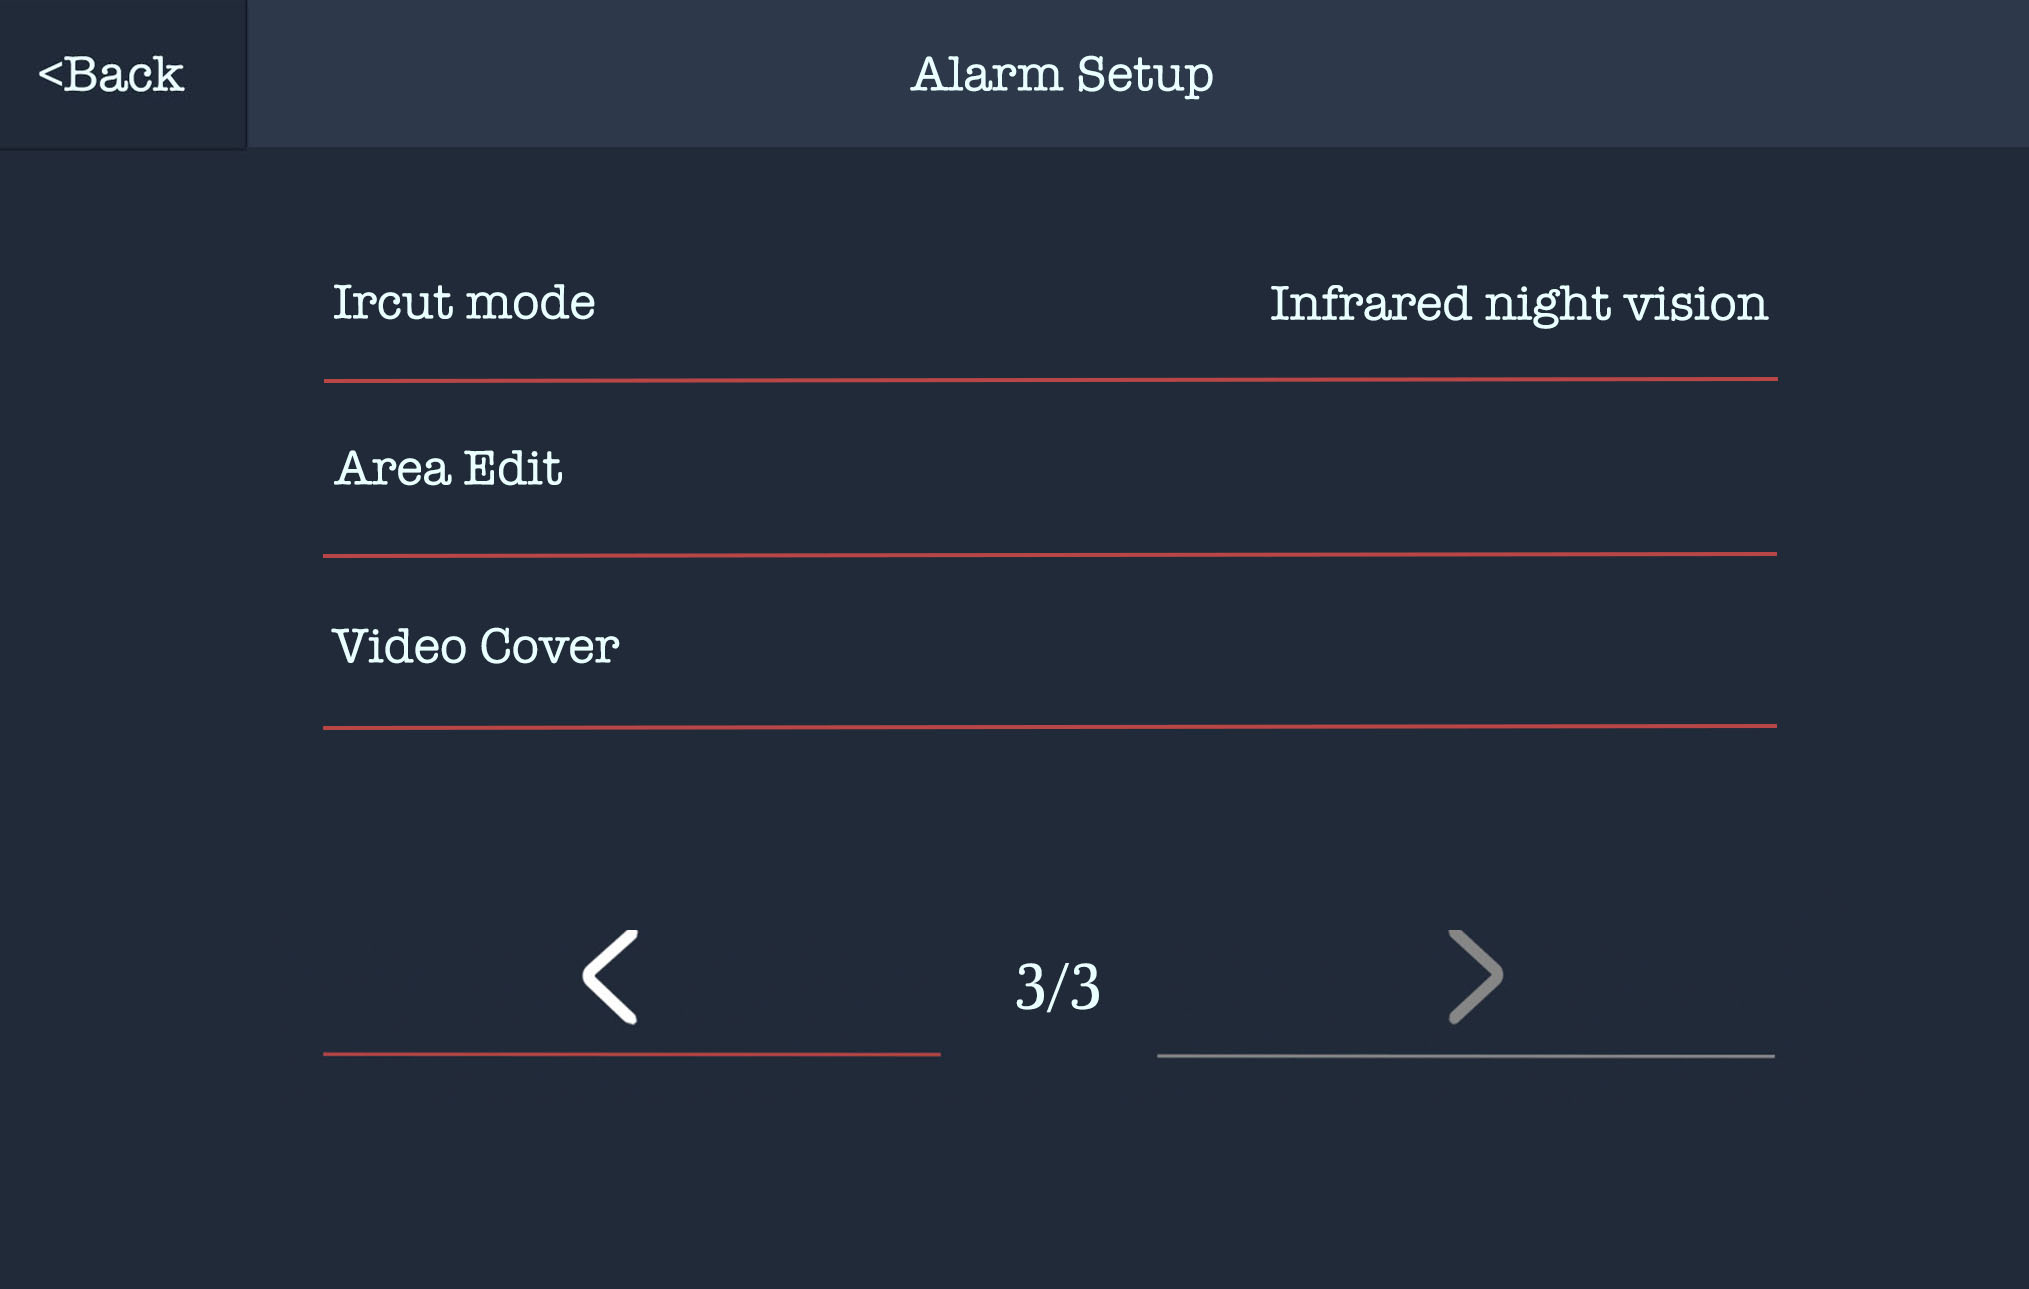
Ircut mode - This allows you to change the IR mode that is currently set. Select this one and you will see various options. We recommend having it on 'Infrared night vision' mode. This will select the right mode depending on the levels of light. When the light is low enough it will automatically switch to the night mode for you and vice versa.
Area Edit - This will allow you to select the area that is be covered by motion detection. For example, if you have the camera set up somewhere there is a tree blowing in the wind and it's setting off the motion detection constantly, you can go to 'Area Edit' and unhighlight the area where the tree is located and this will stop the tree from triggering your motion detection recordings and notifications.
Video Cover - Video cover allows you to select an area to create a digital block on the live feed and playback. For example, if you select four squares in the bottom right, there will then be a grey square visible on the live feed page and playback at the bottom right of the image which blocks out anything from being recorded in that section.
System Manage -
Select the orange icon at the bottom right, labelled 'System Manage'. This will take you to the following screen:
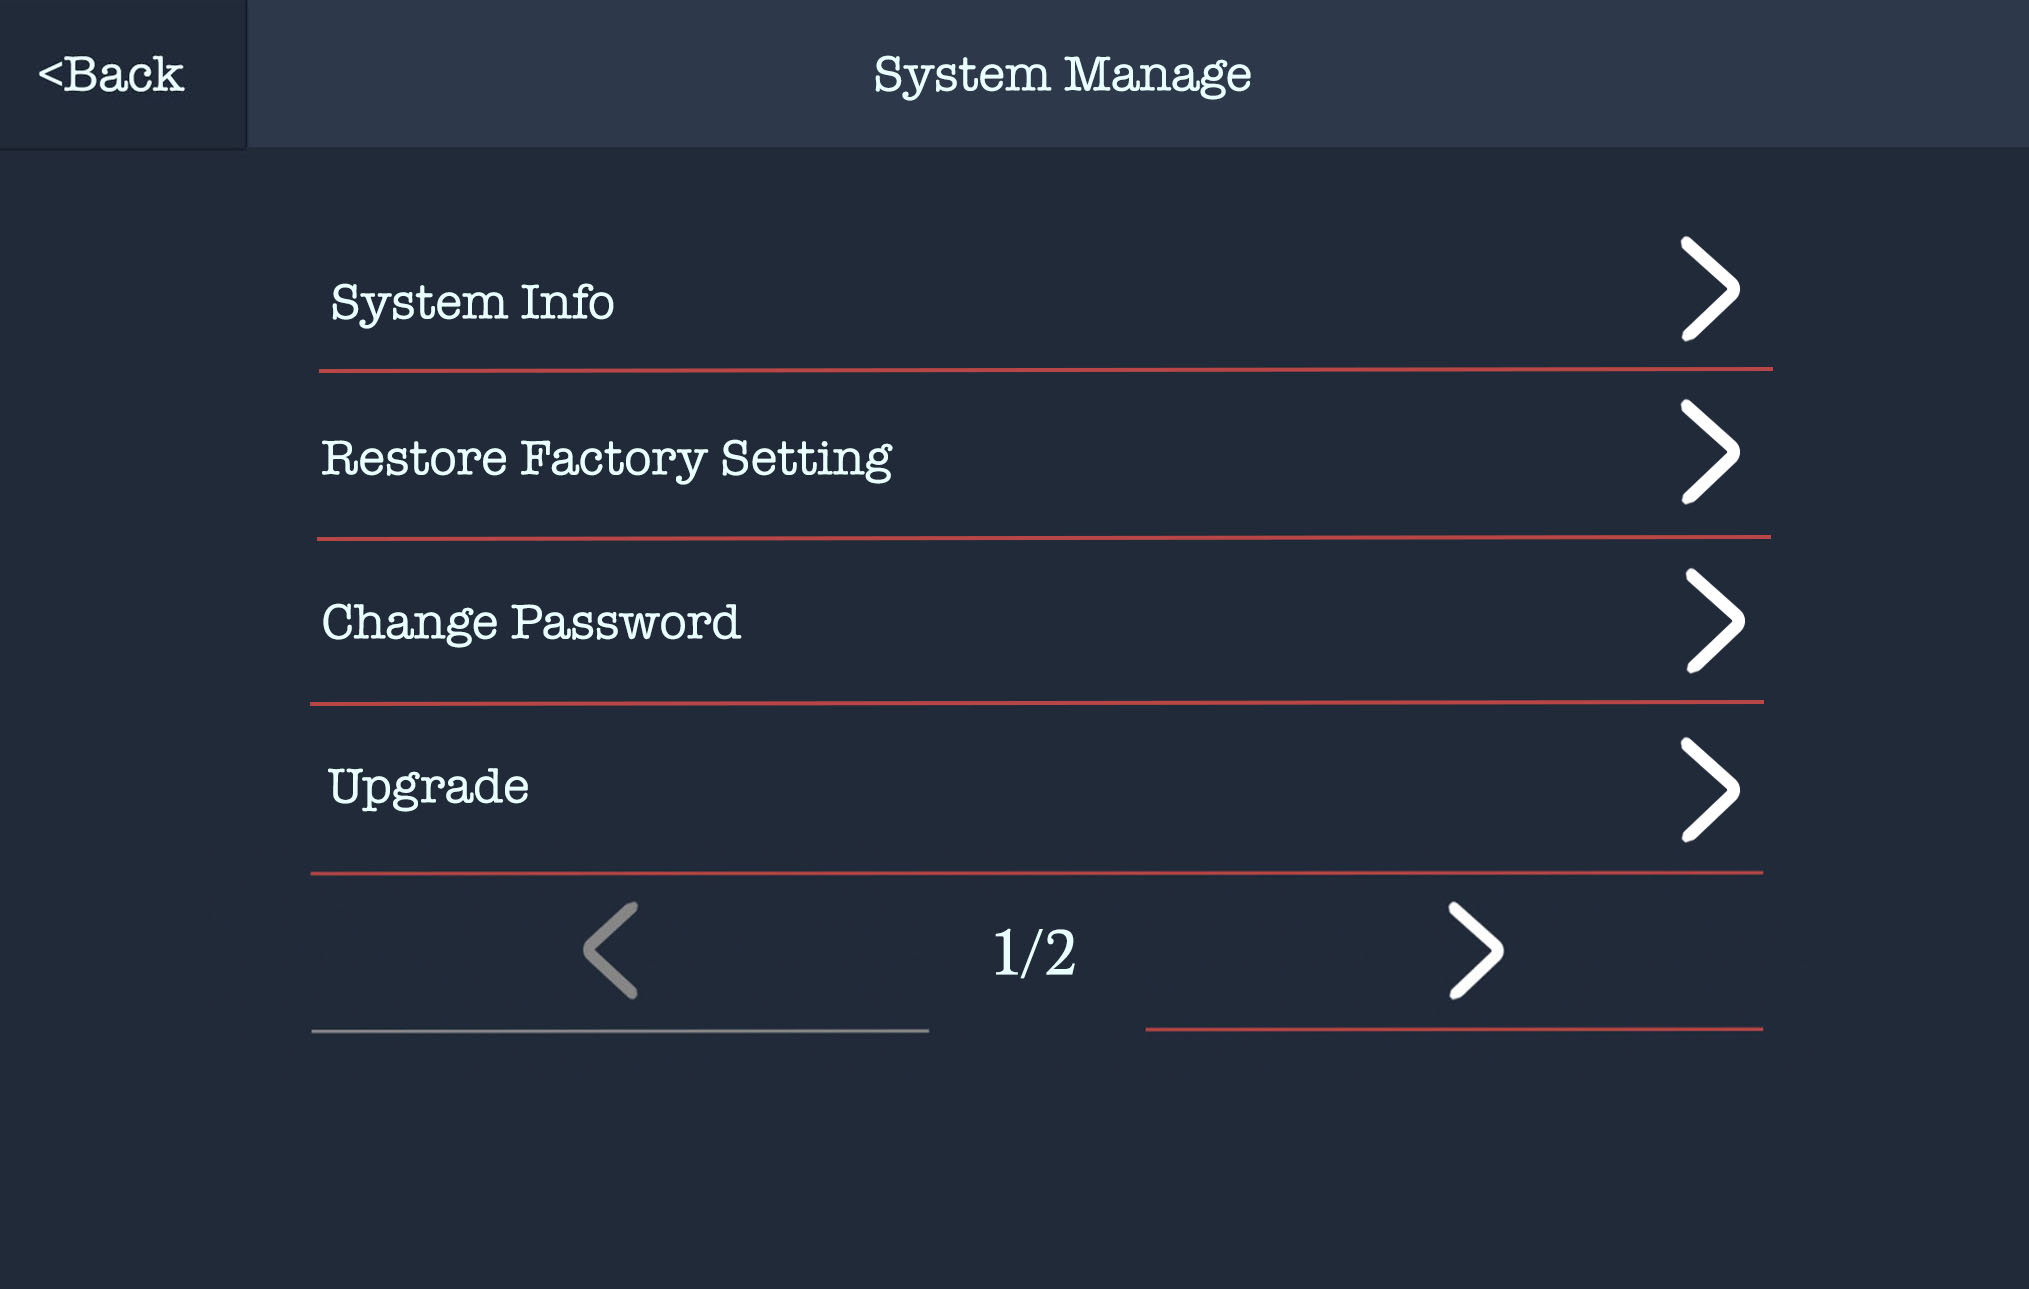
System Info - This shows you the system information, device model, serial number for the camera etc. It also shows you the QR code for connecting/pairing your app to the screen.
Restore Factory Setting - This will give you the option to restore the screen back to it's original factory settings.
Change Password - If you want to set a password or change the password you have set, you can do this here. You can also enable/disable auto login.
Upgrade - This is essentially an update for the screen. We have no scheduled updates as of time of release for this product. If there is one, we will let people know via email.
Click the next arrow at the bottom of this screen to go to page 2/2 and you will see this page:
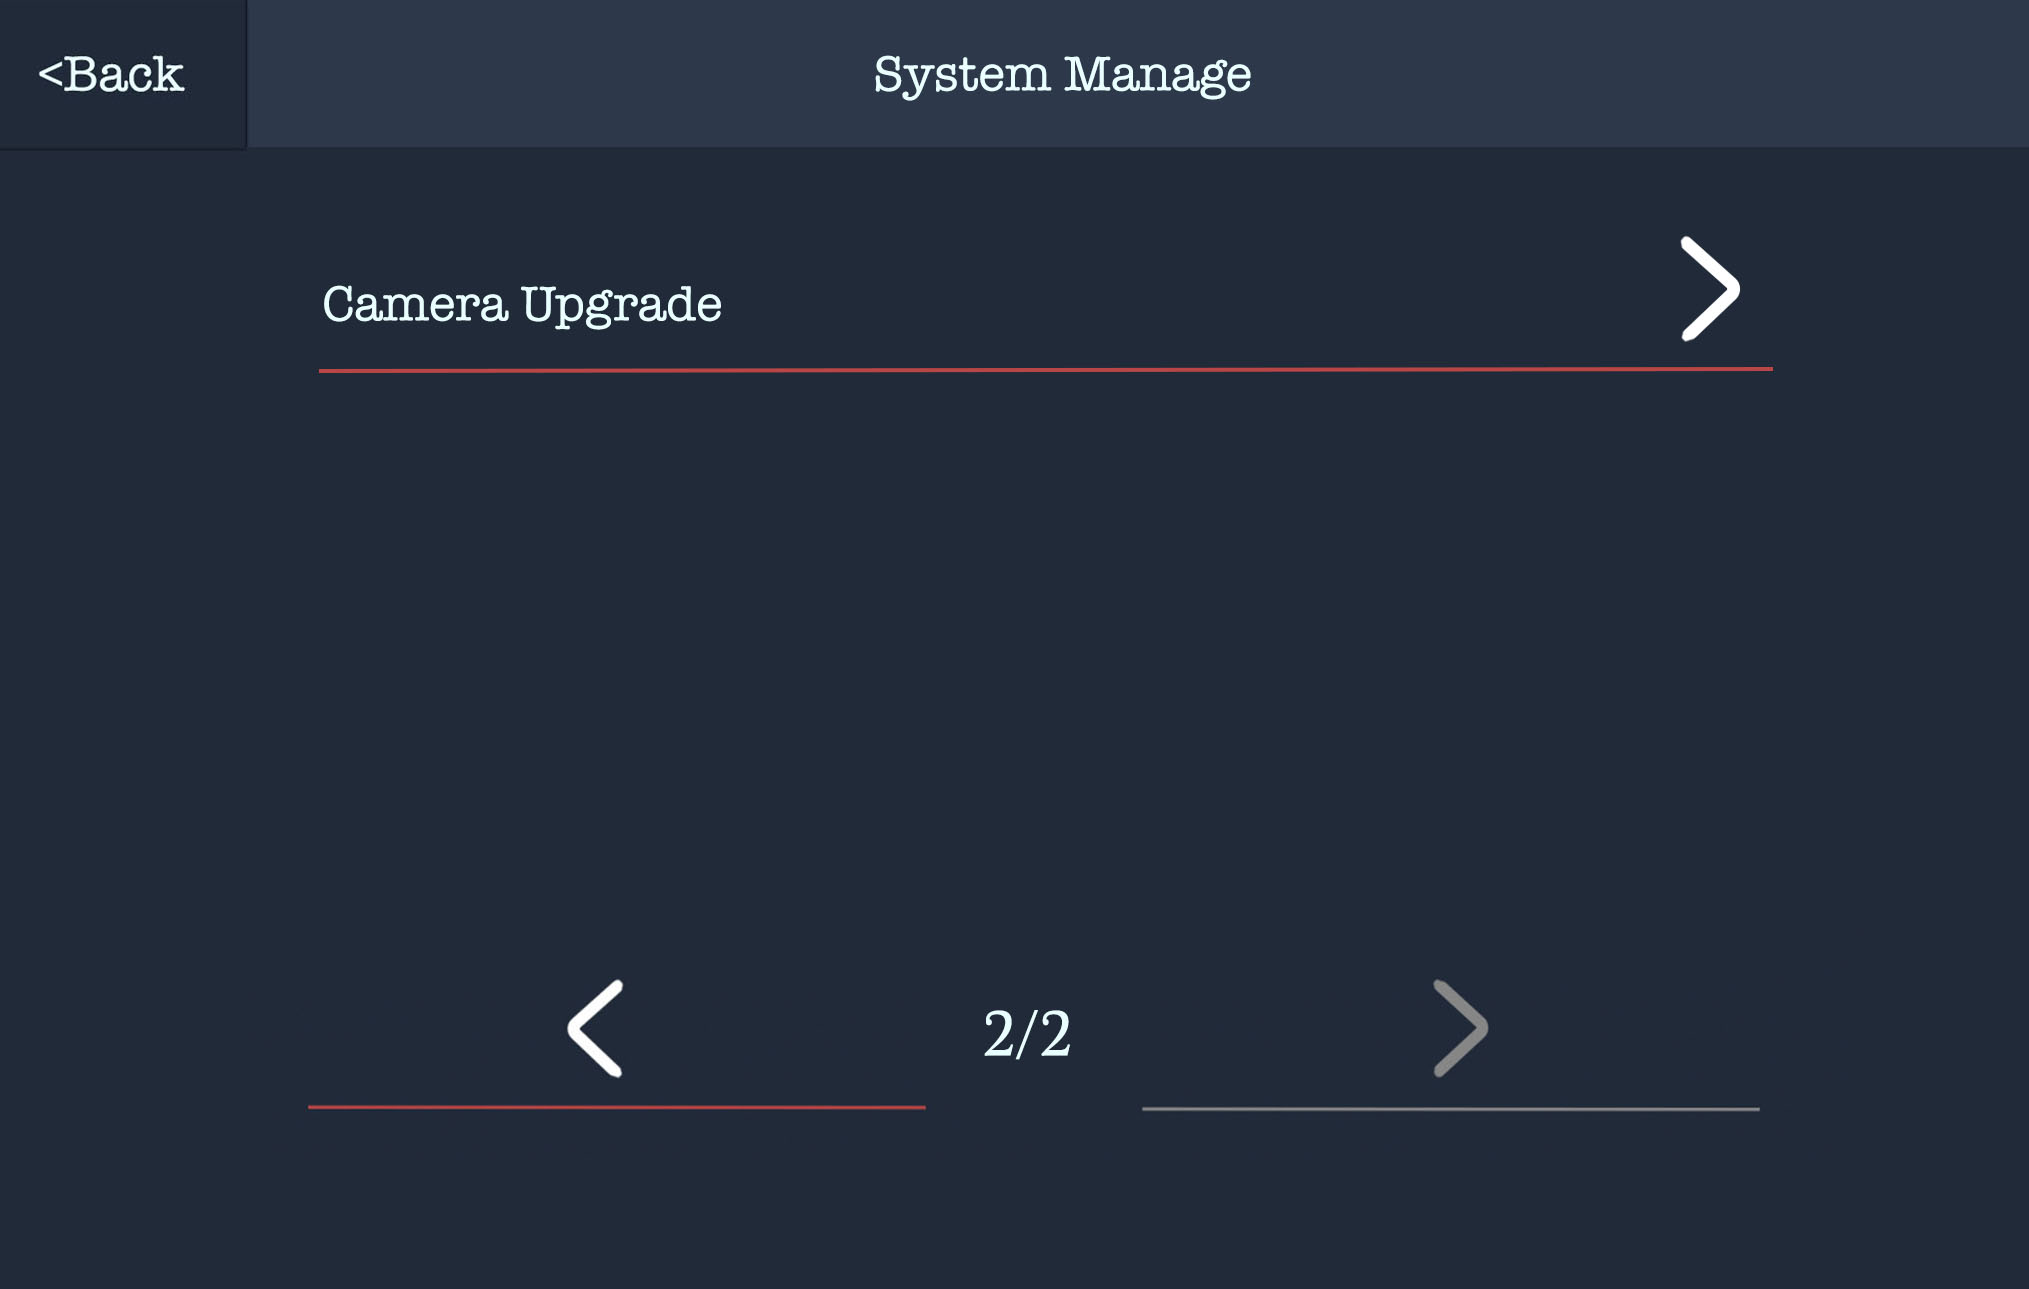
Camera Upgrade - This allows you to update the cameras individually. Again we have no updates scheduled for the cameras since their release and we will contact people to let them know if there is.
Finished
This is the end of the overview of the screen pack, if you require any further help or there is something we have missed here, please do get in contact with us here.