How to: Set motion detection & recording on Green Feathers 3rd Generation Wi-Fi (GFWFR1S1)Updated 22 days ago
This guide shows you how to find the motion detection and recording settings in the Green Feathers app, how to configure them, and where to view the motion notifications within the app.
Please note: To see a more in depth overview of the Green Feathers app and the settings, please have a look at this guide here.
This guide is not compatible with all of our cameras, if you are unsure of which camera you have, check this guide here. Please see below the cameras this guide is designed for: 
Let's Begin -
Our recommended set up is to enable motion detection and event recording, this means that the camera will record events that are triggered by motion and alert you when motion is detected. You want to make sure you have an SD card inserted and have the camera connected to the app.
To enable the motion detection and set the recommended settings for recording, follow these steps:
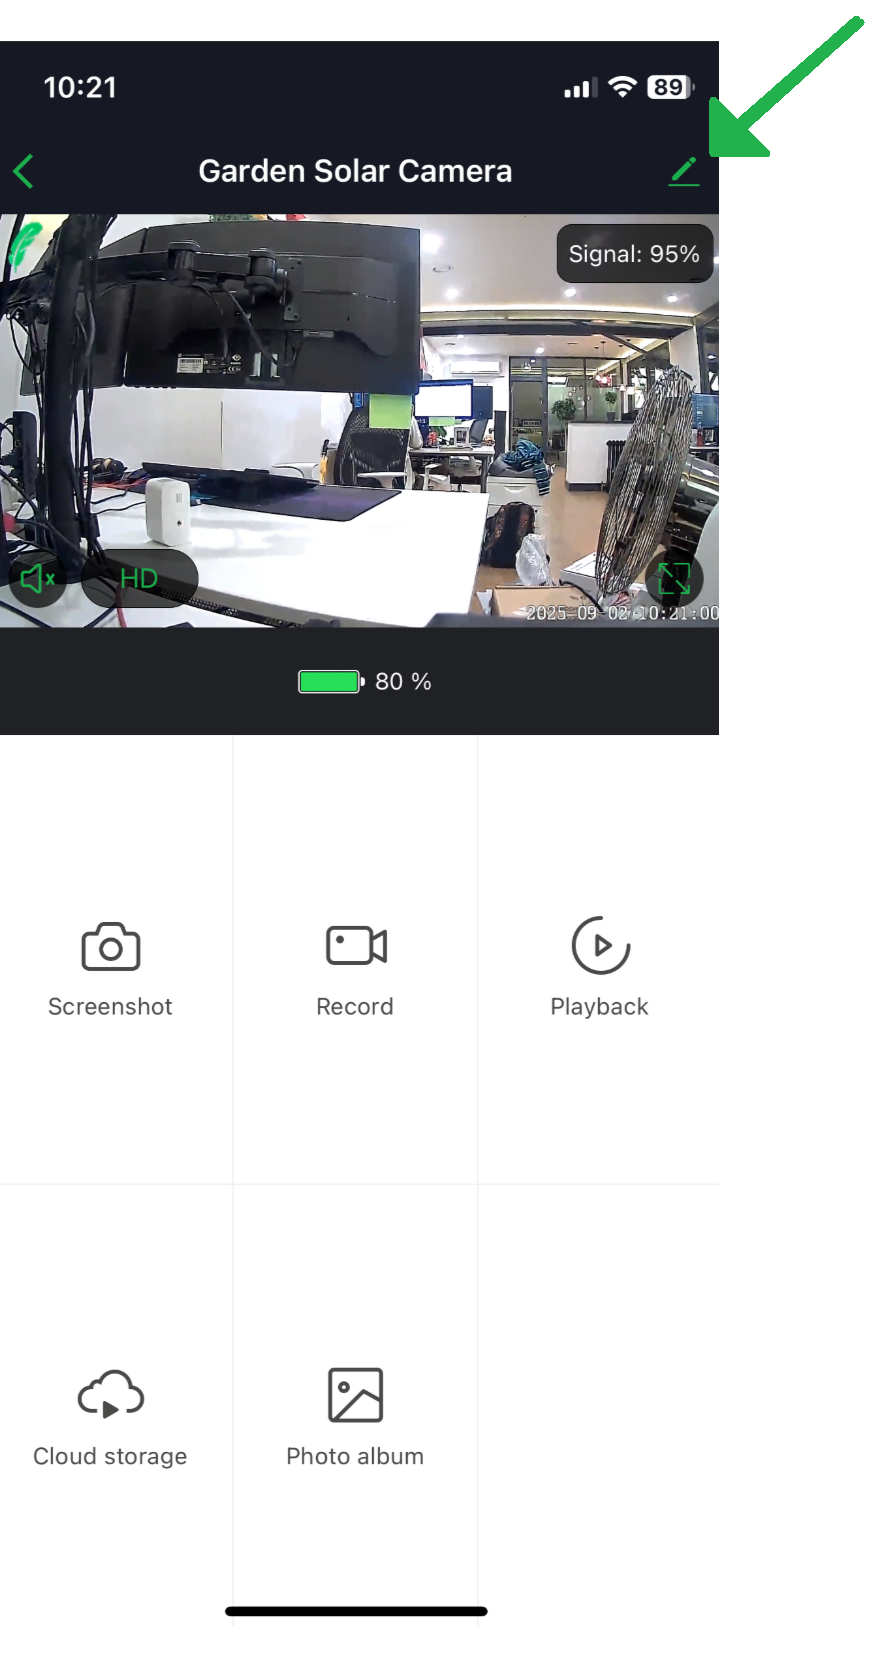
Step 1 - Open up the live feed of your camera and select the pen icon in the top right (this will take you to your camera's settings).
Step 2 - Once you are in the settings, scroll down and click on PIR Settings.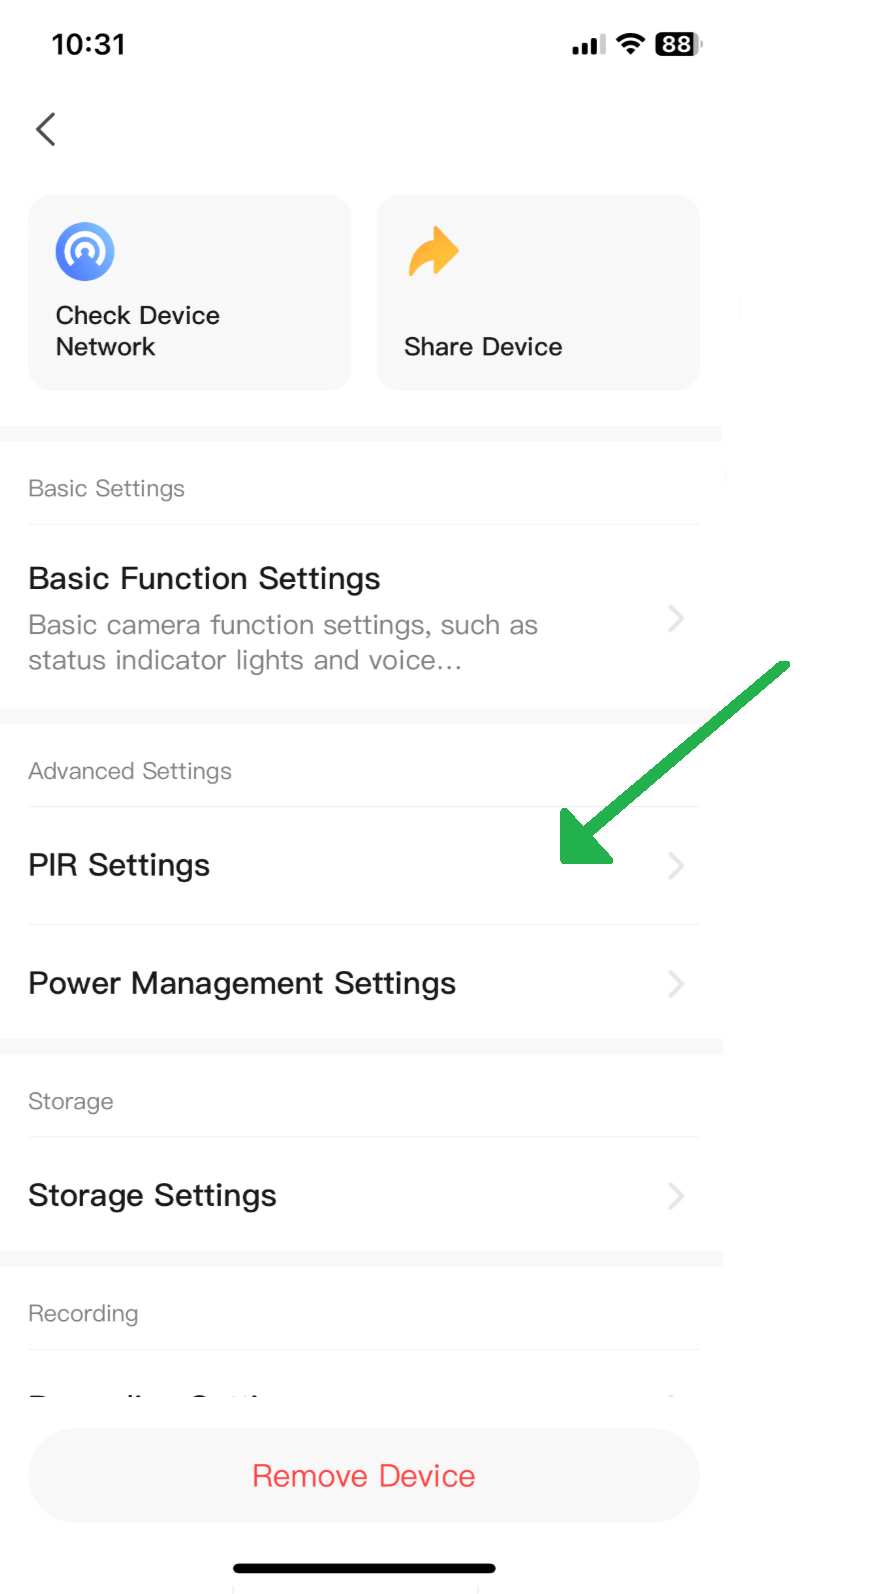
Step 3 - Now you can select the sensitivity of your of your cameras PIR motion detection. This can take some experimentation to get the results you are looking for, so please refer back to this page if your camera appear to be triggering too getting too much, or not enough.
Step 4 - Navigate back to the previous settings page and select 'Recording Settings'.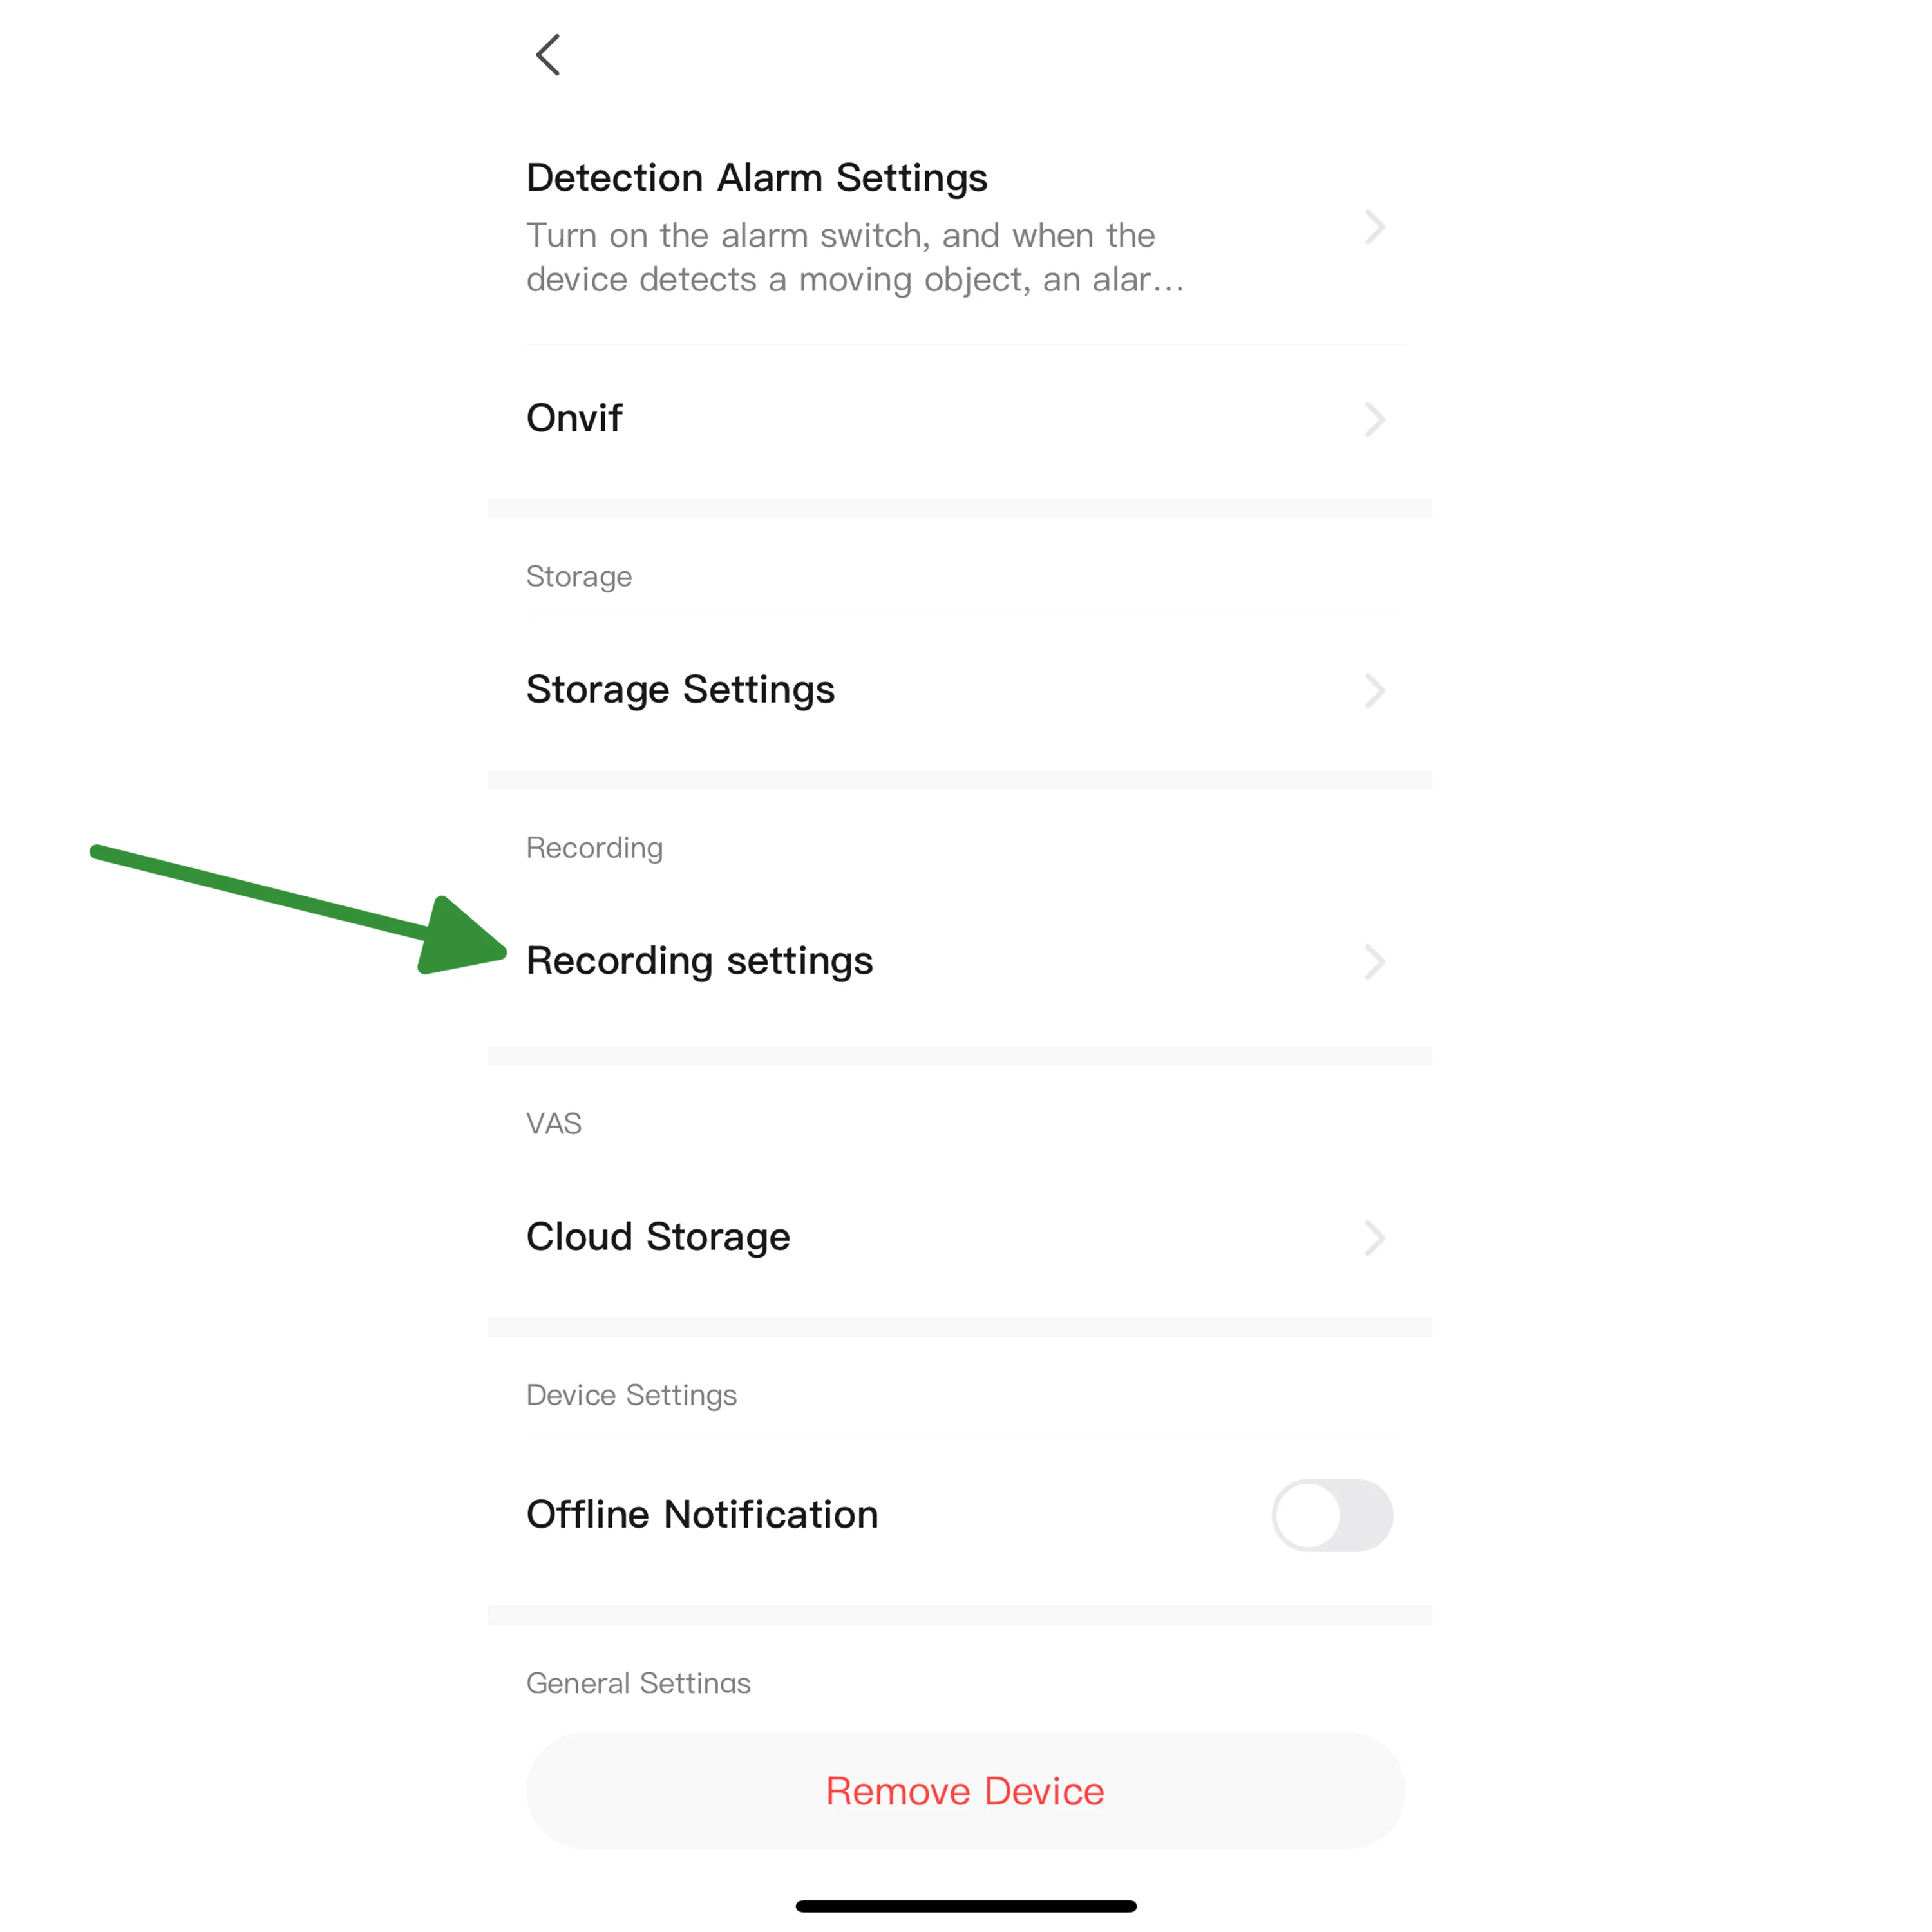
Step 5 -Tick 'Local Recording' and make sure you have the Recording Mode set to 'Event Recording'. You have now successfully set up motion detection and event recording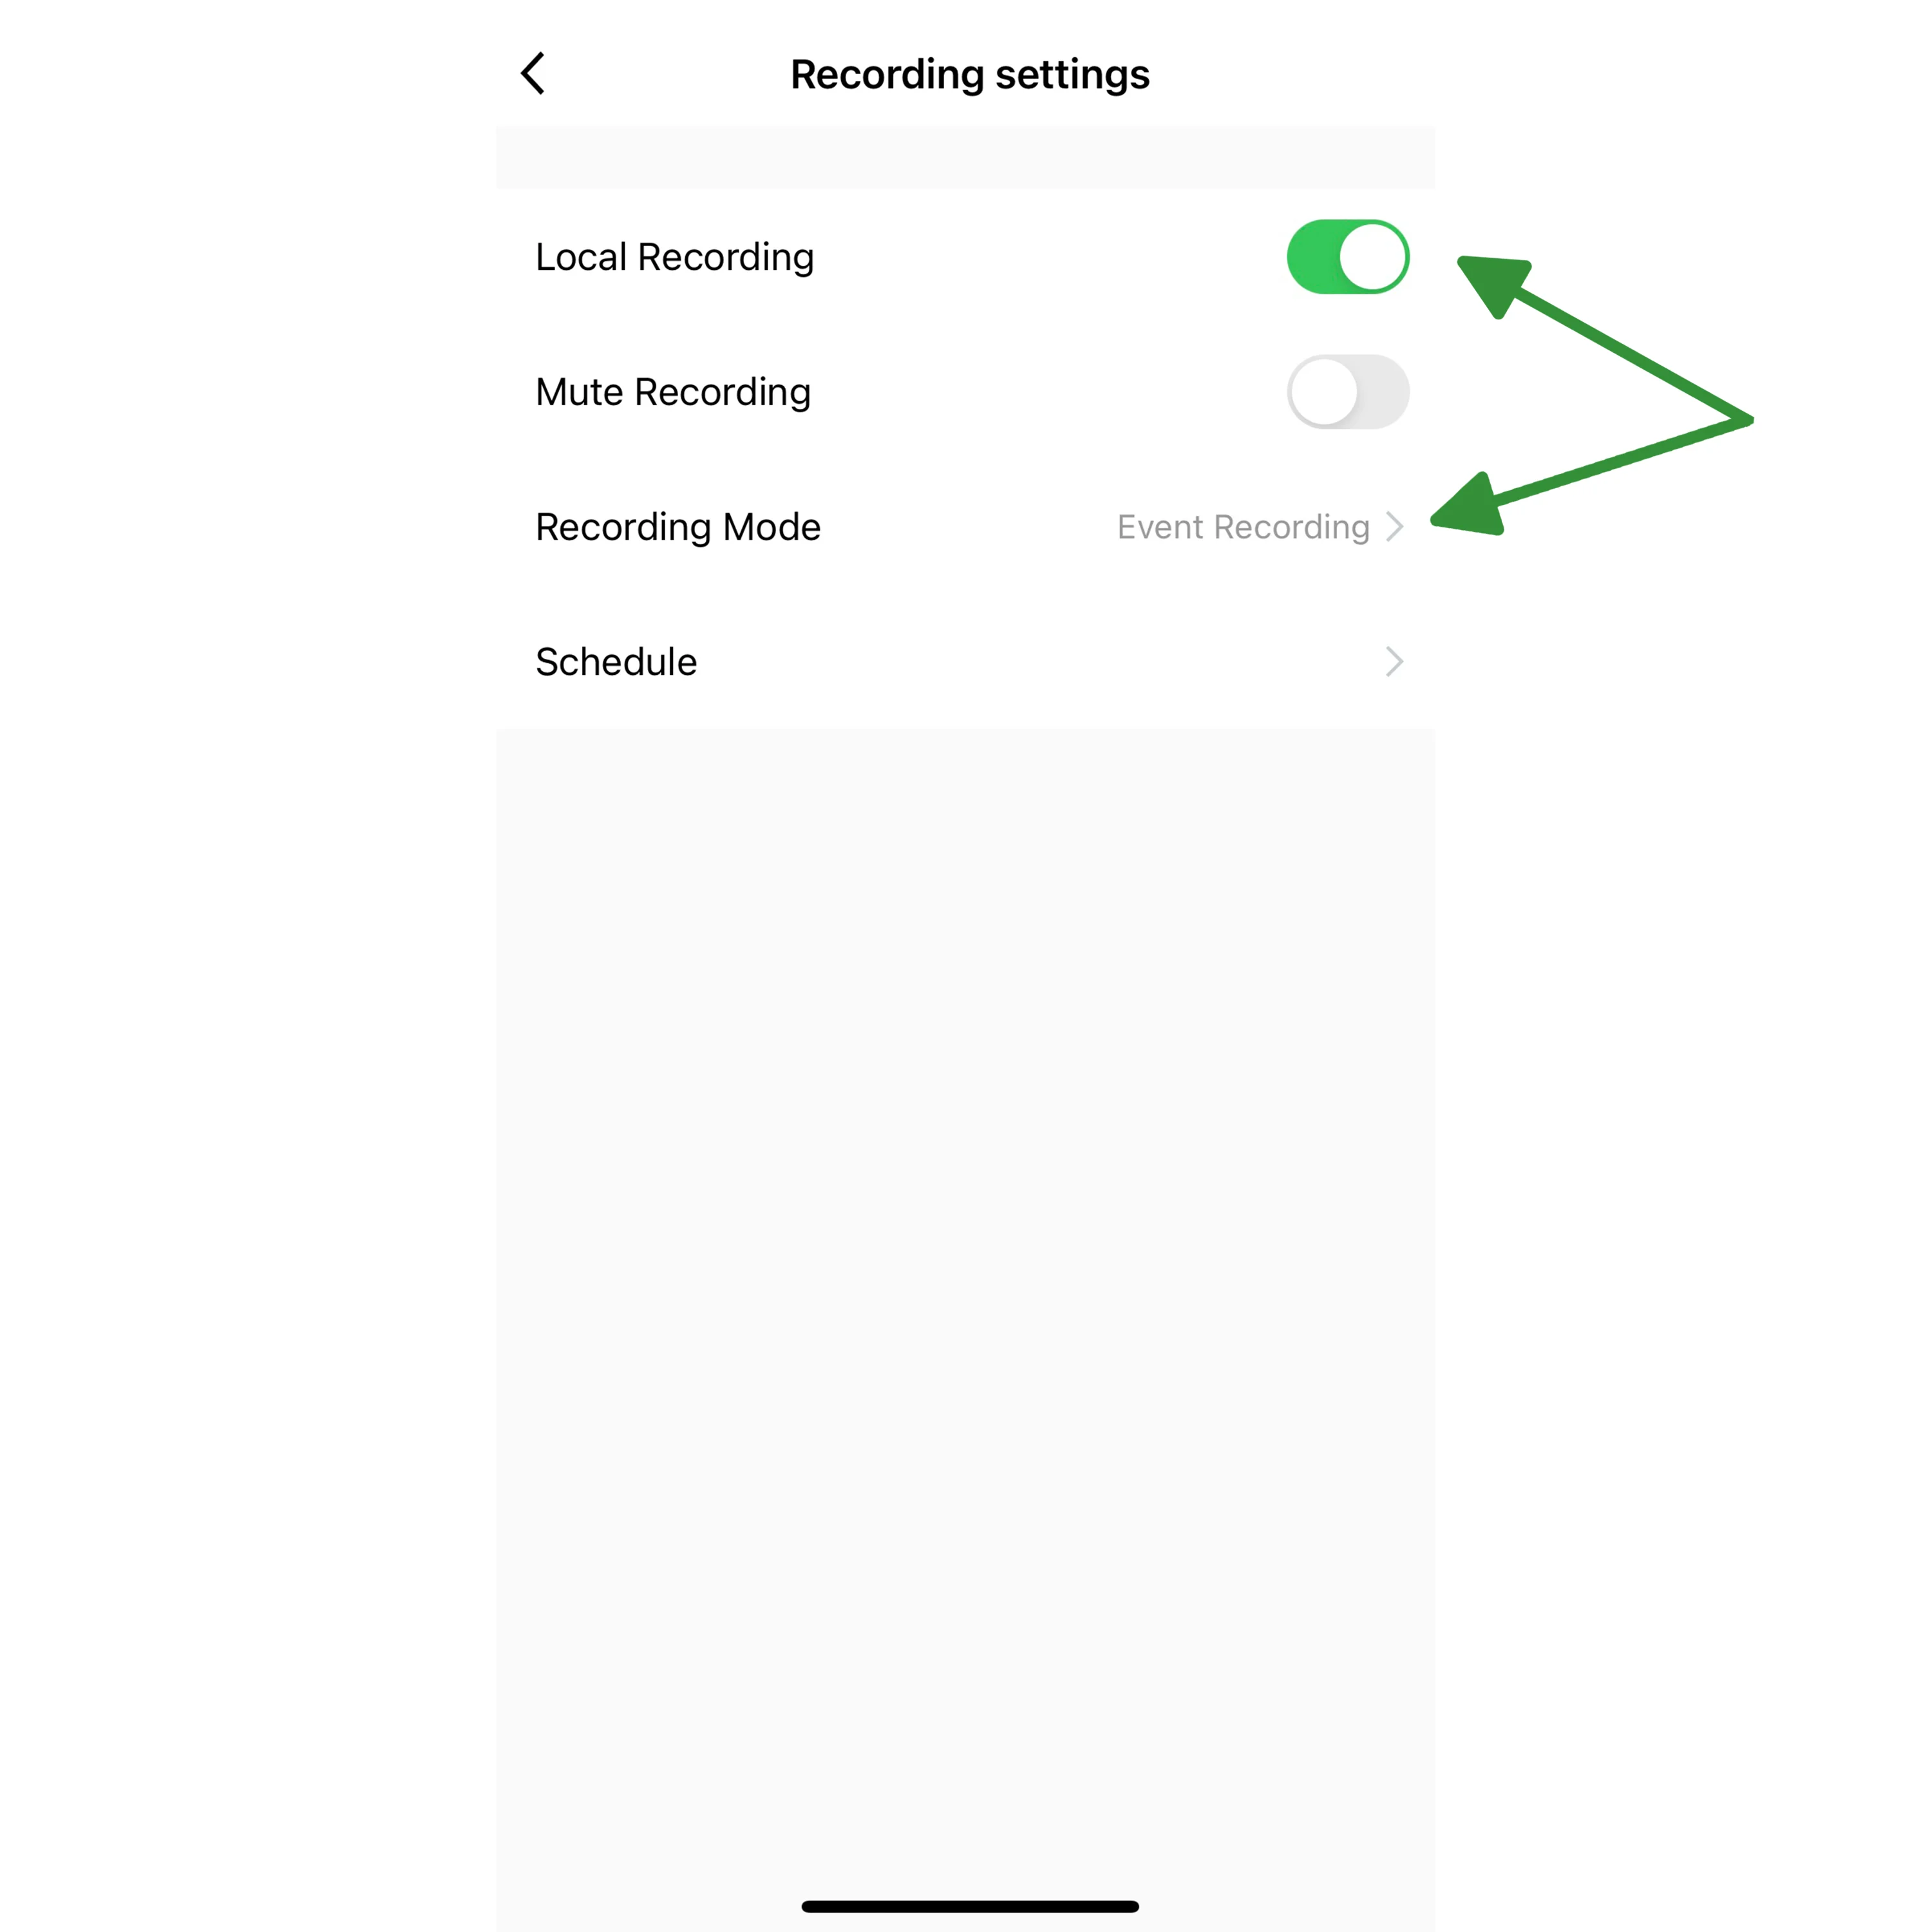
Now let's go over what some of the recording settings mean:
Local Recording - You want to have Local Recording ticked to enable the camera to record.
Recording Mode - Recording Mode has two options, select it and it will open up to show you 'Event Recording' and 'Non-Stop'. Event recording is for motion detection triggered recording and non-stop is for continuous recording. We recommend having it on 'Event Recording' for most uses.
Schedule settings - Setting up a recording schedule is useful if you only want recording (whether continuously or via motion detection) to be between set hours.
For example, if you wanted to have the camera set to record at night time only, you could set it to enable motion detection at 11pm every day, and disable it at 6am every day. Go to Schedule settings then tap the 'Add' button:
Time
Here you can select a time to turn recording on or off.
Repeat
If you tap on the 'Repeat' button you can choose which days you want to enable recording.
Note
If you tap on the 'Note' button you can write a note to associate with this automated schedule:
Notifications
If you set the schedule to disable notifications it will not send notifications during the specified period. This feature is useful because you could set the camera to leave the motion detection feature on, but to disable the notifications at night.
Local Recording
This determines whether the recording schedule is starting recording (On) or ending the recording (Off)
When you are finished, tap 'Save' at the top right of the screen.
Of course, there's no point in setting the motion detection to be turned on every day if it's never being turned off in the first place! So we need to make the counterpart to our first schedule, a second schedule with the Local Recording set to "Off" at a certain time.
For information on how to view your playback and export the footage please see here