
How to: Set up your Camera in Ethernet mode to the Green Feathers app (GFIP320BWF)Updated 19 days ago
This guide will show you how to add your WiFi Outdoor Wildlife Camera (GFIP320BWF) to the Green Feathers app in ethernet mode. If you are unsure of which camera you have please check here.
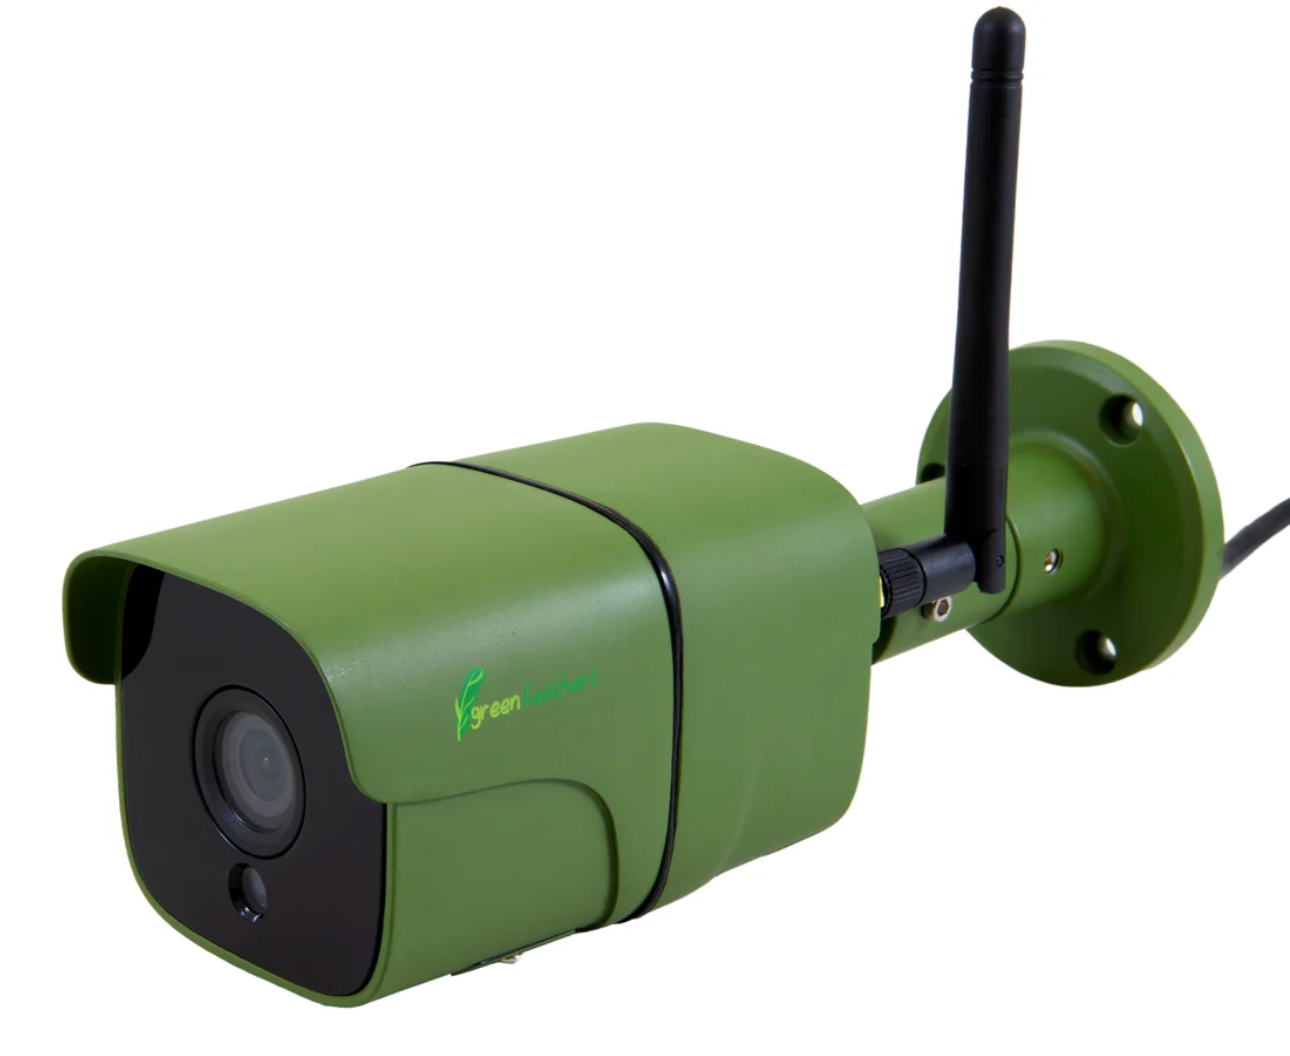
WiFi Outdoor Wildlife HD Camera
(GFIP320BWF)
To Start:
Check your phone/tablet is connected to the same internet router that you want the camera to be connected to (this is only required for the setup process)
Download the Green Feathers app:
Android from the Google Play store - click here.
iOS from the App store - click here.
Before you mount the camera outside, make sure it's connected and can be viewed on the app.
1. Registering an account
Open the app and tap 'Sign Up' to create an account, then select 'Agree' for the 'User Agreement and Privacy Policy'. If you have already signed up then skip below to the section called 'Adding the camera to the app'.
- Enter your email address, tick 'I Agree User Agreement and Privacy Policy' then tap 'Get Verification Code'. If you would like to use your Google or Facebook account to sign up you can do so by tapping the relevant icon at the bottom of the page.
- Enter this code into the app.
- Set a password for your account - make sure it is something memorable.
Once your account is all setup, just log in to the app!
2. Connecting your camera
Once you have signed into your Green Feathers account it is time to connect your camera to your network. Make sure that the camera is connected to power and that the ethernet cable is plugged in, and connected to your internet router. When everything is connected there should be a flashing light visible on the cable that leads to the camera.
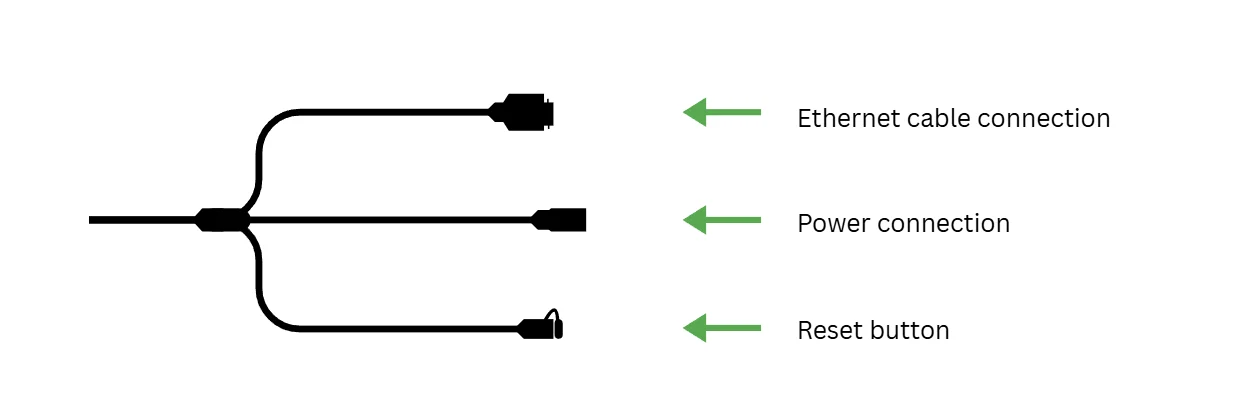
Make sure to use the waterproof seal to secure the ethernet cable to the camera connection.
3. Adding the camera to the app
The first time you go to the Home page, you can choose to allow the app to use your device location. This is not essential, but helps with some features. Next, click "Add Device under the bird icon, or tap the green '+' icon at the top right of the screen and select 'Add Device' from the drop down menu:
From here, your app should be able to automatically detect and add your camera:

If your camera was not detected automatically by the app, please select "Garden Wildlife Camera" from the options below and select 'Ethernet Mode'.
|
|


4. Entering your WiFi details
Once the app has found your camera it will prompt you to enter the details of the WiFi network that you want the camera to connect to. The name of the WiFi network which your phone or tablet is connected to should be automatically filled in, so just enter the password. To change the WiFi network your device is connected to, tap "Select Wi-Fi" to the right of the WiFi name.
Once your WiFi details are filled in correctly, select "Next:
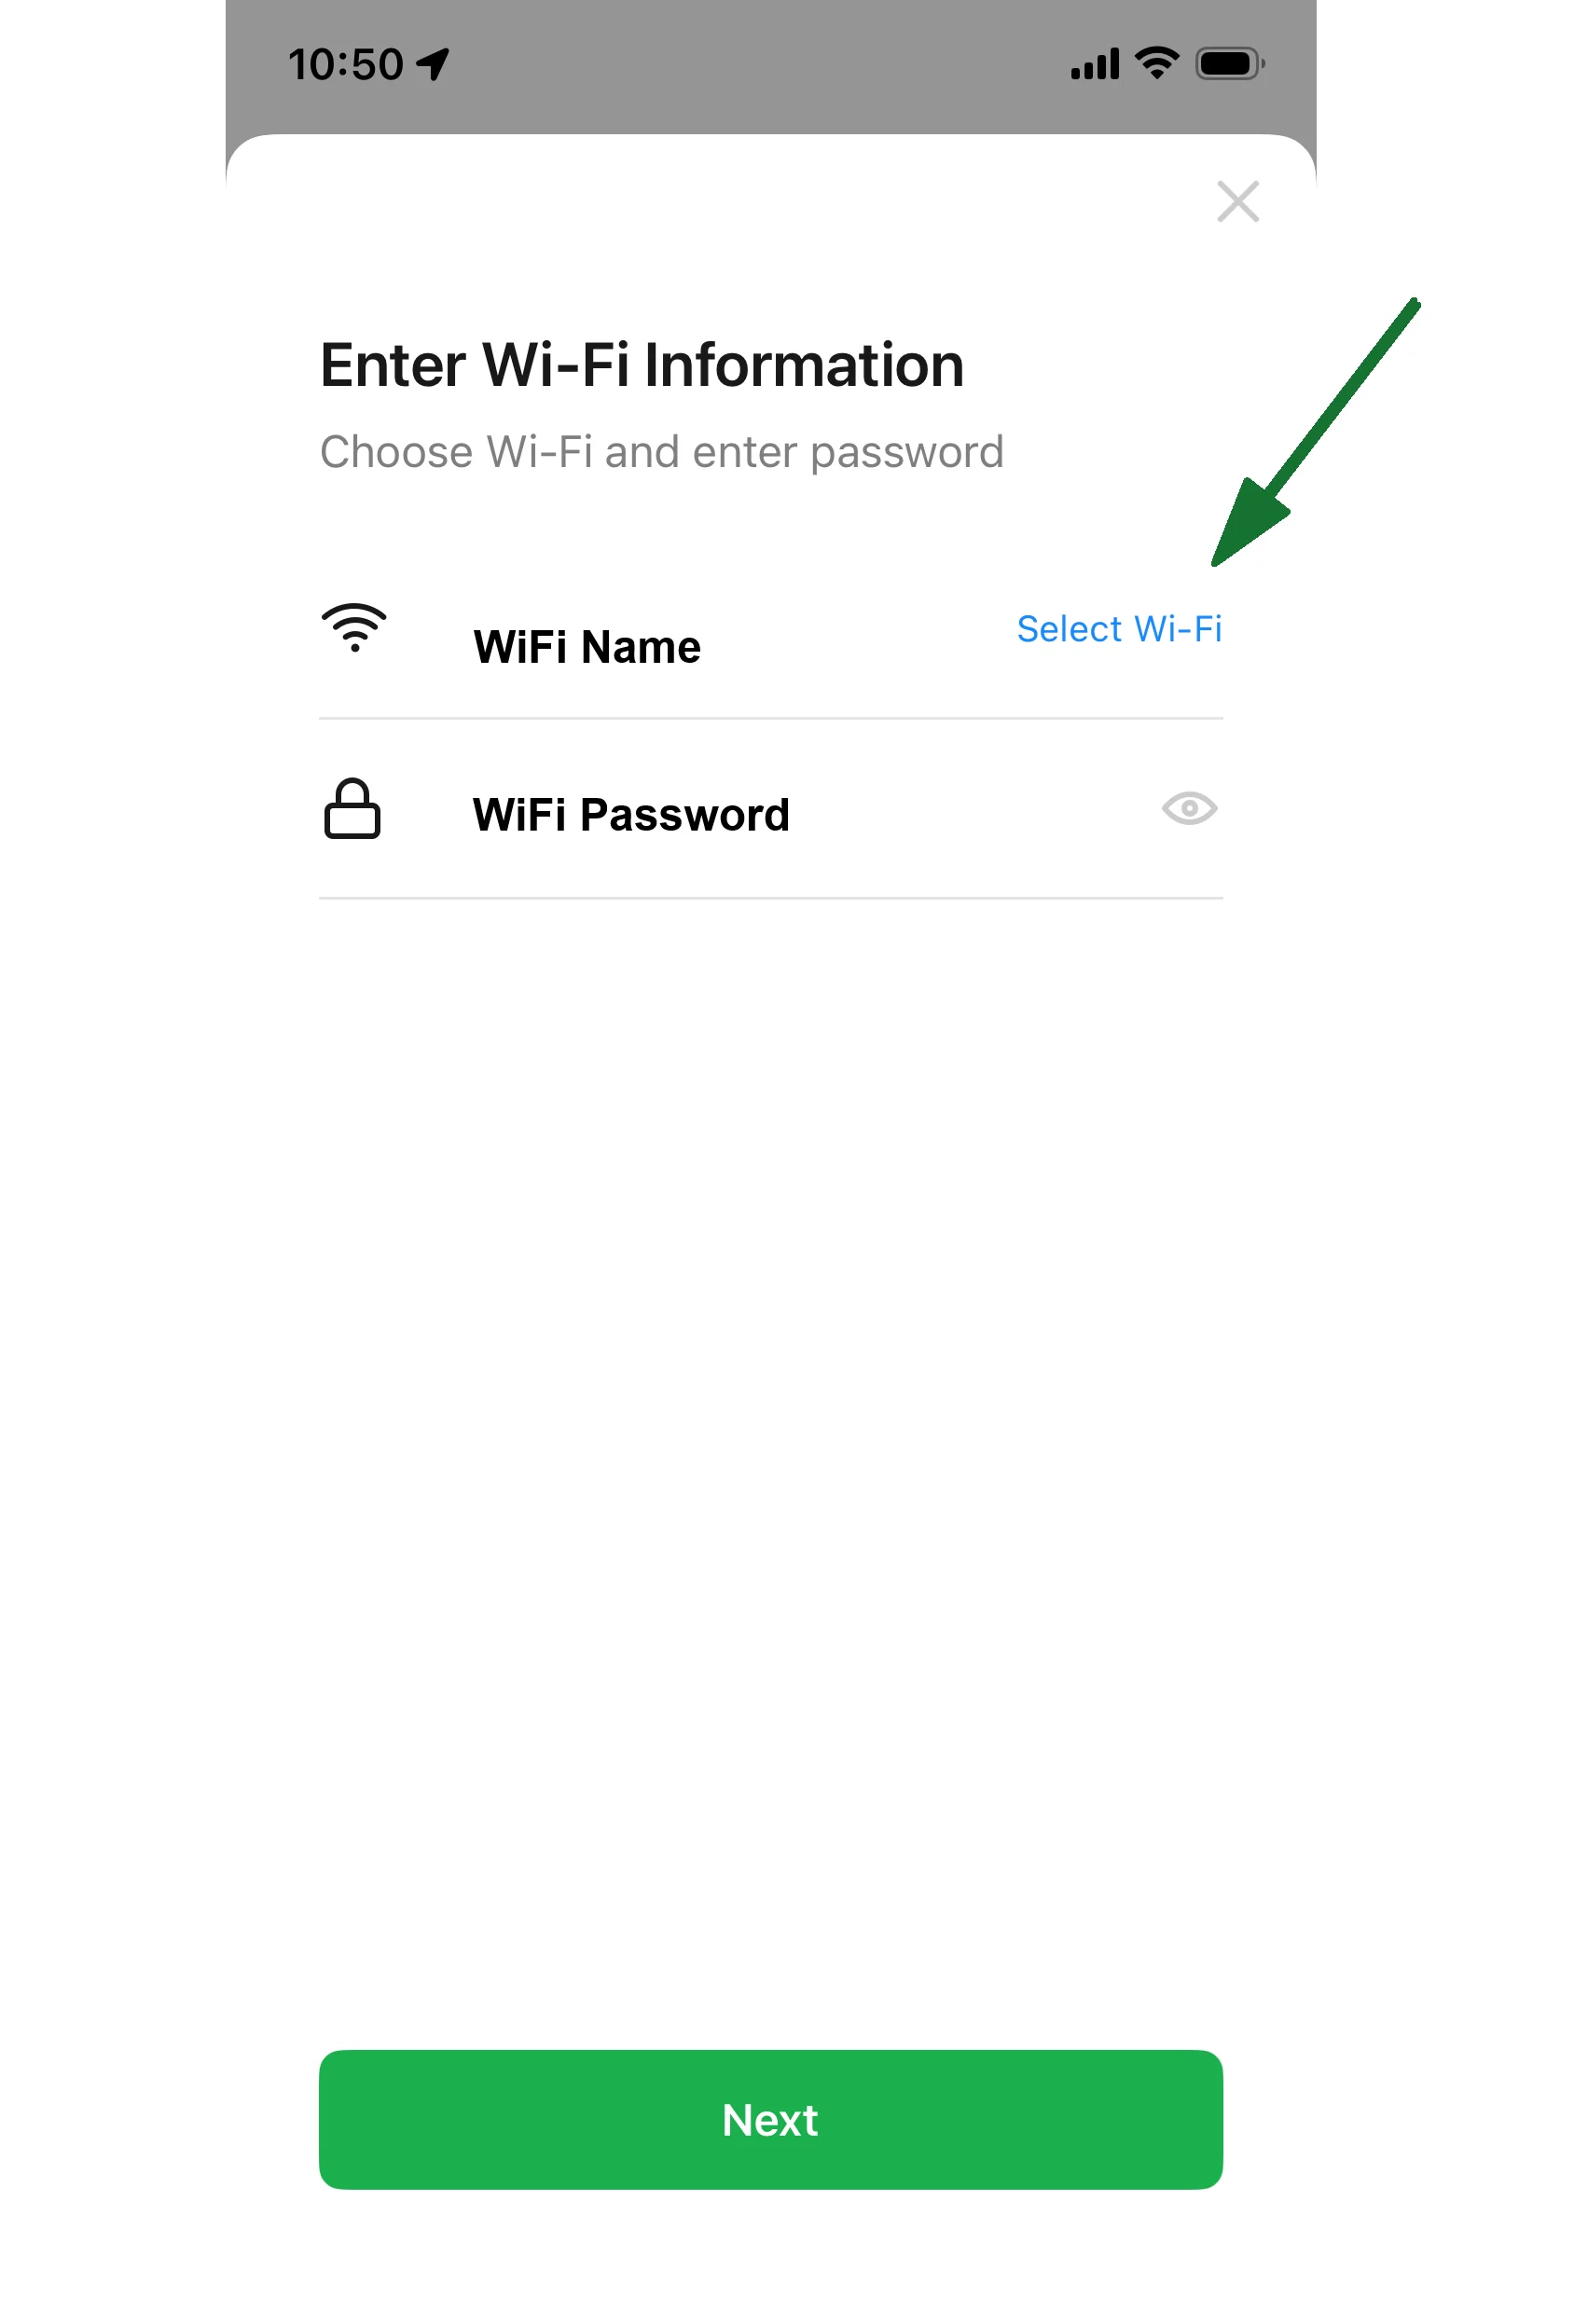
Your camera will now start to be added to the app. Once your camera is added you can choose a name for it in the settings menu.
Troubleshooting
If the camera does not connect to your WiFi:
- Try resetting it by pressing the reset button (attached to the power cable) and start again.
- Check that Bluetooth is turned on for smart phone/tablet - It wont be able to scan your camera without it.
- Try the QR setup or AP setup modes instead.
- If you have connected it to your internet router, but it shows the message 'Establishing encrypted channel' and doesn't load:
- Try closing the app and re-opening it.
- If that doesn't work, please check what version of app you are using (go to the 'Me' section of the app, then select Settings > About). You will not need to set the camera back up if you do this, it will remain connected to your Wi-Fi router.
For more information on the Green Feathers app:
For a run through of the app, have a look here.
To read about the motion detection and recording settings have a look here.
To share the camera to other devices check this guide here.
Need more help?
If you need help with anything else please check out our other guides or get in contact.