
How to: Set up your 3rd Generation Wired IP camera (GFIP3)Updated 21 days ago
This guide shows you how to connect up your 3rd Generation Wired IP camera (picture below) so that you can get everything in position before adding it to our Green Feathers app. If you are unsure of which camera you have, please have a look here.
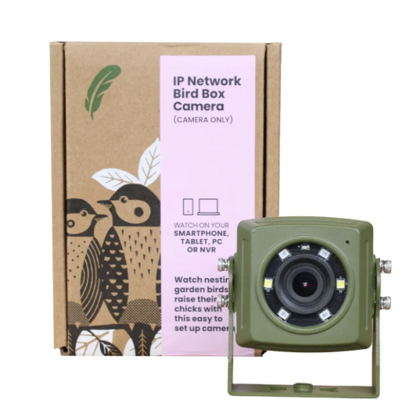 Wired IP Network Bird Box Camera
(GFIP3)
Before you begin
We recommend setting up your new Camera inside first, this way it is easier to make sure everything is up and running before mounting in position.
If you would prefer this guide in a video format, please click here.
Initial setup
Your camera has four cables running from it which should all be labelled:
- Reset Button – this is used for initially connecting the camera to the app and resetting it when required.
- Data/ PoE cable – This is likely to be outside of the box so will need to be made watertight using the step-by-step instructions in the next section of this guide.
- Light sensor (optional) – If you want to use of the lights on the camera, the sensor will need to be positioned outside the box with the cap off. They should turn on during daylight and off when dark. Please note if you plan to have the camera inside a hedgehog box, you will need the cap to remain on.
- 12v power connection (optional) – In most cases this will not be used and the waterproof cap will remain on. If powering your camera separately to PoE however, this will be the power connection that you use.
How to connect the cables:
First, empty out the bag that contains the parts for the waterproof connector. You should have all the items below:
Part 1 - Screw on cap
Part 2 - Rubber bung with split
Part 3 - Plastic cover with different twist screw ends and fins
Part 4 - Rubber ring
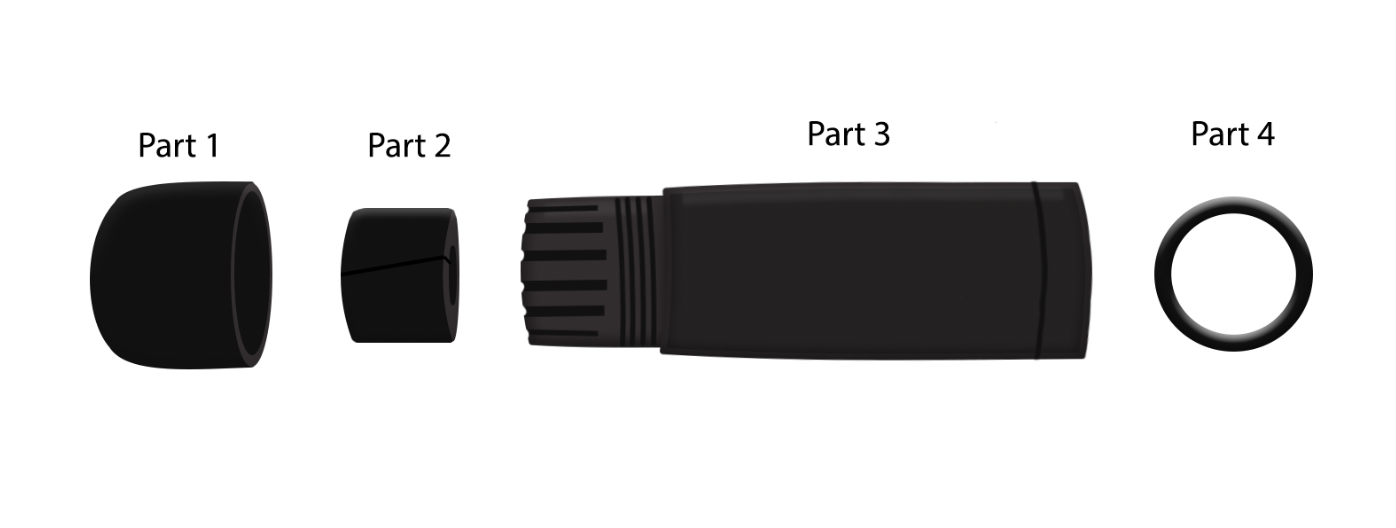 Now you need to assemble the waterproof connector, this ensures that when the camera is in place in your garden there'll be minimal chance of water getting to the connection and causing damage to the camera.
If you look at the picture above you will see the four parts are numbered, what you need to do is assemble them as shown in the image below.

If your network cable has a plastic sheath on the end, you should be able to push it down.
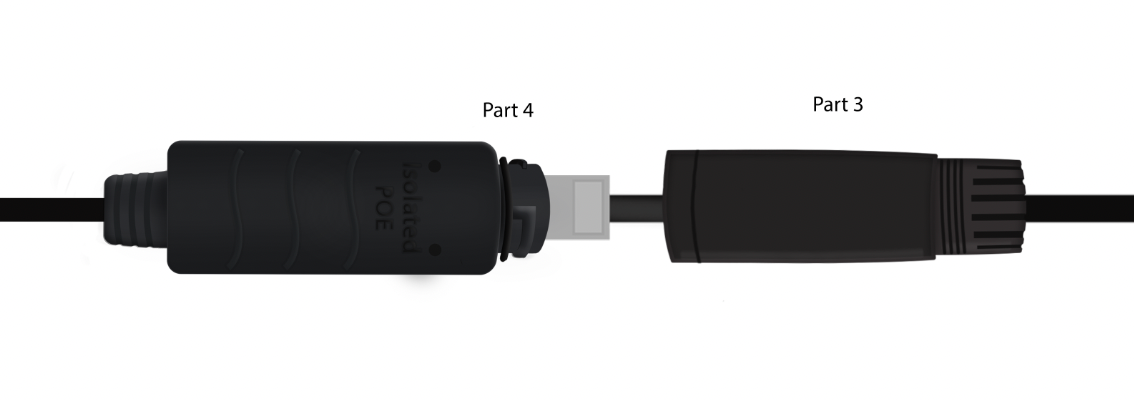
Parts 1, 2 and 3 are placed on the cable that will connect the camera to your router or network video recorder (NVR).
Part 4, the small O-Ring, is placed on the connection from the camera, making sure that it sits flush against the body of the connector.
Now plug the cable into the camera end and screw part 3 on to the connector on the camera:
Slide part 2 down the cable until it sits underneath the plastic fins at the end of part 3:
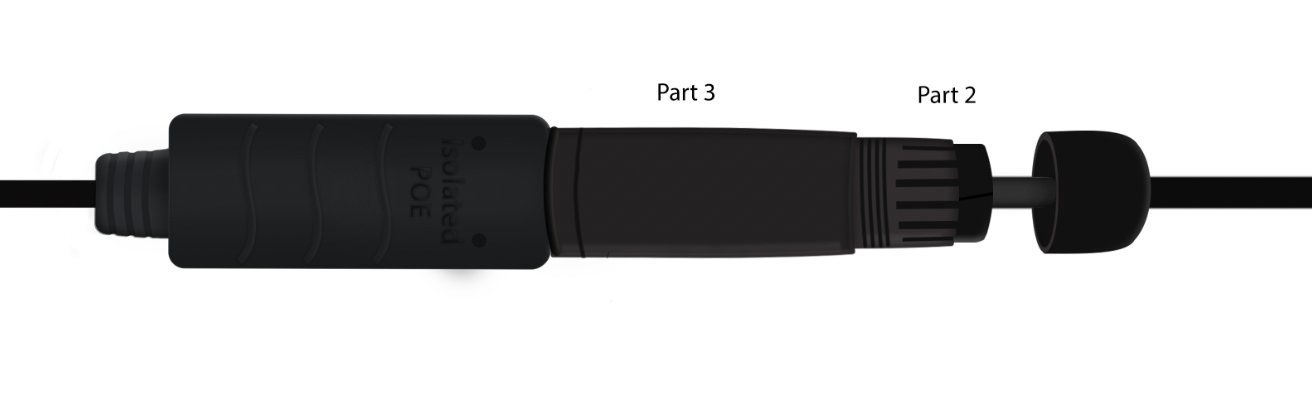
Finally, screw part 1 on to the end of part 3:
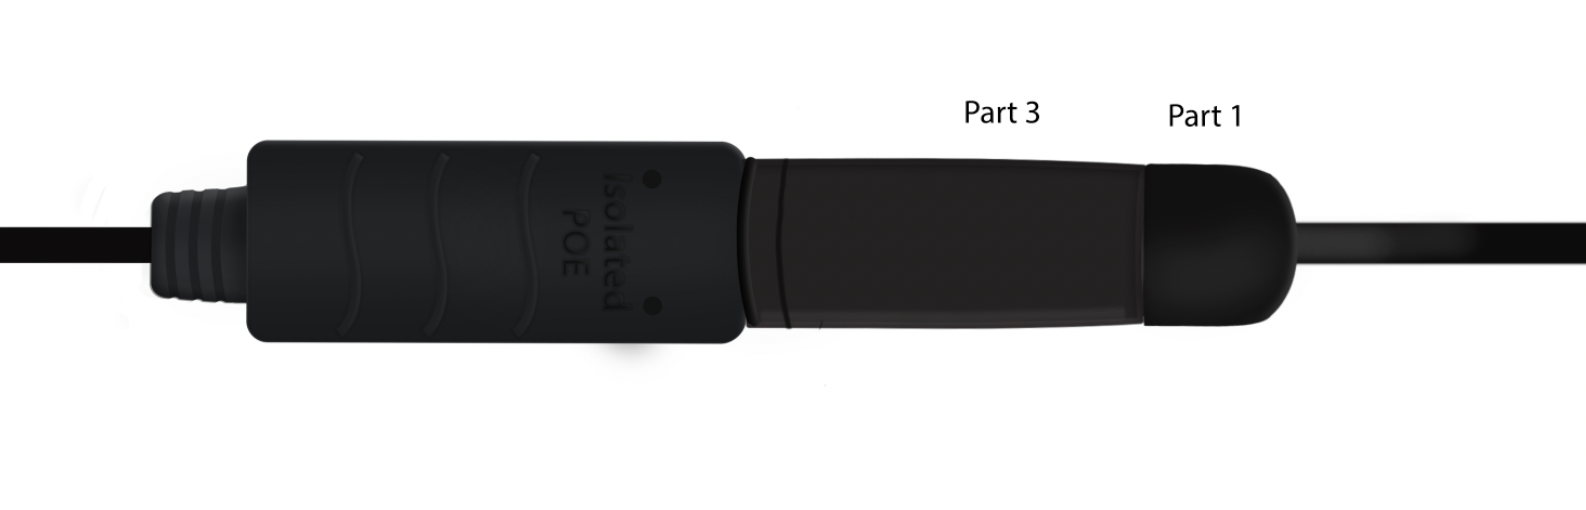
You now have a waterproof ethernet connection for your camera. Whilst we don't recommend submerging the connection it will provide a good level of protection against the elements in your garden.
How to connect your camera to the network
The next step is to connect the camera to your network using the POE injector.
Your POE Injector has two ethernet ports: one labelled POE and one labelled LAN. Connect the cable from the camera to the POE port and connect the other cable from the LAN port to your router. Make sure that the POE injector is also connected to a power socket using the included power cable. Your setup should now look like the image below, with one cable running from the POE injector to your camera and one cable going back into your router.
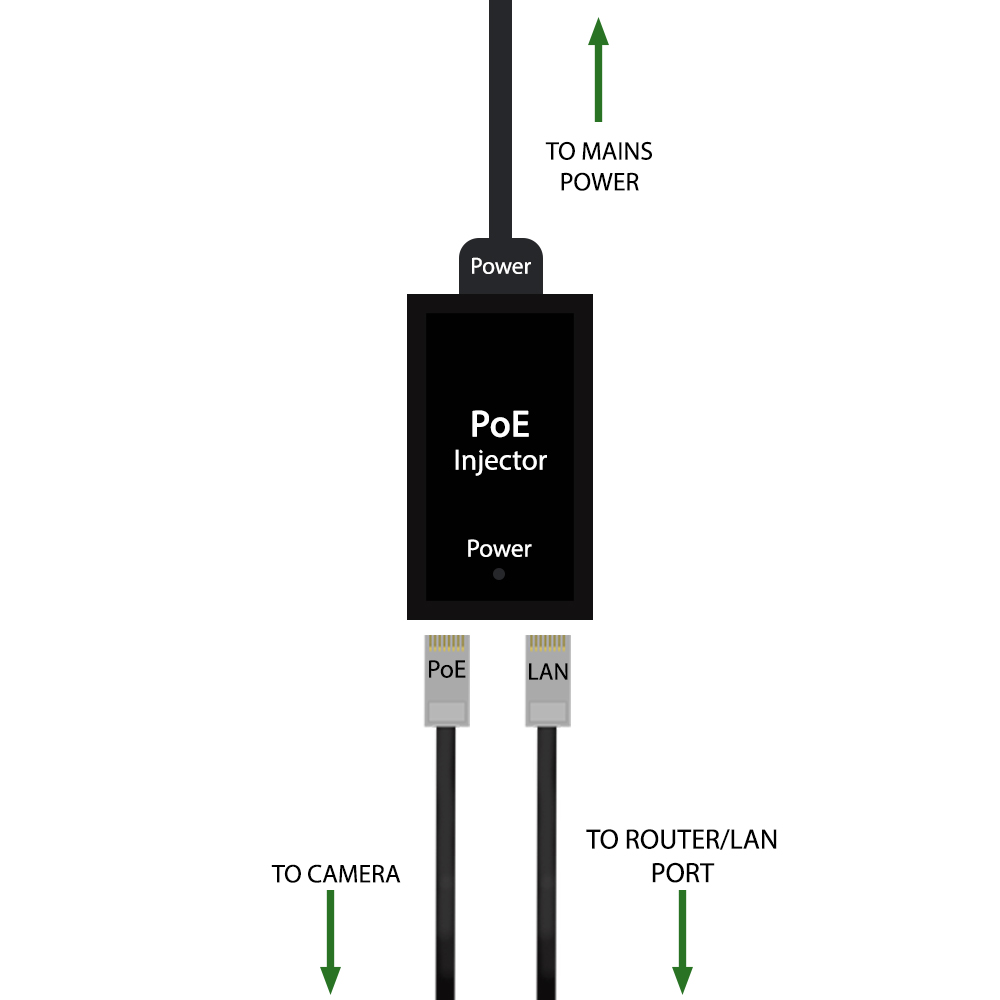
Once everything is set up, please follow this guide to connect your camera to the Green Feathers app to view this on your phone or tablet.
Need more help?
If you need help with anything else please check out our other guides or get in contact.