
Green Feathers App Guide for Wireless Screen Kits (GFTX2SC2N1)Updated 2 months ago
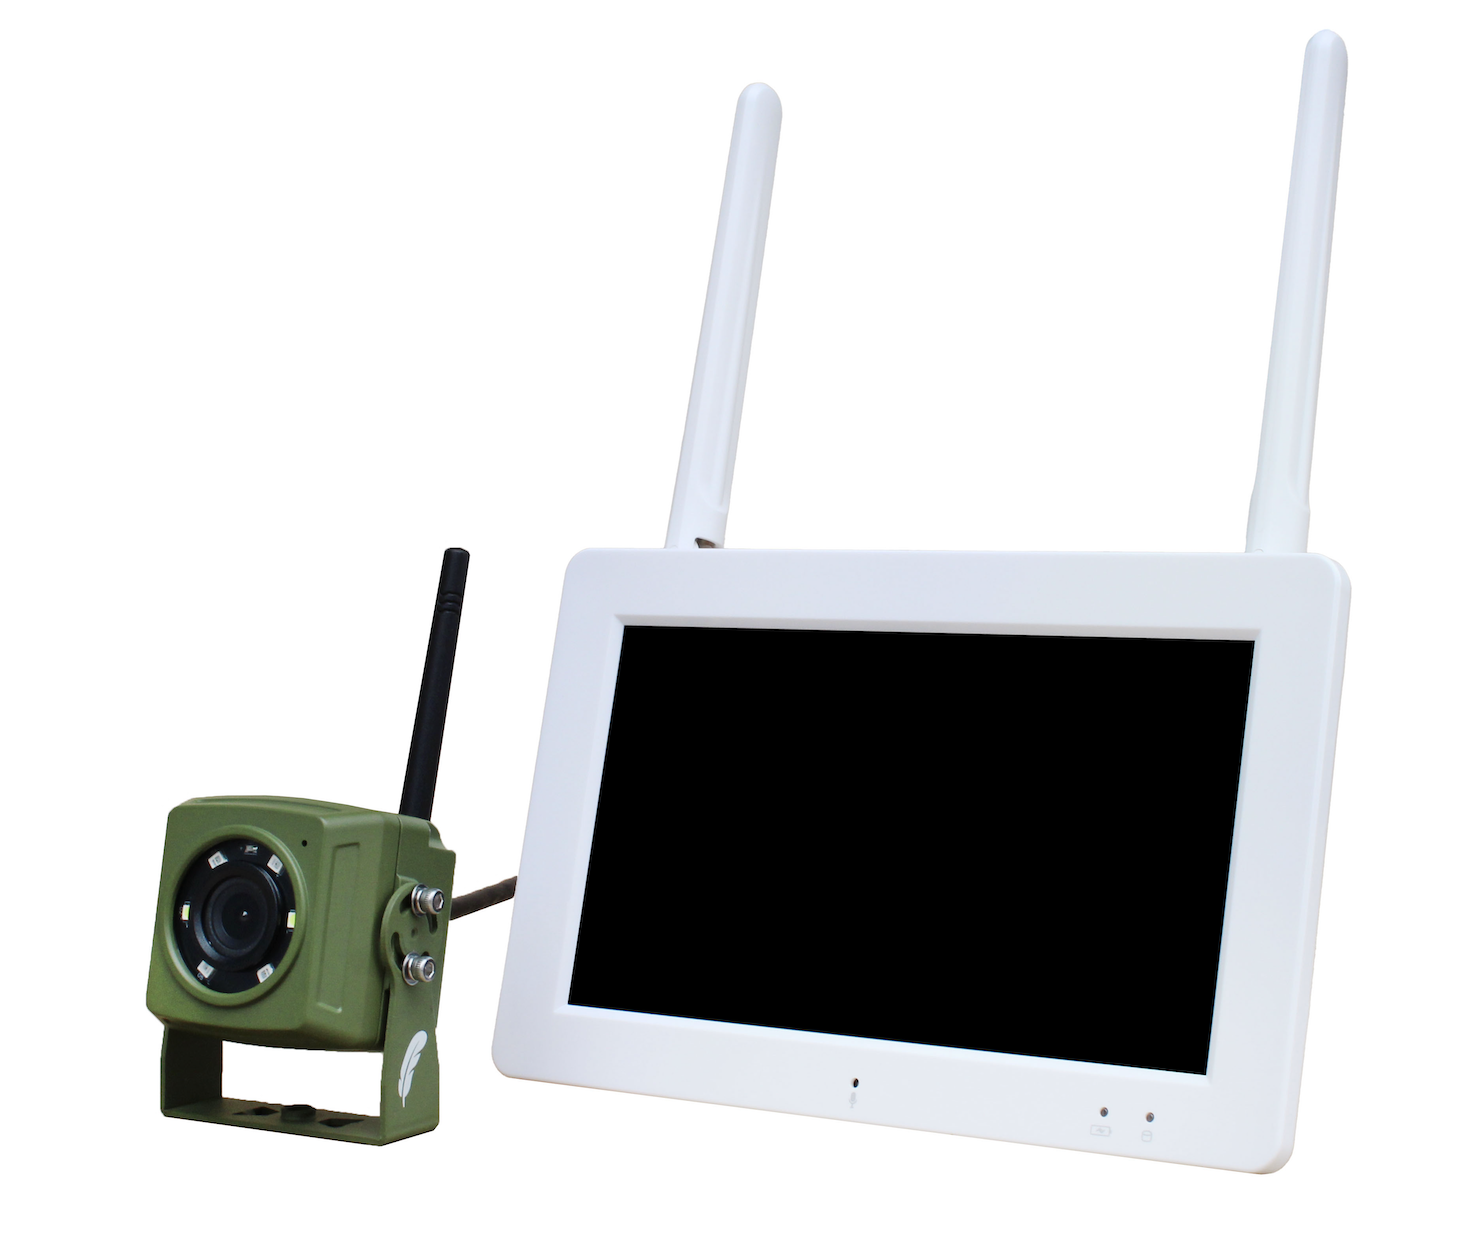
This guide will run you through the Green Feathers app, specifically for the Wireless Screen and Camera pack pictured below. If you are unsure of which camera you have please check here.
 |
Let's Begin:
Let's start at the homepage of the app, here you will see the following options: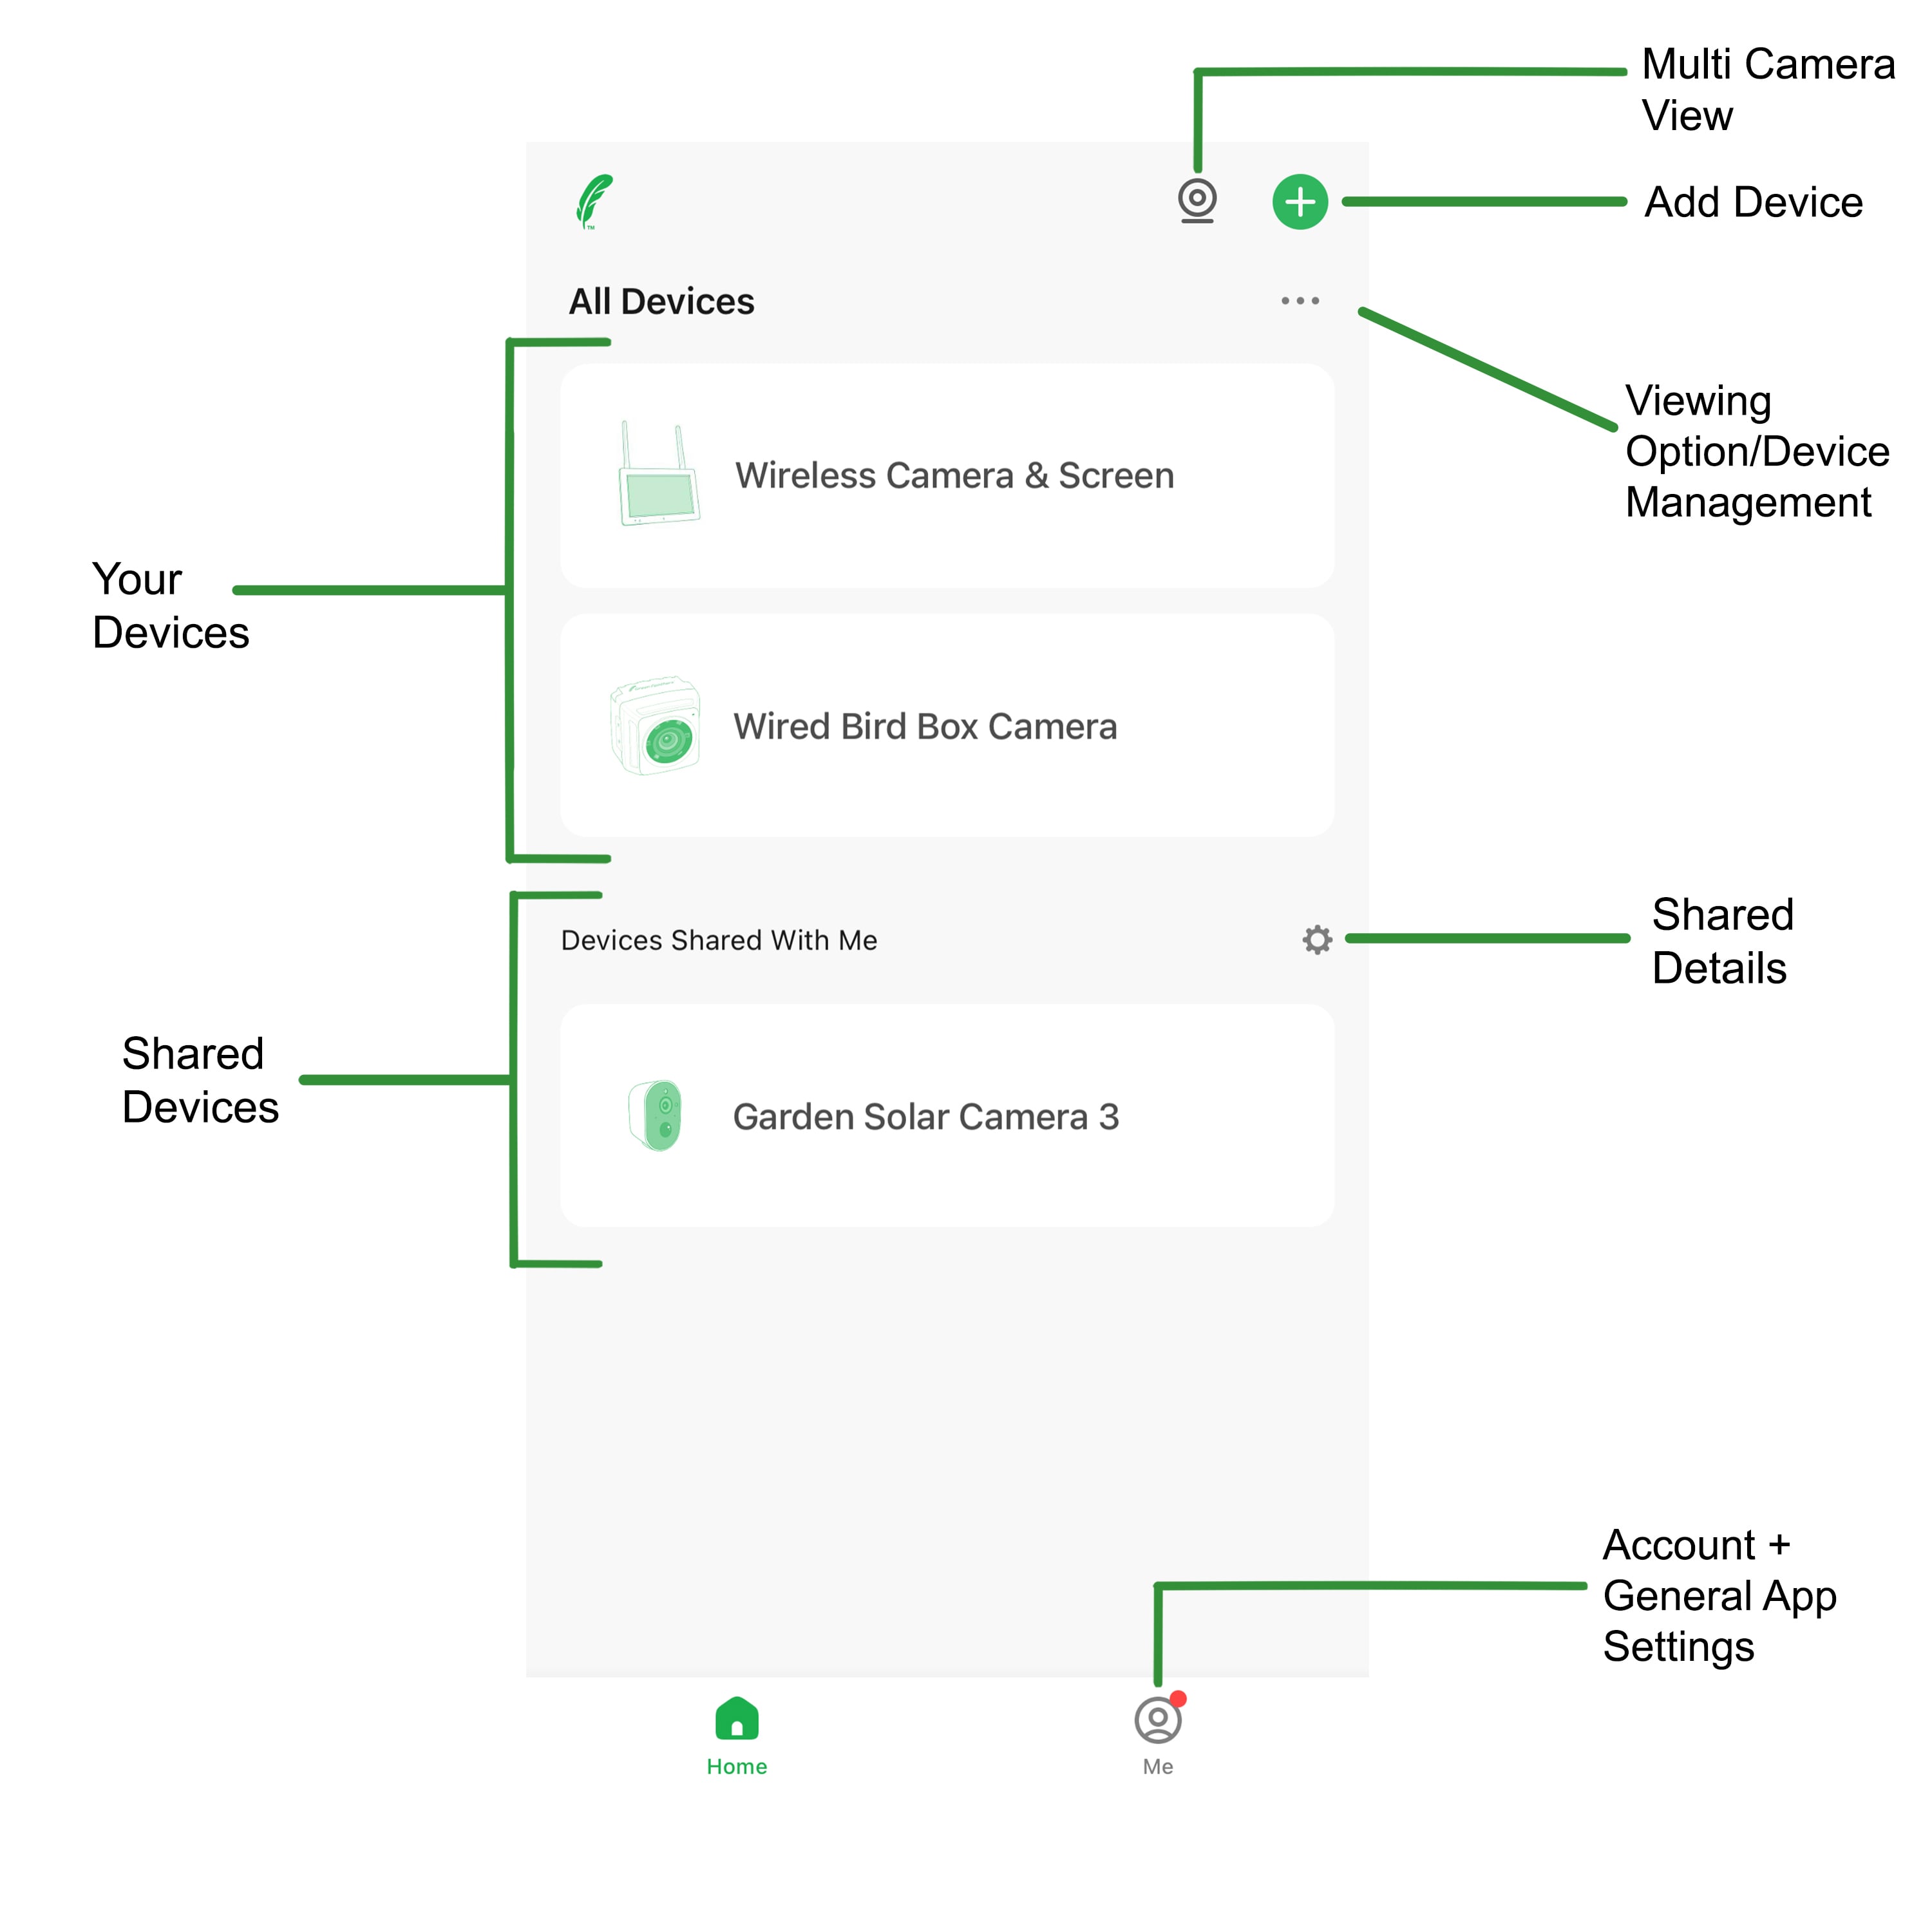
Your Devices - This section will show you the devices you have connected to the app. There is no limit to how many cameras you can connect and they will all show up here.
Shared Devices - This section shows you the devices that have been shared with you.
Multi Camera View - This allows you to view all of your devices live feeds at once in a tile view. You can view up to 16 at once. You can also record and screenshot from your live feeds on this layout.
Add Device - Select this when you want to add a new device.
Viewing Option/Device Management - Viewing option gives you the choice between list view and grid view. Device Management lets you edit the order the cameras as well as delete them.
Shared Details - The shared details option lets you see who has shared the camera with you.
Account + General App Management - For more information on this have a look at this guide here.
Your Screen:
If you select the Wireless Camera & Screen you have connected to the app it will take you to the live feed page for the screen and camera kit and you will see the following icons:
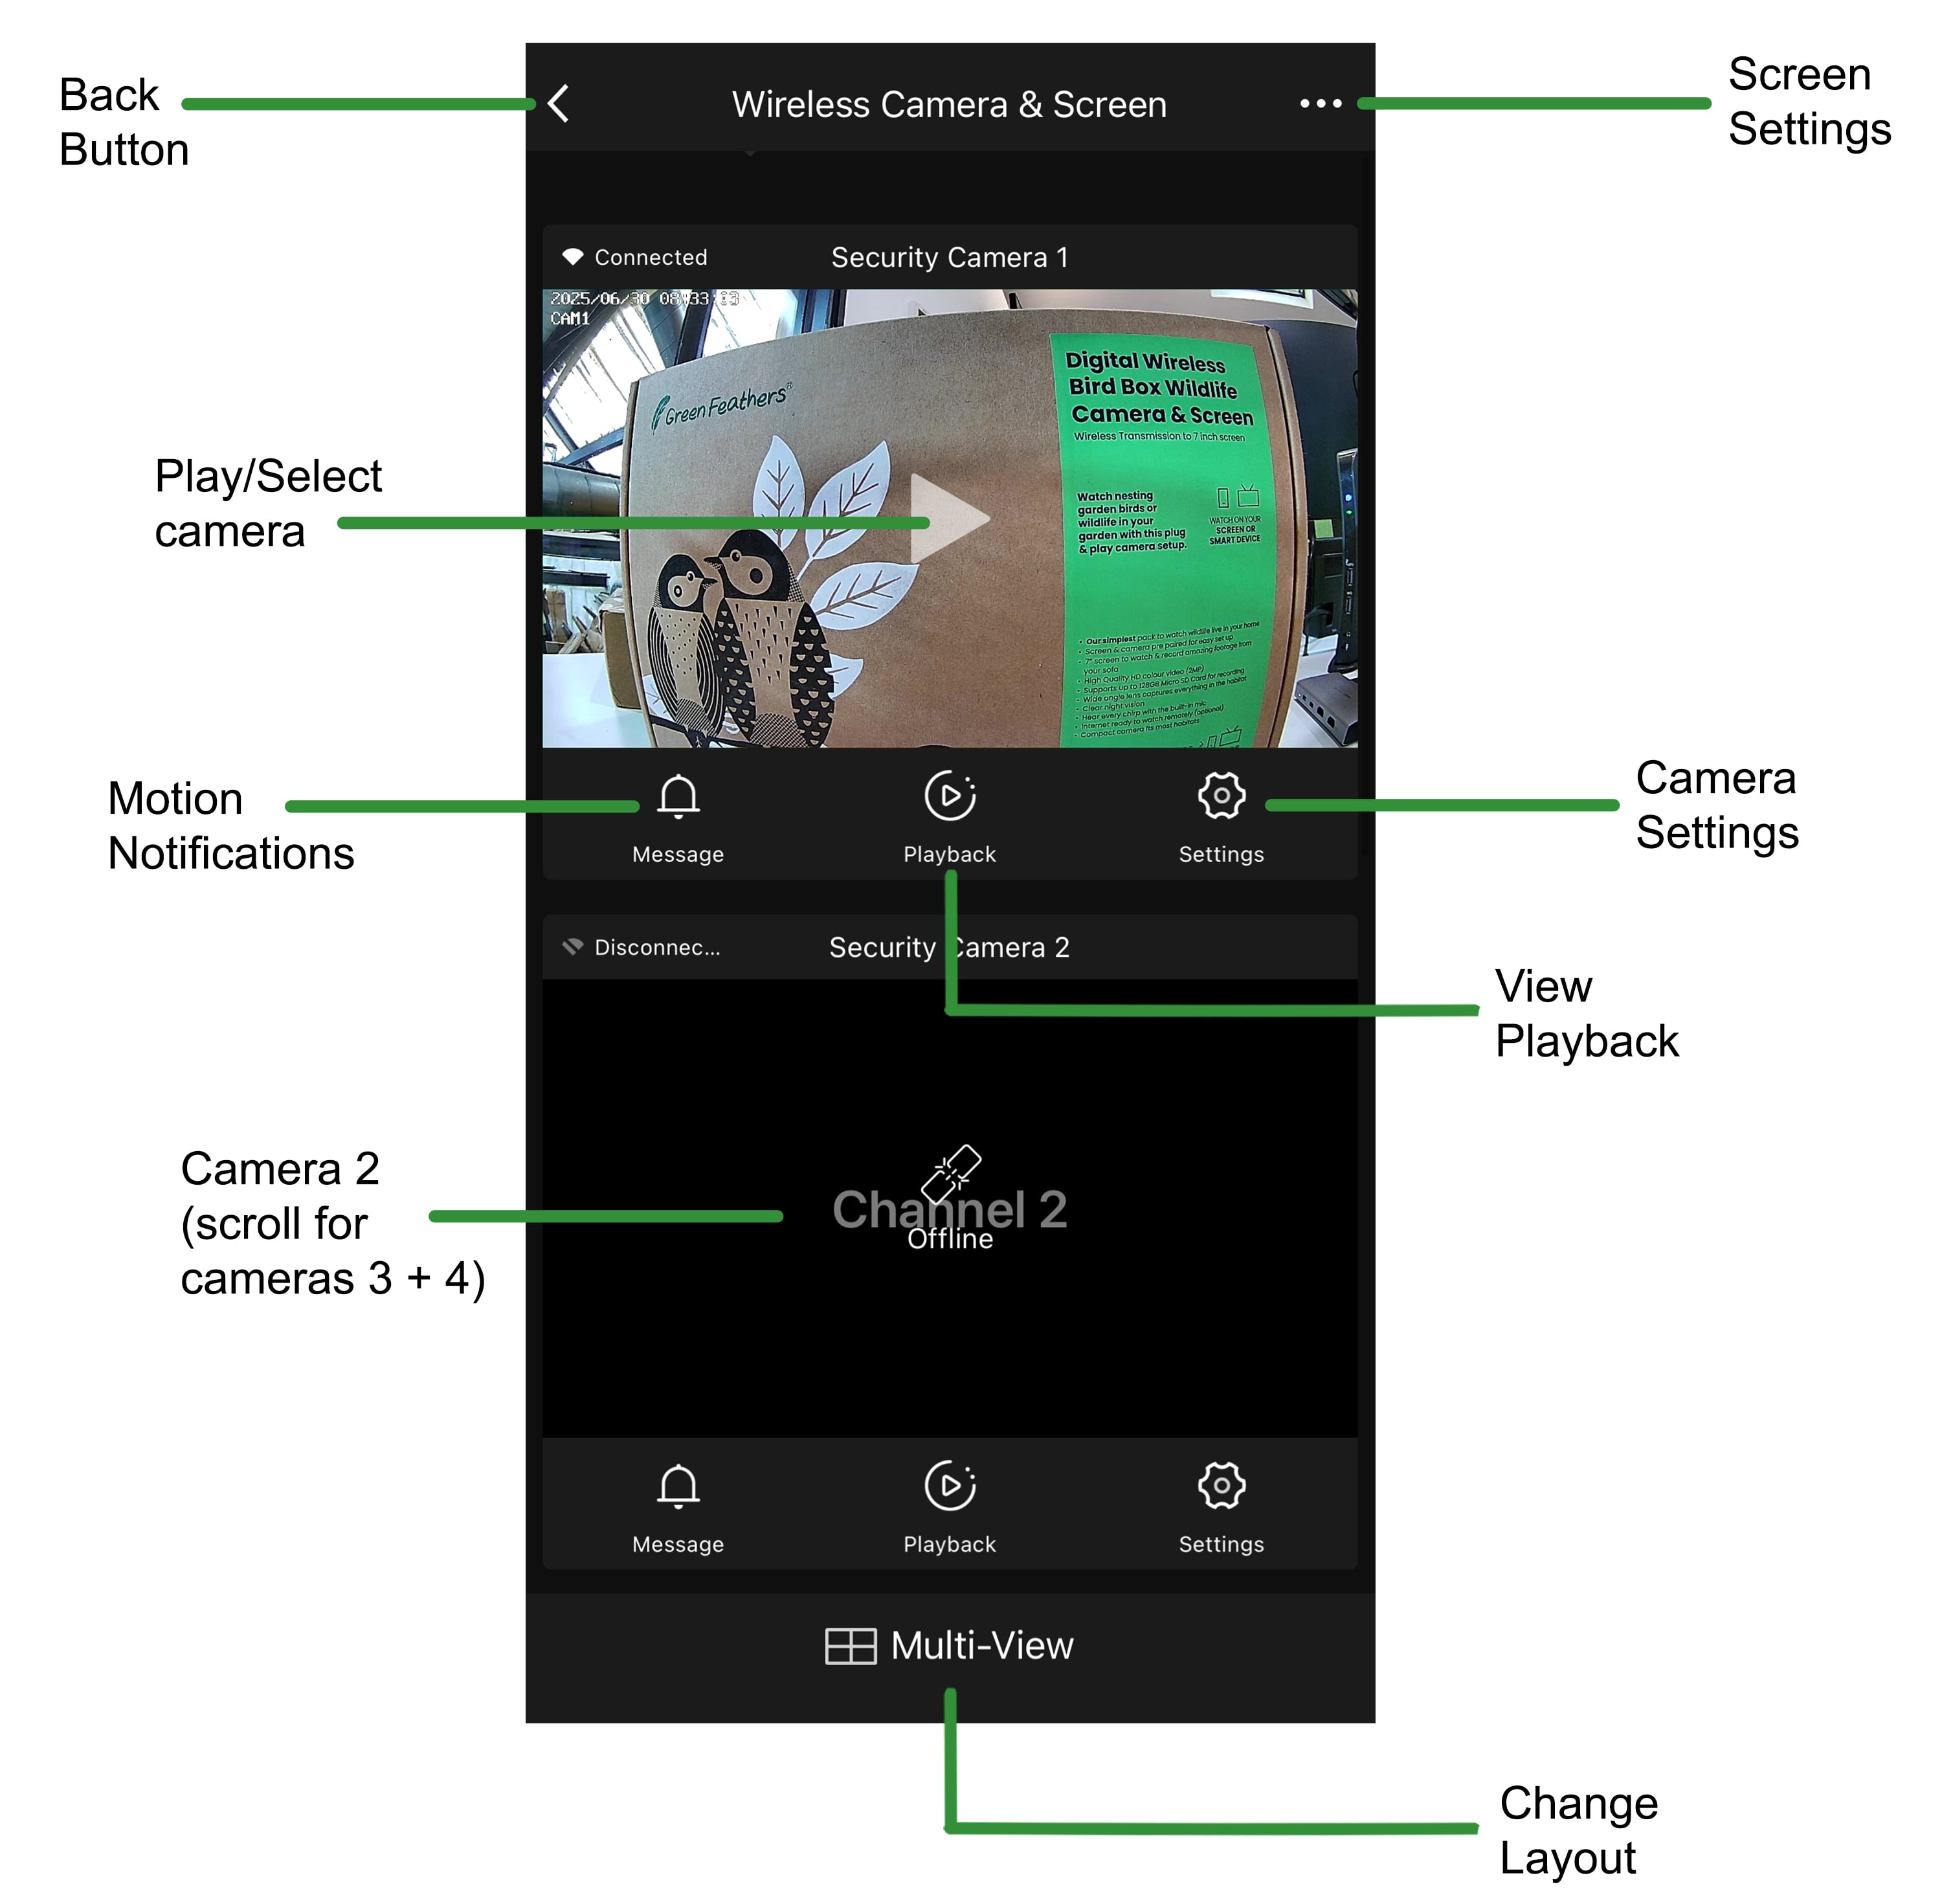
Back Button - This will take you back to the homepage of the app.
Play/Select camera - By selecting this, it will take you to that cameras live feed page.
Motion Notifications - Here you will find all of the motion detection notifications/alerts for that camera.
Camera 2 (scroll for cameras 3 + 4) - You can add up to 4 cameras per screen so this section of the app will show you the cameras individually. If you scroll, you will see the other two cameras below. You can access each cameras notifications/playback/settings.
Change Layout - This allows you to view the cameras in a different format, this shows you a tile/grid layout with each cameras live feed.
Camera Settings - This will take you to the settings of that particular camera. Each camera will have it's own settings.
View Playback - This will take you to the playback of that particular camera. Each camera has it's own playback.
Screen Settings - This will take you to the screen settings:
Device Information - This shows the screen's Virtual ID, IP address and time zone.
Check Device Network - Test connection status between the screen and your router.
Share Device - Follow step 4 in our guide here to share your screen with others.
My Service - Shows your Cloud Storage subscriptions (Not applicable to screen).
Storage Settings - Shows remaining memory of SD card if you have inserted one.
Help Centre - Our guides are not currently available in the app!
Add to Home Screen - Allows you to add a homepage widget on your phone.
Device Update -This will show you any current device updates for your screen.
Device Restart - This will reboot the screen.
Remove Device - This will remove the screen from the app and do a factory reset.
Your Camera
Press the Play/Select button to take you to the live feed page for your camera and you will see the following page:
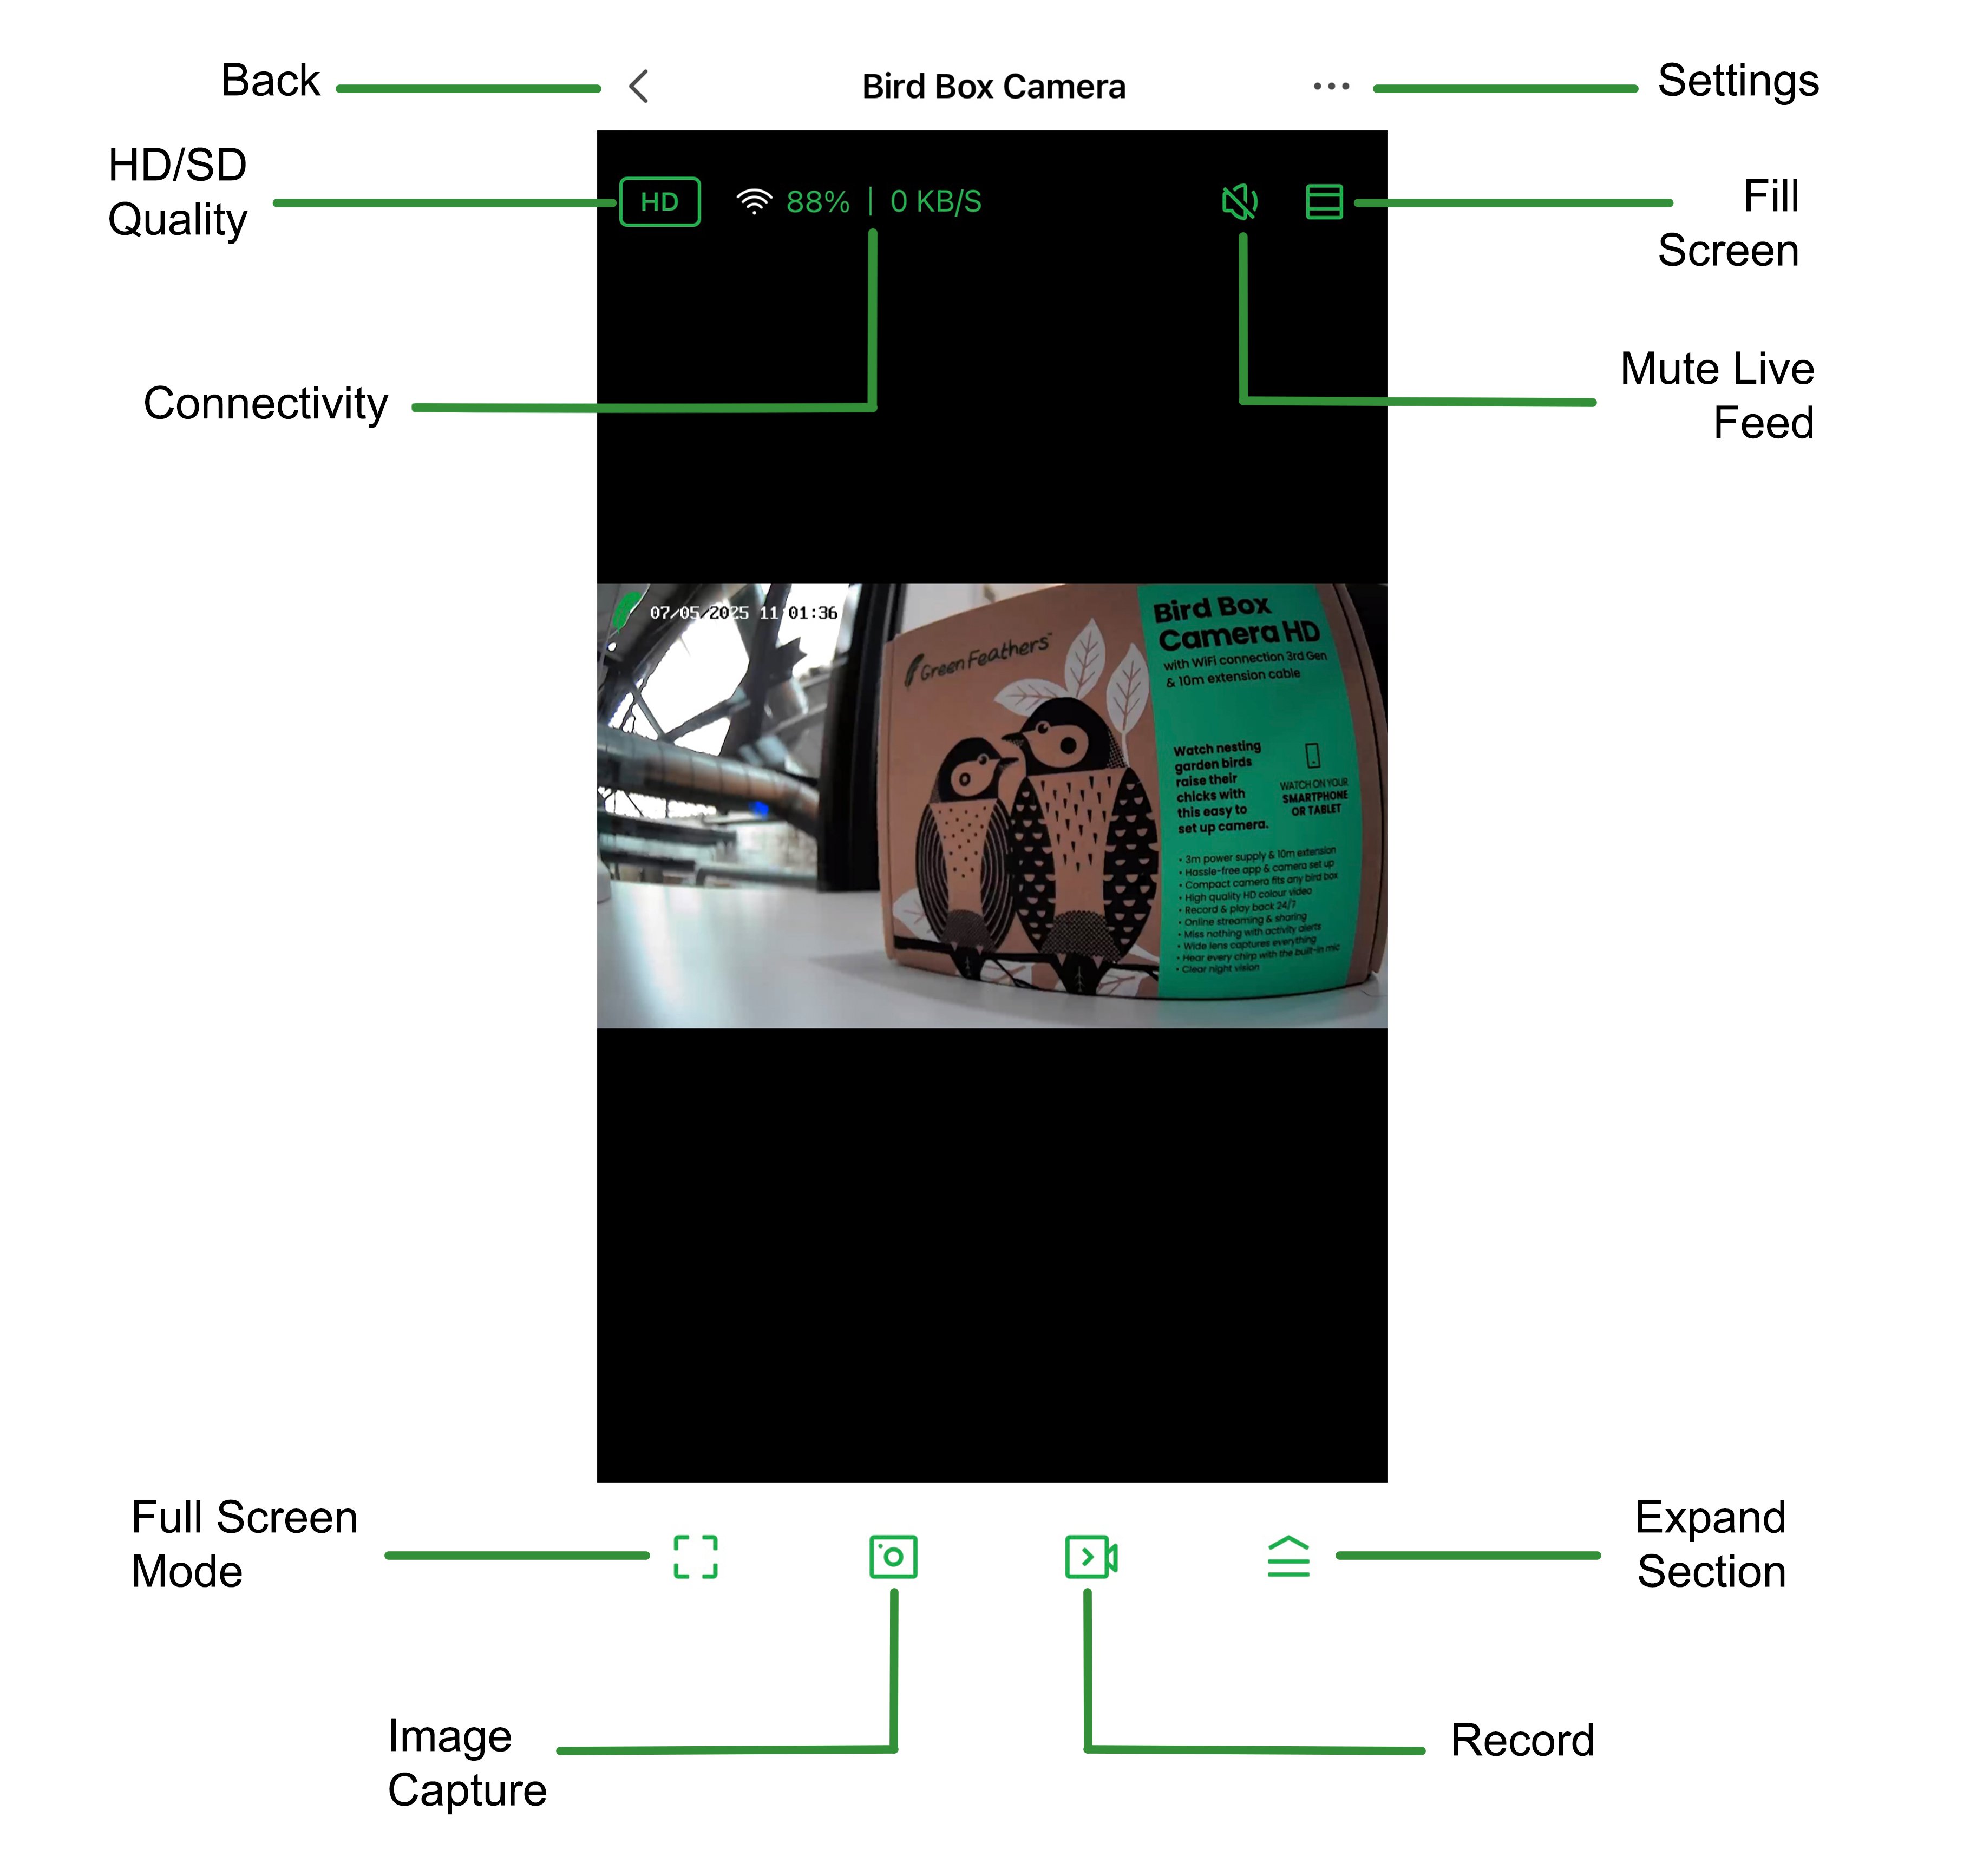
Back - Takes you back to the homepage of the app.
HD/SD Quality - This allows you to switch between HD and standard definition.
Connectivity - This shows you the current connection percentage and the KB/S.
Full Screen Mode - Selecting this will change the live feed to landscape and full screen.
Image Capture - This will take an image of the live feed and saves it to your gallery on the app.
Settings - This will take you into the cameras settings
Fill Screen - This makes the live feed image larger and fills the screen.
Mute Live Feed - This just mutes to noise you are hearing from the live video.
Record - This allows you to record a section of the live feed you are seeing, you can record for as long as you like and this will be saved into your gallery on the app.
Expand Section - Select this and it will show you this selection of icons: 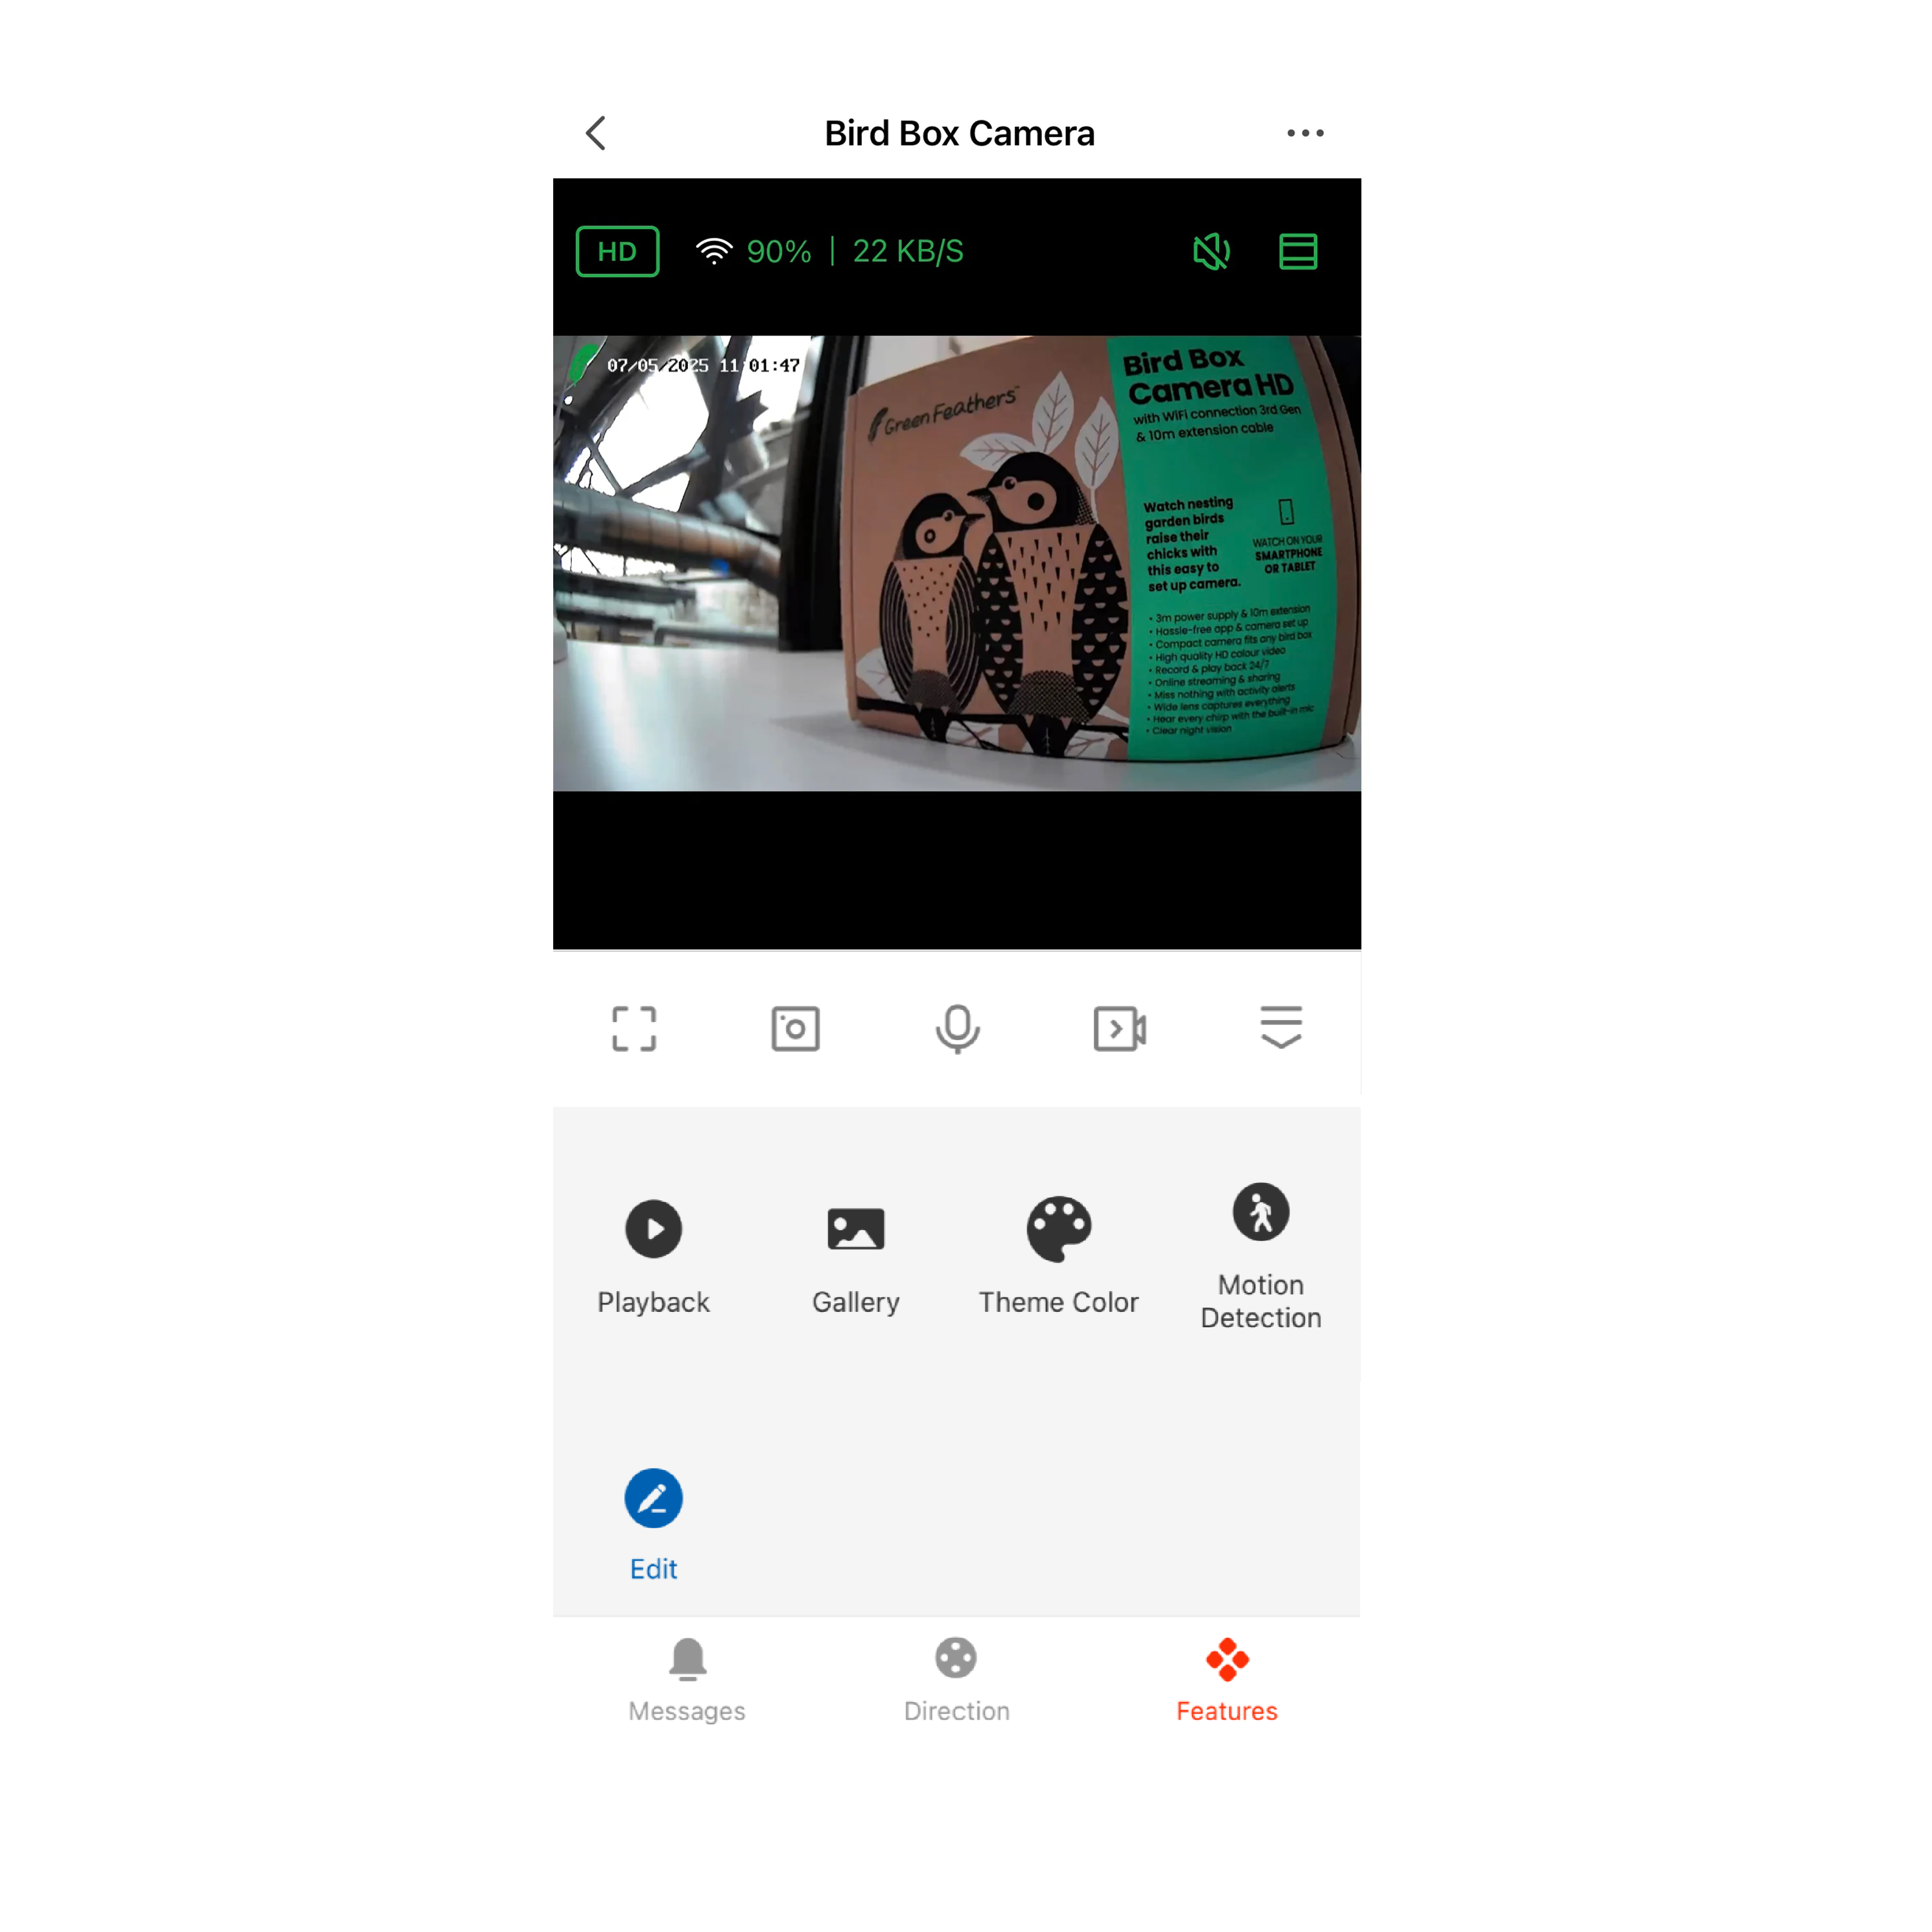
 Playback - The playback function shows you any videos recorded from motion detection/continuous recording (this is only if you have an SD card installed). Click here to find out more about the playback section and exporting recordings.
Gallery - This is where any of your saved images/video clips will be stored.
Theme Colour - This allows you to switch between 'Light' and 'Dark' mode. This only changes the colour layout of the app.
 Night Mode - Night mode refers to the camera's black and white IR night vision. By selecting this, a menu will appear that includes 'Auto' 'Off' and 'On'. We recommend setting the camera to 'Auto', this means the camera will switch between day and night mode when the light levels are right. Selecting 'Off' disables the night mode and selecting 'On' keeps night mode on constantly.
Motion Detection - This allows you to disable/enable motion detection.
 Sound Detection - This allows you to enable/disable sound detection. This works in a similar way to motion detection but will send you alerts triggered by sound (this can be far more frequent that motion)
Edit - This is not a function we have enabled on the app just yet. It would allow you to change the order of the buttons.
Below these options you have the following
 Messages - This will show you a reduced message centre which shows you the most recent motion detected. If you click on that one it will show you the still image taken from the camera when motion was detected.
Direction - This function is not applicable to our current three different screen compatible cameras.
Settings information:
Now let's have a look into the camera settings, see the screenshot below, you want to click on the three little dots in the top right.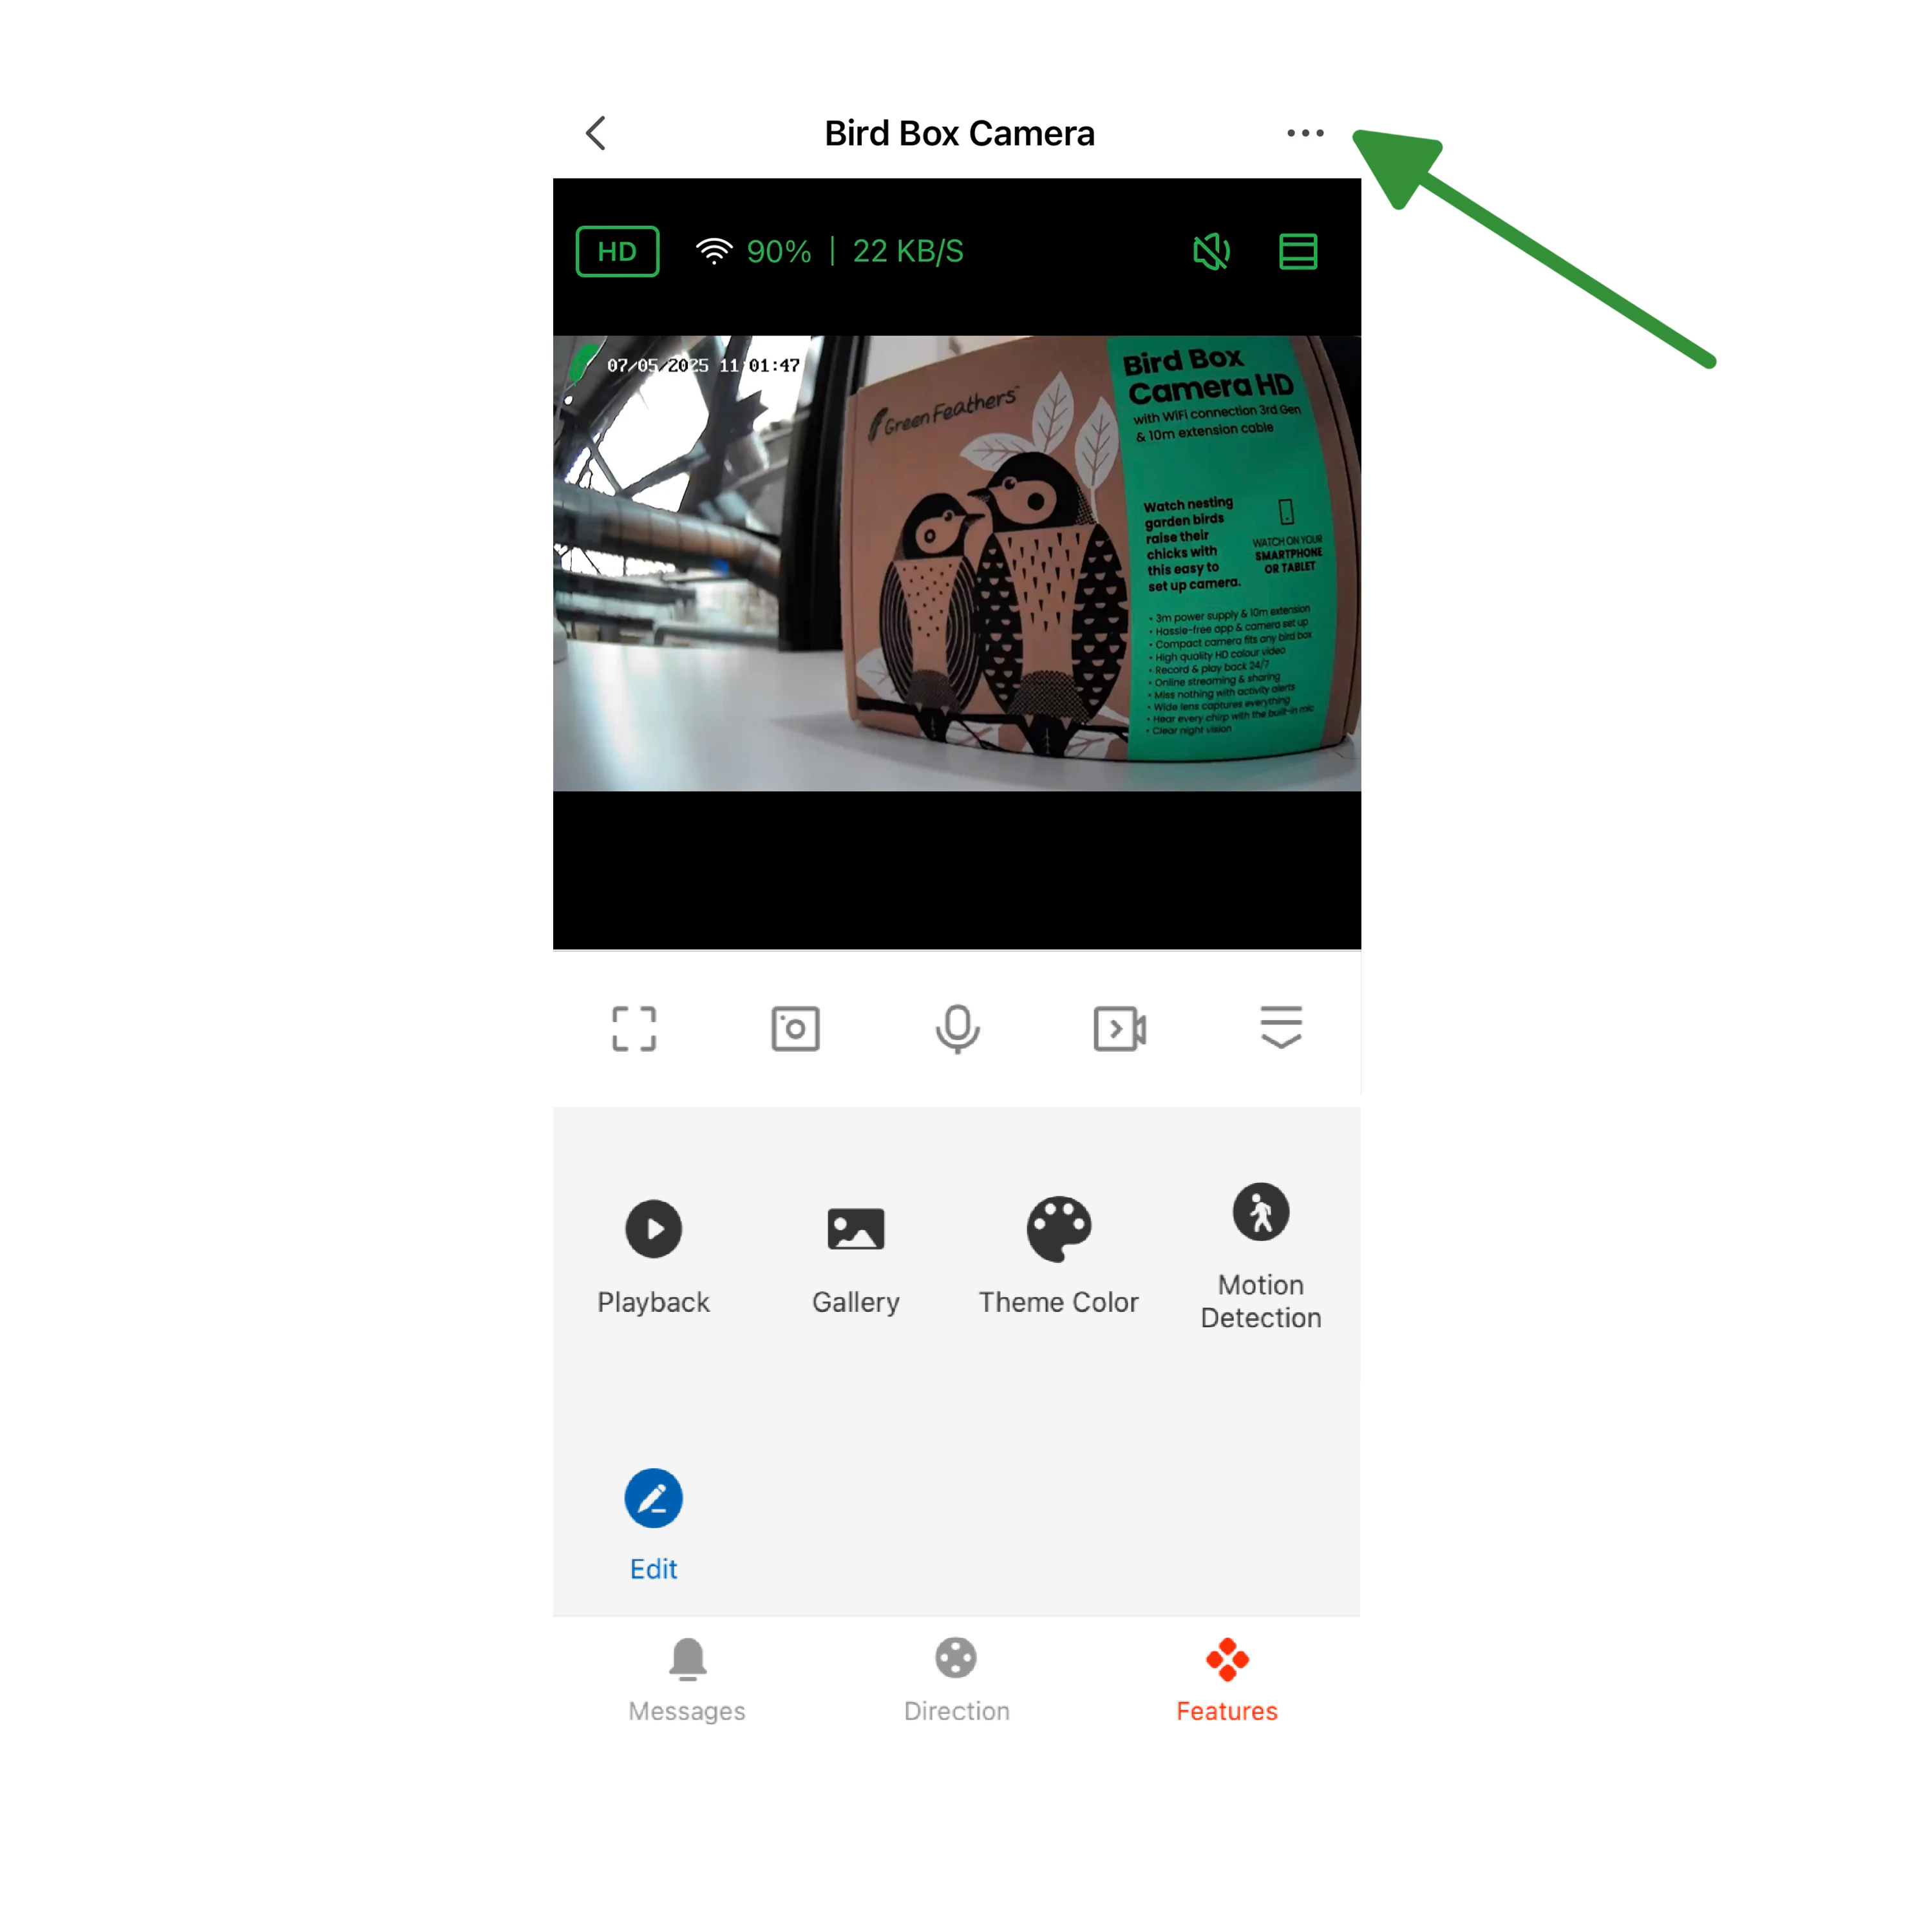 Device Information - This shows the camera's Virtual ID and time zone.
Share Device - Follow step 4 in our guide here to share your screen camera with others.
My Service - Shows your Cloud Storage subscriptions (Not applicable to screen cameras).
Basic Function Settings - This give you the option to 'Flip Screen'. This will mirror the live feed image if you need to install the camera upside-down.
Detection Alarm Settings - This will show you the settings for the motion detection. Please see the next section for more information
Offline Notification - Tick this one if you want to receive a notification if your camera goes offline.
Help Centre - Our guides are not currently available in the app!
Add to Home Screen - Allows you to add a homepage widget on your phone.
Device Update -This will show you any current device updates for your screen.
Device Restart - This will reboot the screen.
Remove Device - This will remove the screen from the app and do a factory reset.
Detection Alarm Settings:
If you select the Detection Alarm Settings page from the camera's settings menu, you will see the following screen. Please see below for the how the different detection alarm settings work:
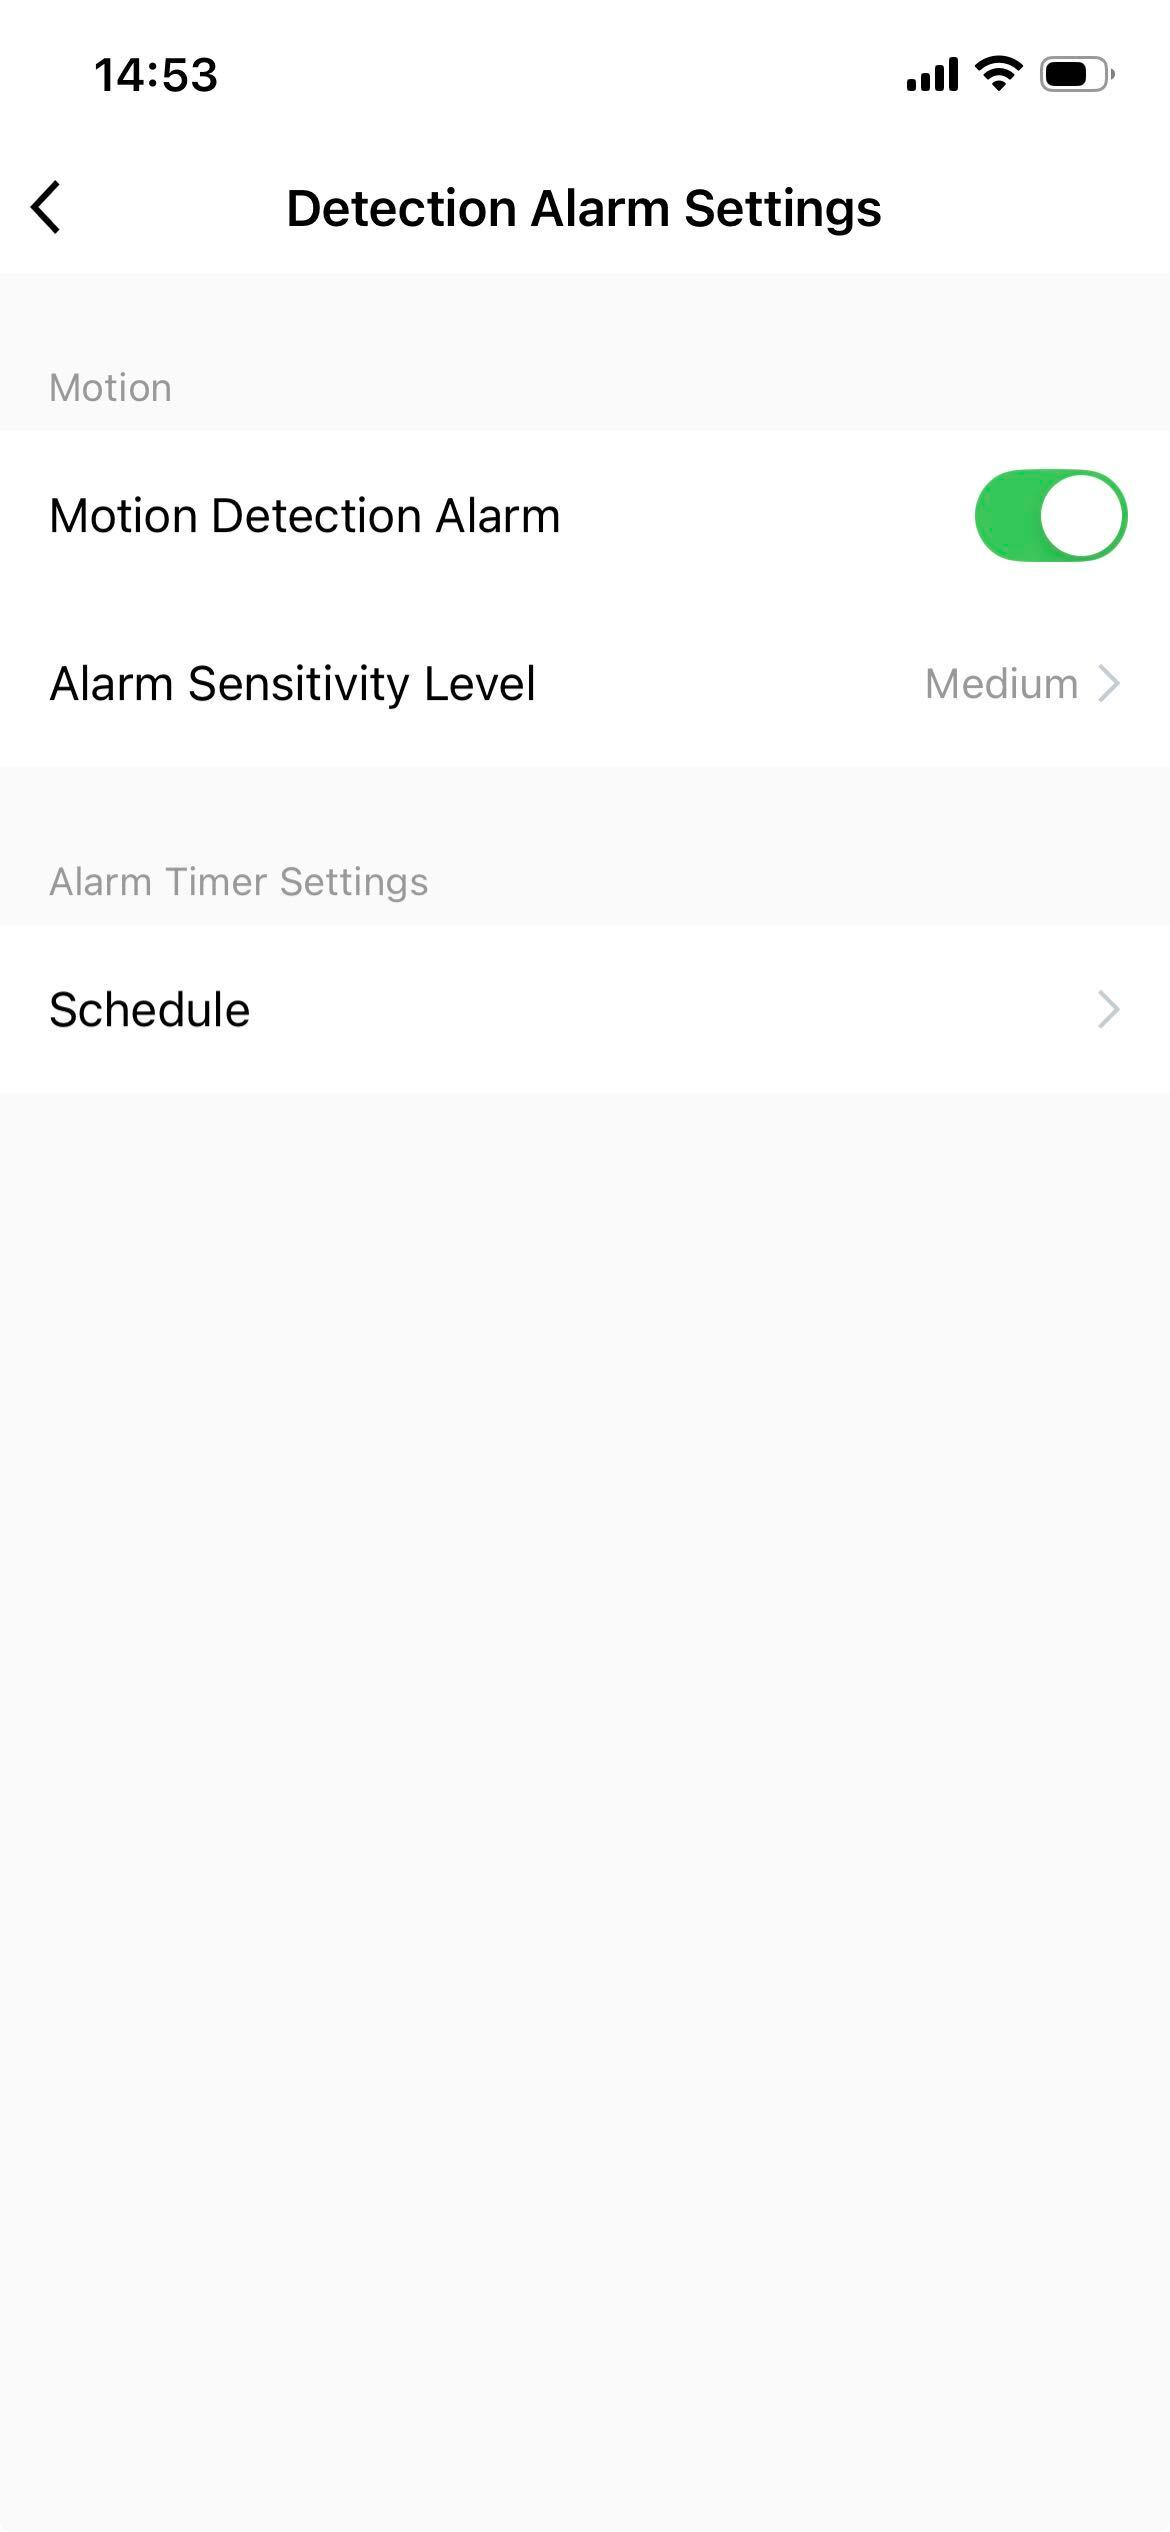
Motion Detection Alarm - This switch turns on your camera's motion detection.
Alarm Sensitivity - You can toggle the alarm sensitivity between Low, Medium and High
Schedule settings - Setting up a schedule is useful if you only want notifications to be between set hours.
For example, if you wanted to have the motion detection or sound detection at night time only, you could set it to do this at 11pm every day, and disable it at 6am every day. Go to Schedule settings then tap the 'Add' button:
Time
Here you can select a time to turn motion detection/human body filtering/sound detection on or off.
Repeat
If you tap on the 'Repeat' button you can choose which days you want to enable detection.
Note
If you tap on the 'Note' button you can write a note to associate with this automated schedule:
Notification
If you set the schedule to disable notifications it will not send notifications during the specified period. This feature is useful because you could set the camera to leave the motion detection feature on, but to disable the notifications at night.
When you are finished, tap 'Save' at the top right of the screen.
Of course, there's no point in setting the detection to be turned on every day if it's never being turned off in the first place! So we need to make the counterpart to our first schedule, a second schedule to turn the detection off at a certain time.
As an example we have set it to disable detection at 3pm, and set it to run every day of the week as well. This means that our camera will enable detection at 2:50pm every day, and disable it at 3:00pm every day.
Need more help?
If you need help with anything else please check out our other guides or get in contact.