Getting Started with your Wireless Solar Powered Bird Box Camera & Screen Pack (GFTX2SC2R1S1)Updated 5 days ago
This guide will advise you on how to set up the Wireless Solar Bird Box Camera & Screen Pack (GFTX2SC2R1S1) pictured below. If you have our Wireless Bird Box Camera & Screen Pack or our Wildlife Outdoor Bullet Camera & Screen Pack please click here. If you are unsure of which camera you have please check here.
 Wireless Solar Bird Box Camera & Screen Pack
(GFTX2SC2R1S1)
Before you begin
We recommend setting up your new Camera and Screen pack inside the house first, this way it is easier to make sure everything is up and running before mounting in position.
Charging
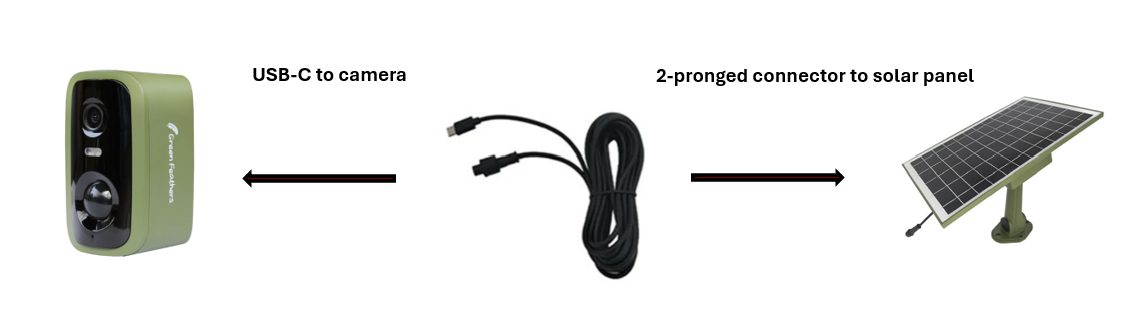
Solar Panel – The first step you want to do is connect your solar panel to power so it has a full charge before installation, this will give you optimal performance once out in position. A full charge from flat will take between 18 - 20 hours.
On the side of the solar panel there will be two rubber grommets. Please remove these and use the micro-USB lead provided to connect to the solar panel and charge. Before you put the solar panel in its final position, please make sure to turn the panel on using the on/off switch on the side and place the rubber grommets back in position to maintain a watertight seal.
Camera – Your camera will need charging as well, this will take 6-8 hours.
Please use the provided USB-A to USB-C cable to charge your camera. Insert the USB-C cable into the port located beneath the rubber grommet on the bottom of the camera and charge. After charging, ensure the grommet is securely pressed back into place to maintain the camera’s watertight seal.
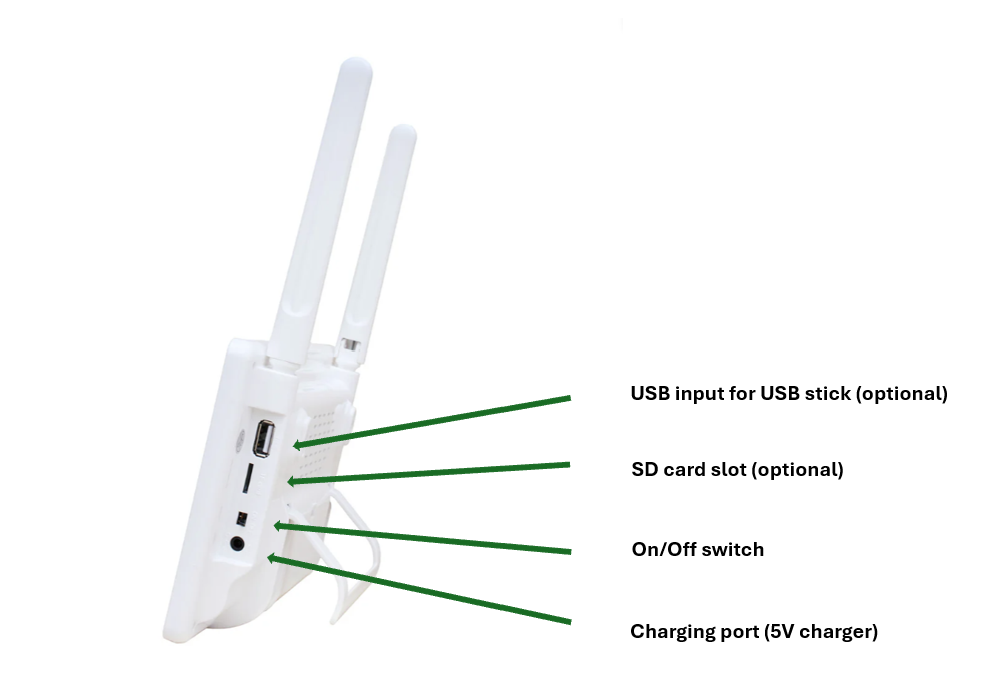
Screen – The screen will also need to be connected to power initially and turned on using the on/off switch on the side next to the SD card slot. To charge the screen, please use the round pin 5v charger and insert into the charging port.
If you have one, insert the micro SD card into the side of the screen. With the screen facing towards you, you want the metal contacts on the SD card to also be facing you. Push the SD card in, you will feel it click into place against a spring mechanism. To remove it, just push it in again and it should spring out.
Next Steps
Once everything is charged, please turn your camera on by pressing the on/off switch under the rubber grommet and connect it to the screen using the instructions below:
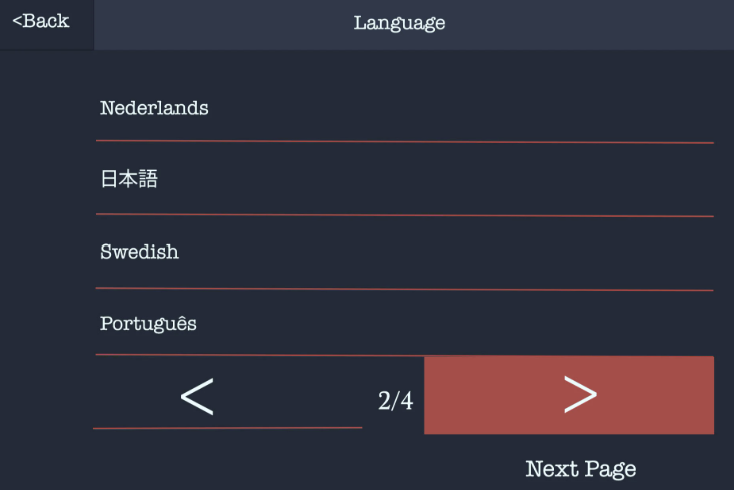
Firstly, tap on the language button to bring up the language options which the screen can operate in.

Now select the language you wish to use by tapping on it, you can use the arrows at the bottom to scroll through the pages.
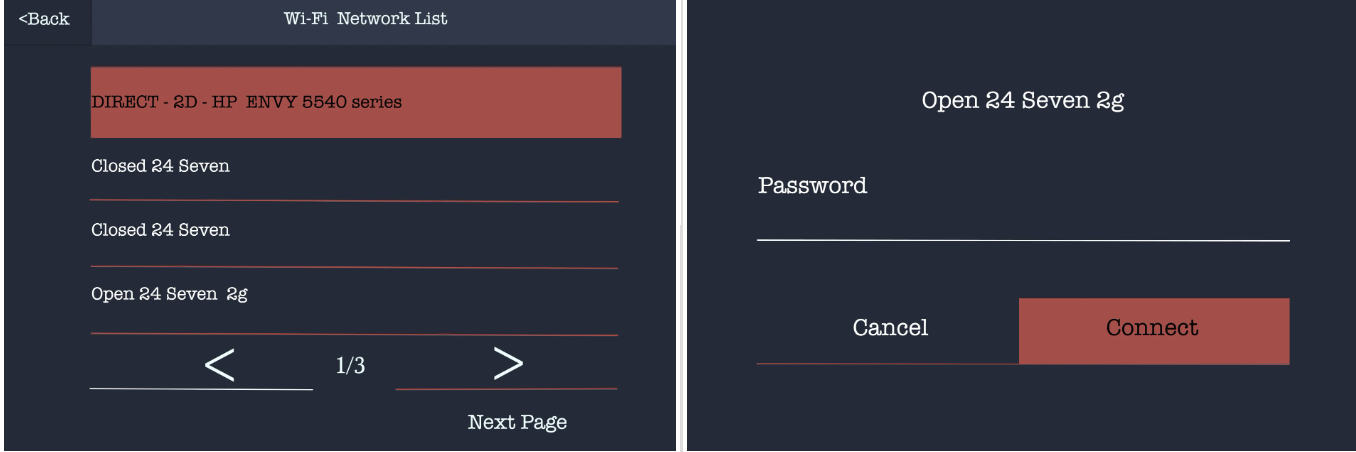
If you wish to connect the screen to Wi-Fi so you can view it from a mobile device, select your Wi-Fi network from the list by tapping on it and input the password and then press next page.
- Should you wish to skip this step, press the next page button at the bottom right. You can connect the screen to Wi-Fi later.
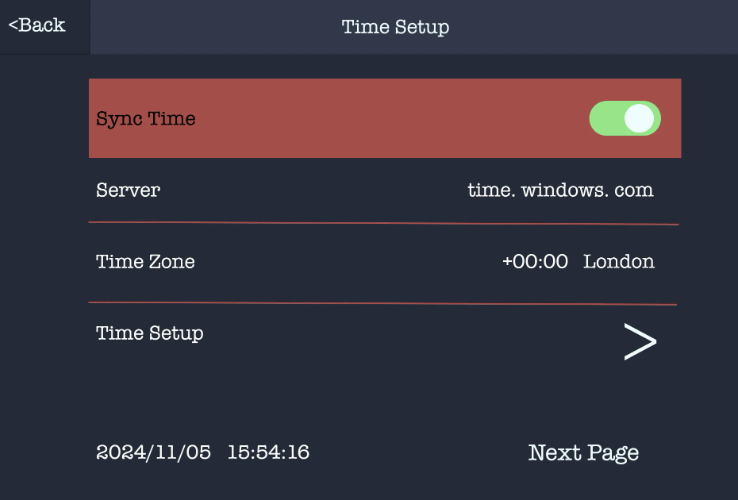
The next option is to set the date/time, if you have connected to Wi-Fi this will automatically update based on the “Time Zone” you have selected.
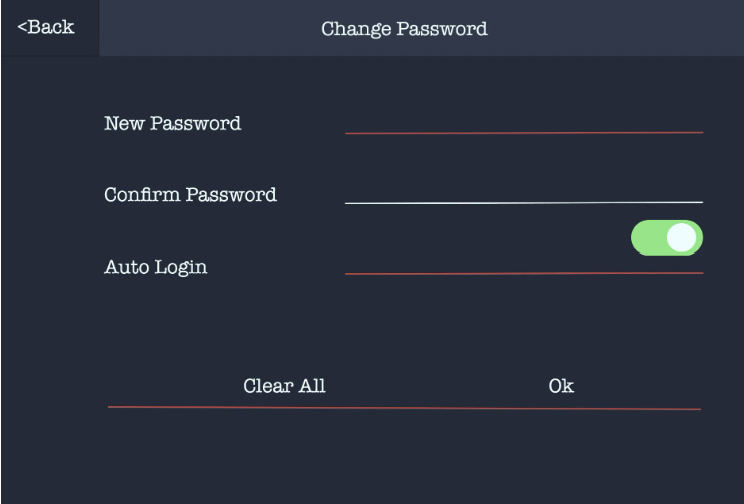
Now set a password on the screen, this is for logging in and out of the settings menu. You can select the auto login option if you don’t want to have to put the password in each time.
On the next screen you will see 2 QR codes, the right hand one is for downloading the Green Feathers app and the left one is for connecting the screen to the app.
- Once the app has downloaded and open you will either want to login to an existing account or register a new one.
- Now you are logged in you can press the plus symbol in the top right corner and then the scan button. This will ask for phone camera access which you will want to grant.
- Point the phones camera at the QR code on the left-hand side.
- When it has successfully scanned you will see a count down and then confirmation once the camera has been added to the app successfully.

You will now be on the live view screen; your camera comes pre-paired so you will have the live view showing in one of the four boxes providing the camera is powered on. To make this full screen you can tap on that window, to go back to the 4 camera view you can tap on the screen again.
Once everything is connected, please mount your camera and solar panel in position. Please see this guide for tips on placement.
Final position set up
Need more help?
If you need help with anything else please check out our other guides or get in contact.