How to add a GFIP3/GFIP320BWF to a Gamut GT2/GT3 RecorderUpdated 6 months ago
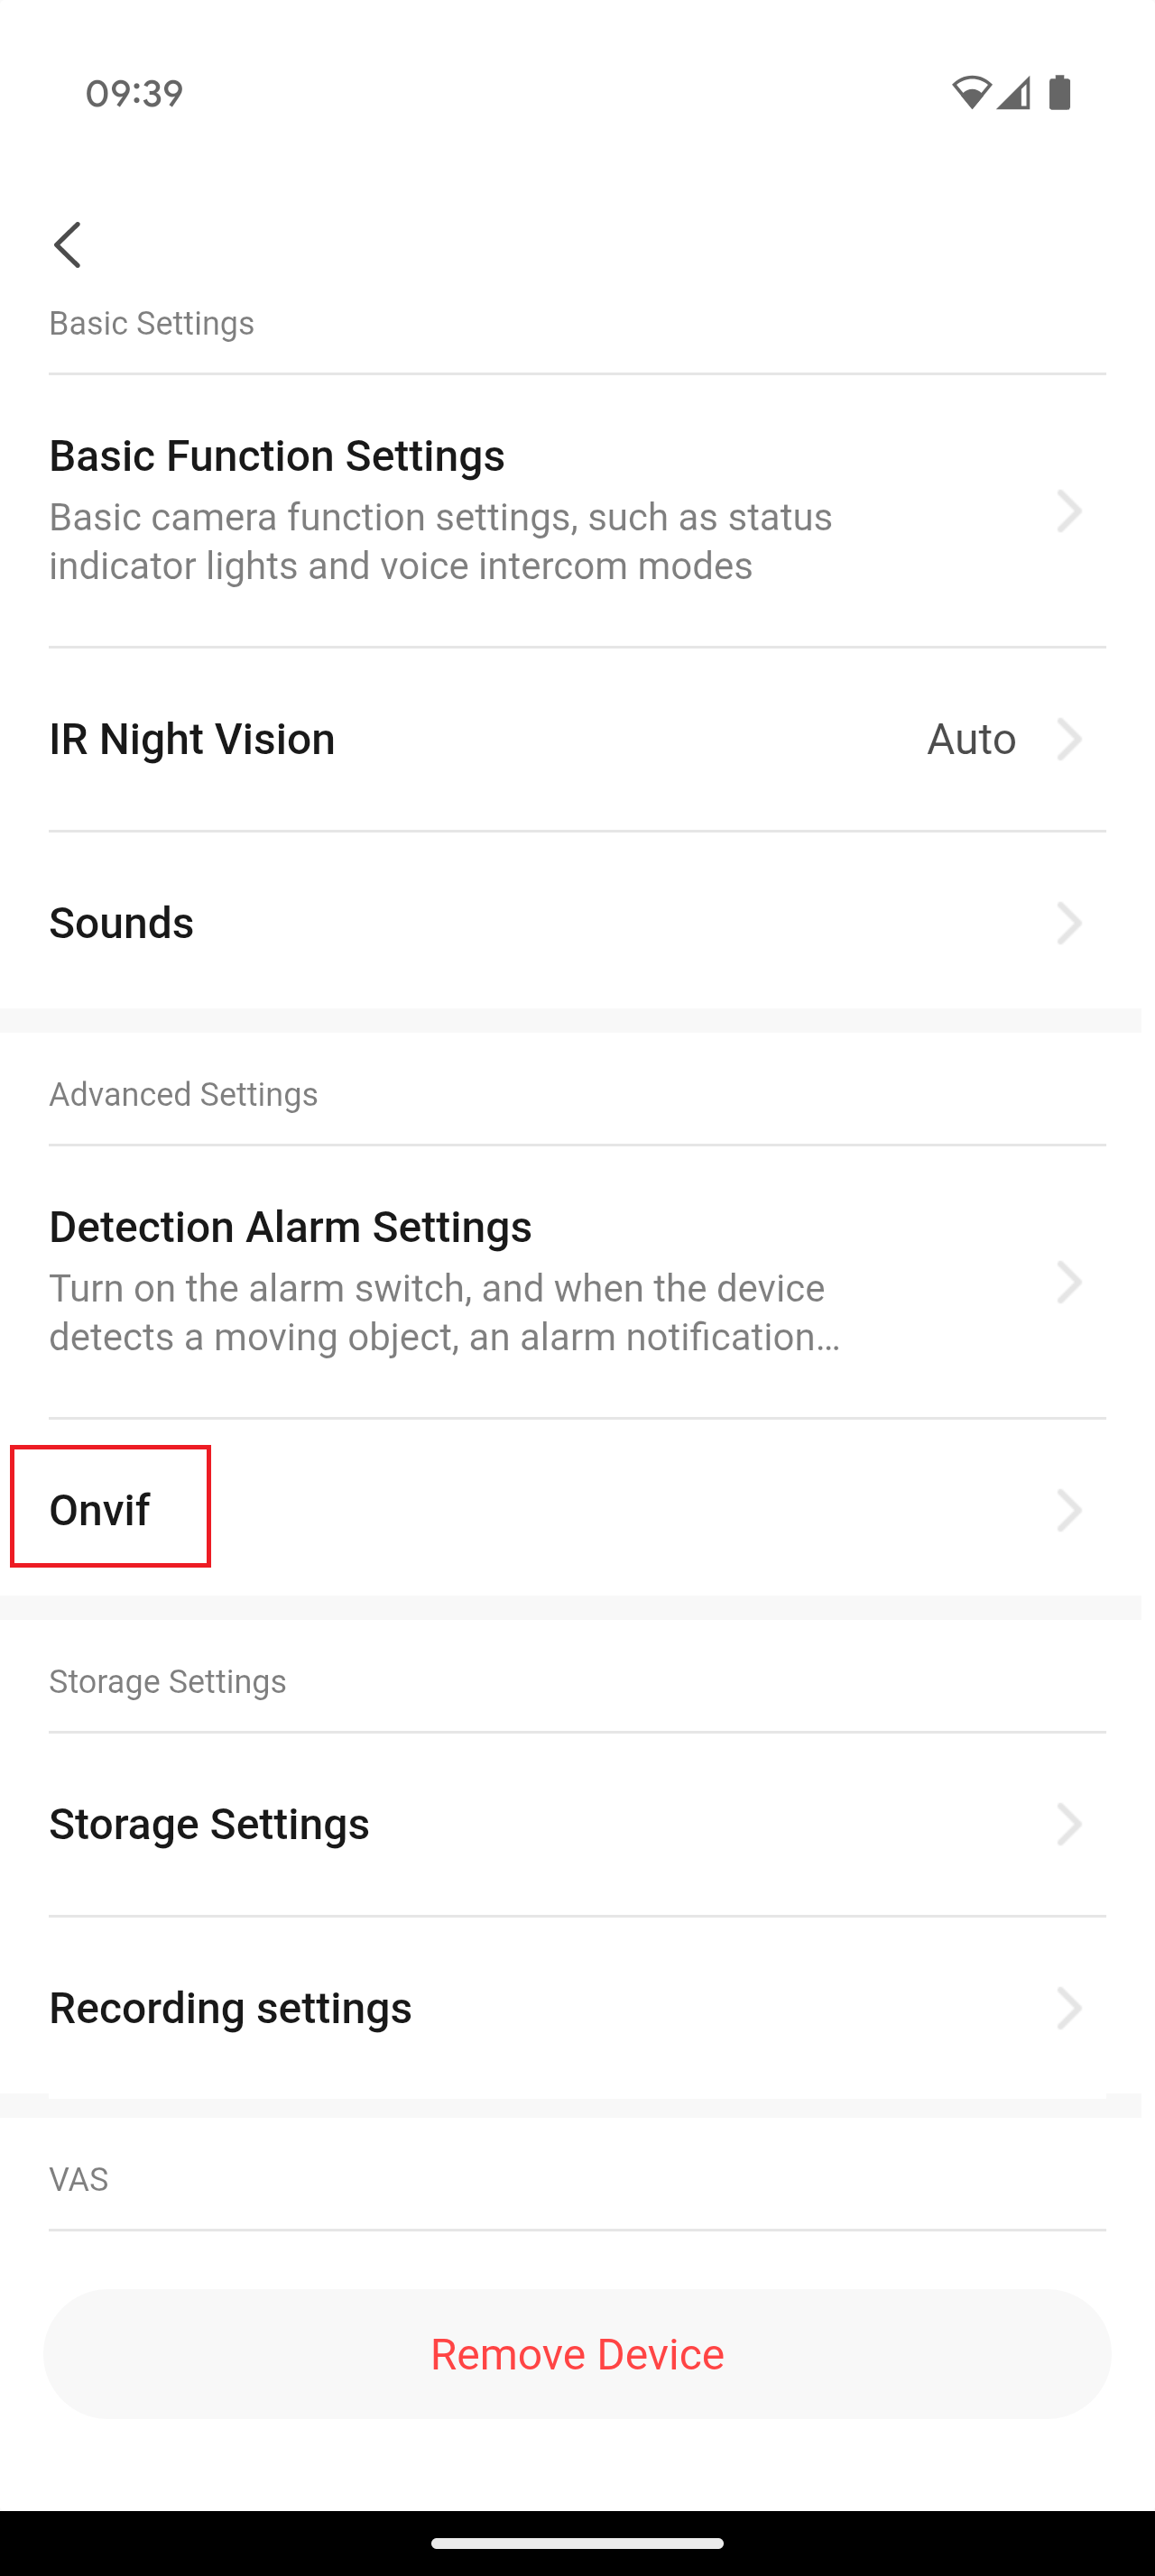
The first thing we need to do is in the Green Feathers app, we will need to turn onvif on for each of the cameras, this can be found by going into the camera settings and finding the correct section, shown below.
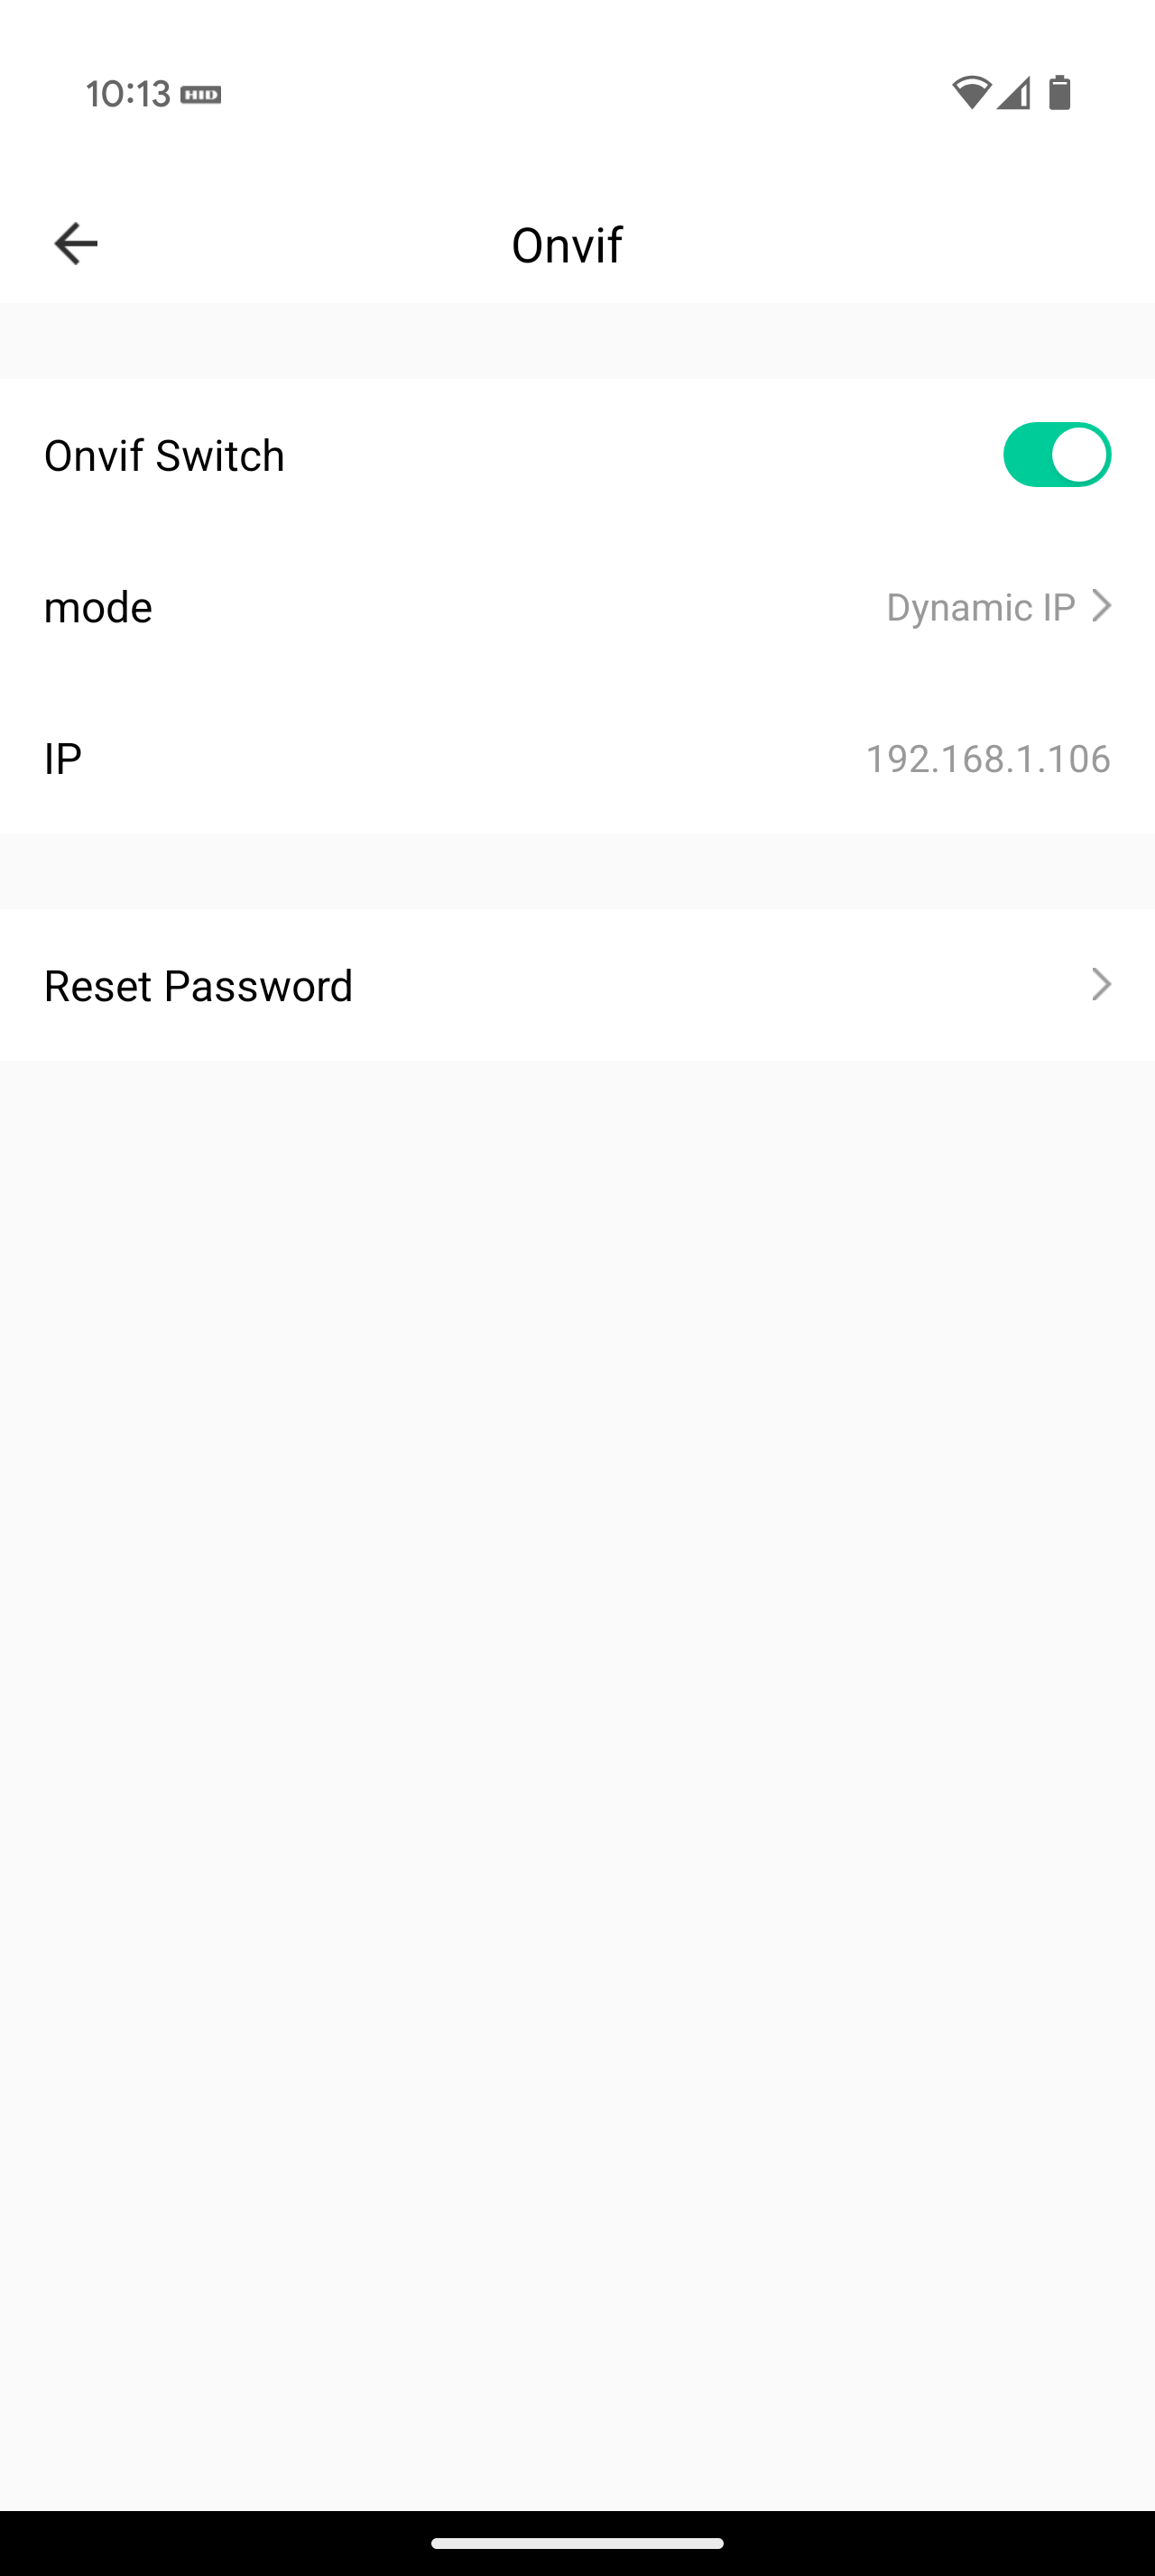
Once you go into here, you will want to set the switch to on, it will prompt you for a password, for the purpose of this guide we have used 12345Abc, once enabled it will look like below, you will want to make a note of the IP address for each camera that you do this on, as this will be needed later on.
Once this has been done for each camera, the next step will require accessing the settings on your recorder. You will want to bring up the on screen setup menu, to get the below.
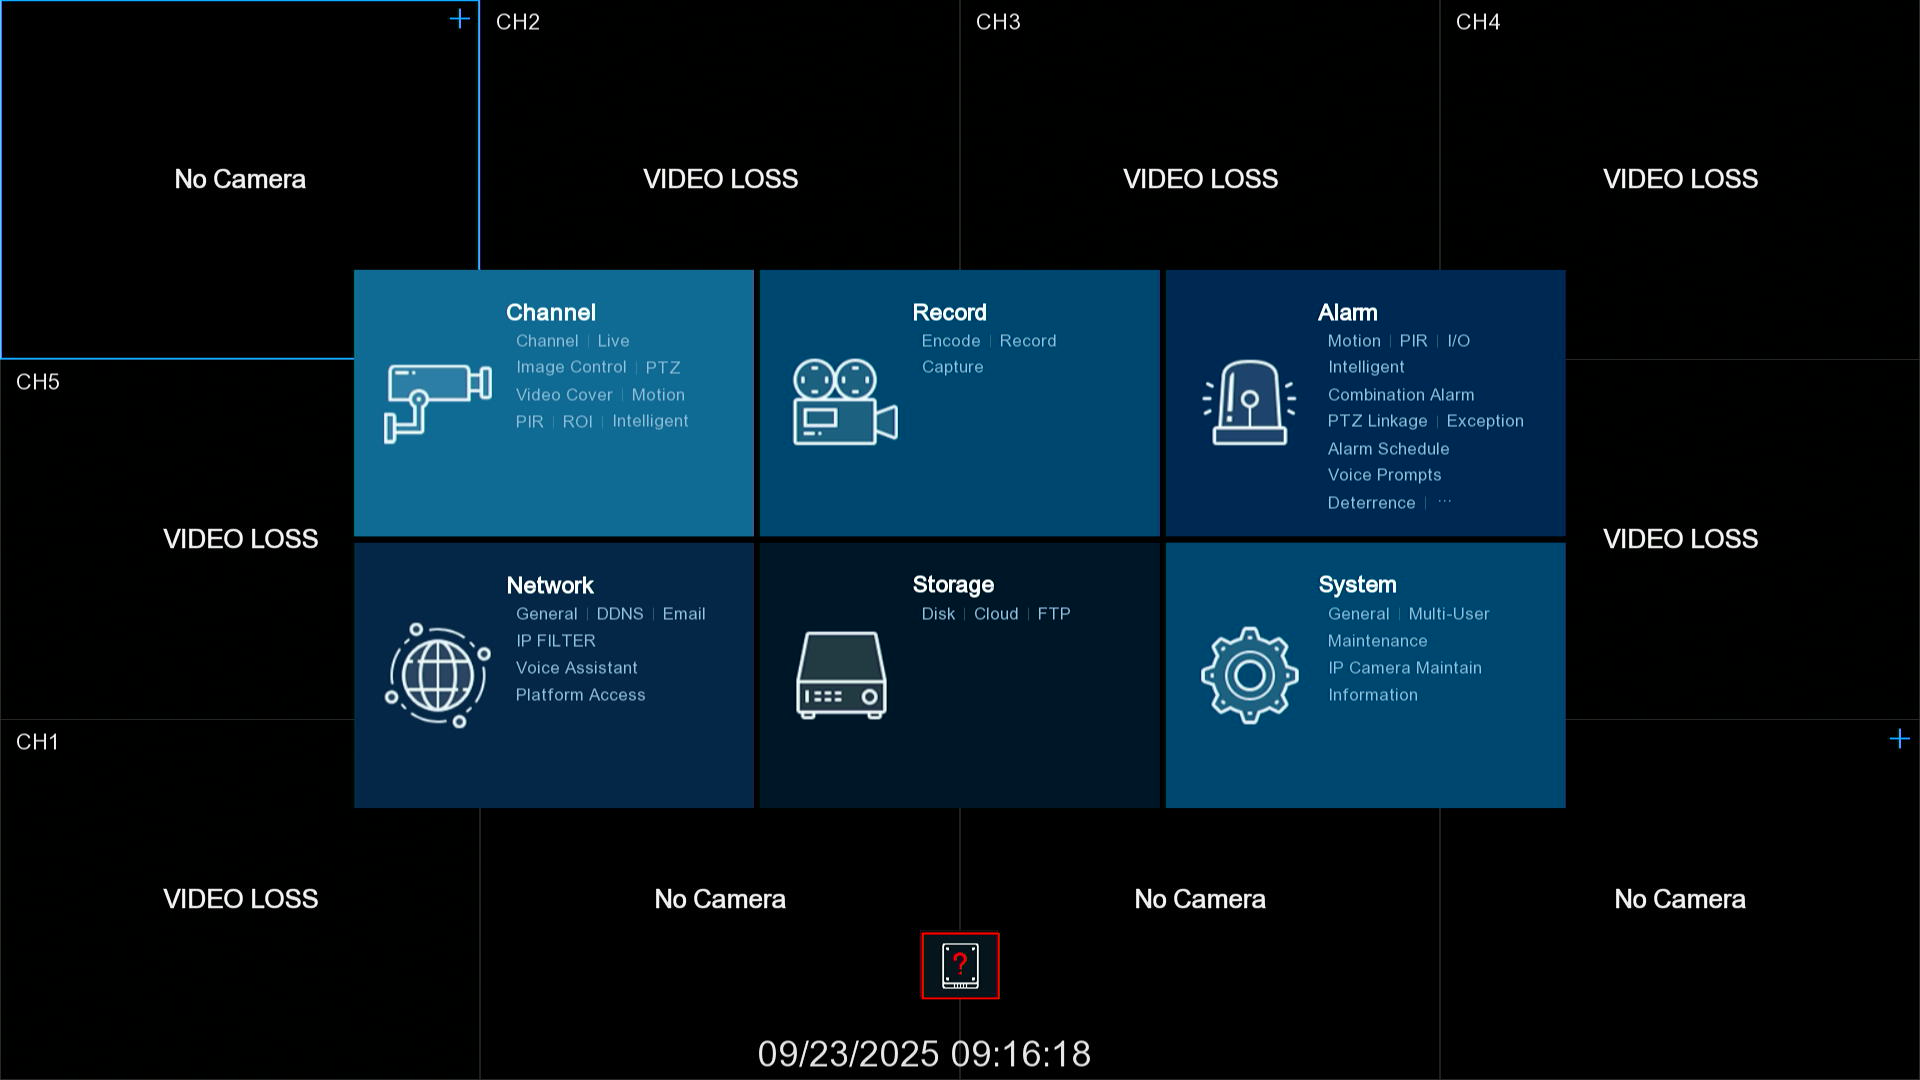
On here you want to select Channel which is normally the top left option, this will take you into the camera settings, the menu's might be slightly different in here, but mostly should look the same, in here we will need to enable the channels so that we can add the cameras to them.
We will want to start off by clicking the pen symbol under the edit tab.
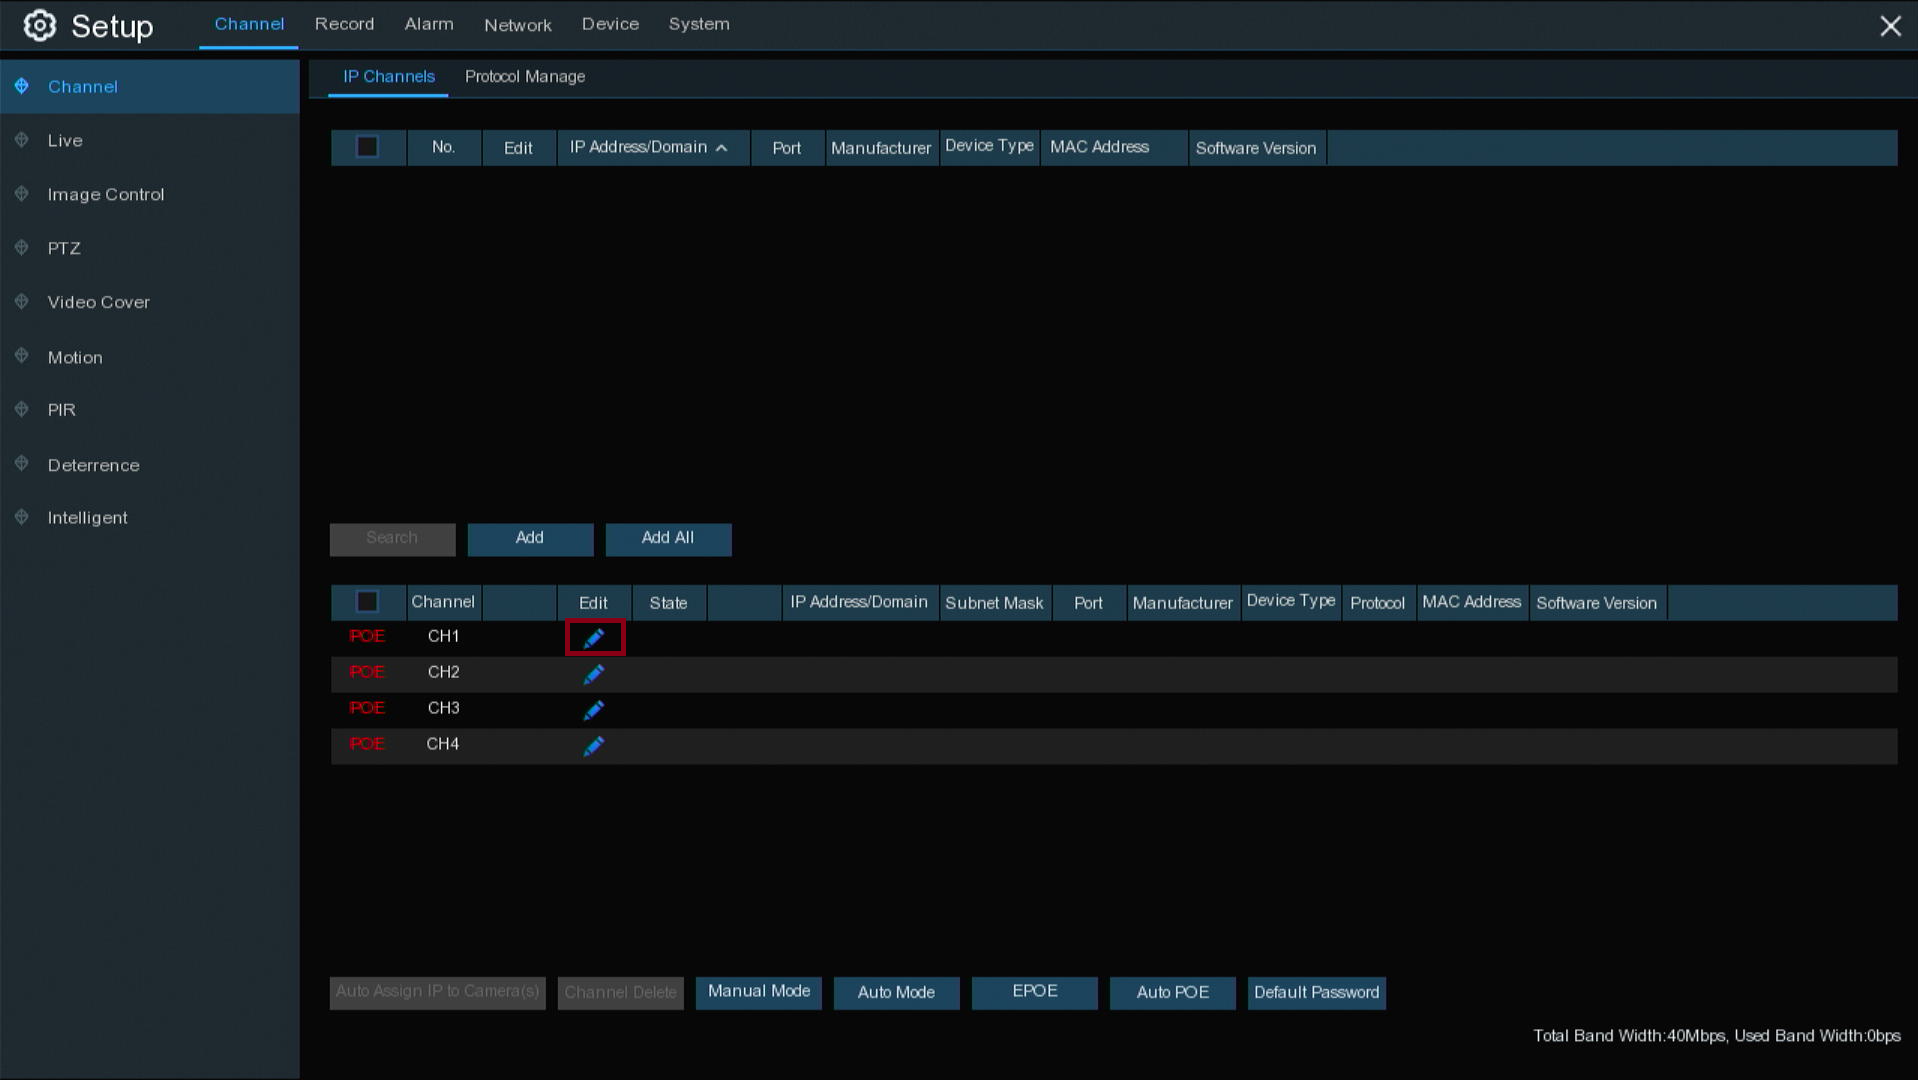
You will then get the below image and will want to click on Switch Mode and change this to manual.
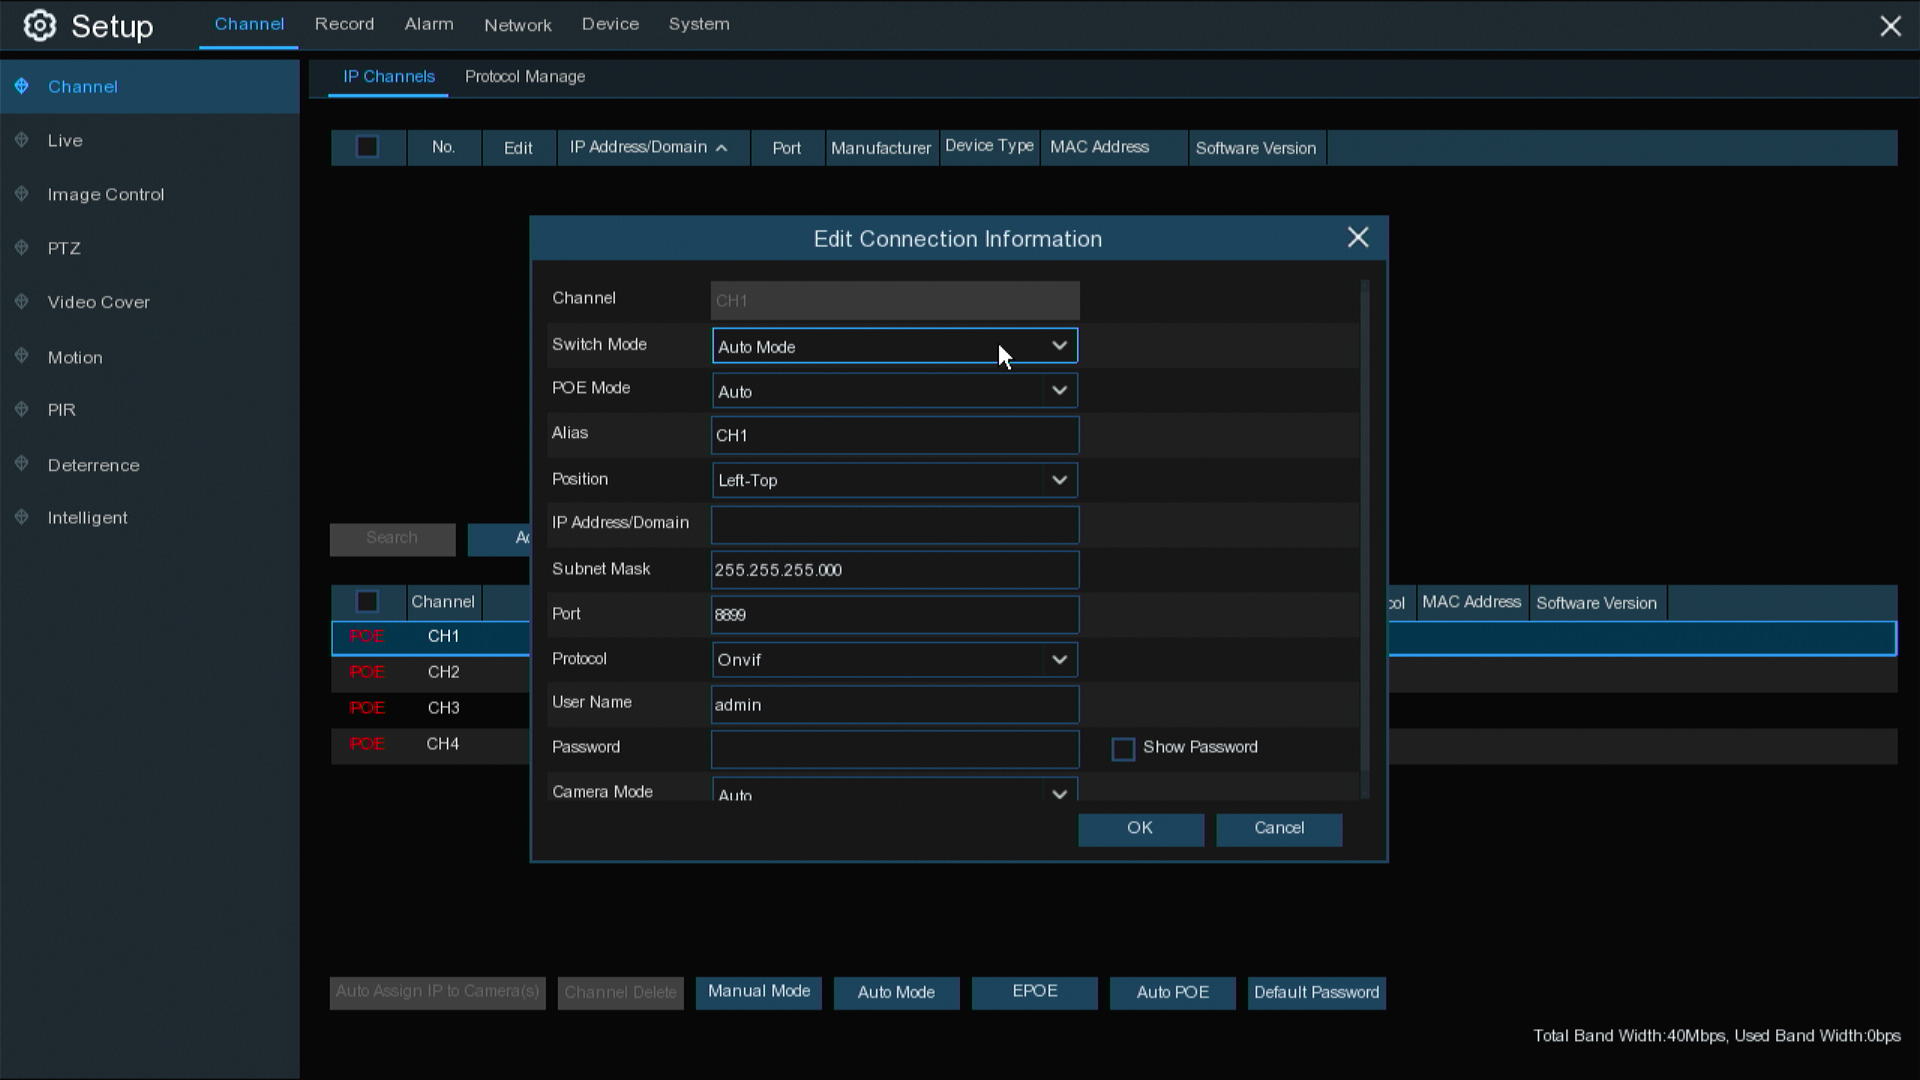
Click on Ok and then do the same for each channel we want to use, in the screenshot below you can see that I have done this for all 4 on our recorder and it now looks slightly different from beow.
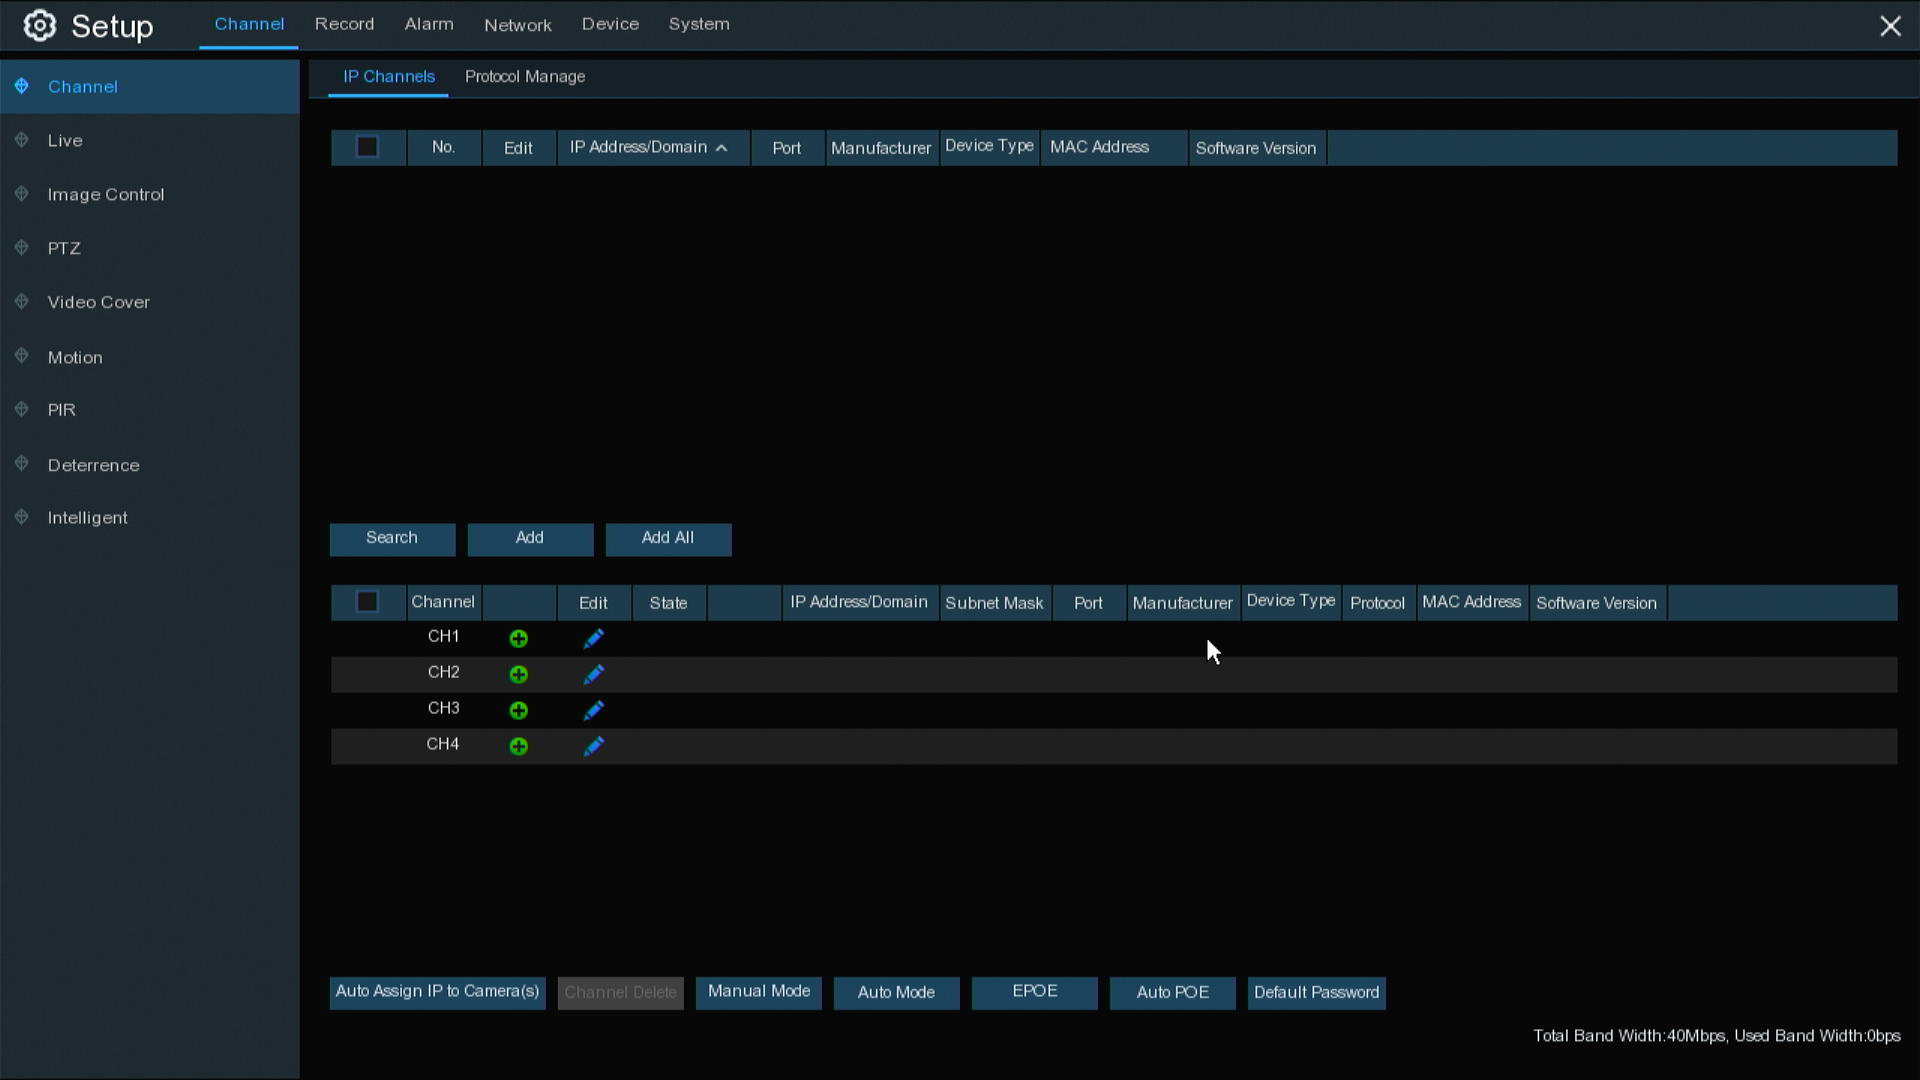
The next step is to click the Search button above the section we have been making changes to, this will then search your network for any cameras that are online, in theory it should only find a few cameras, in my screenshot below it has found alot as we have many cameras setup around our office.
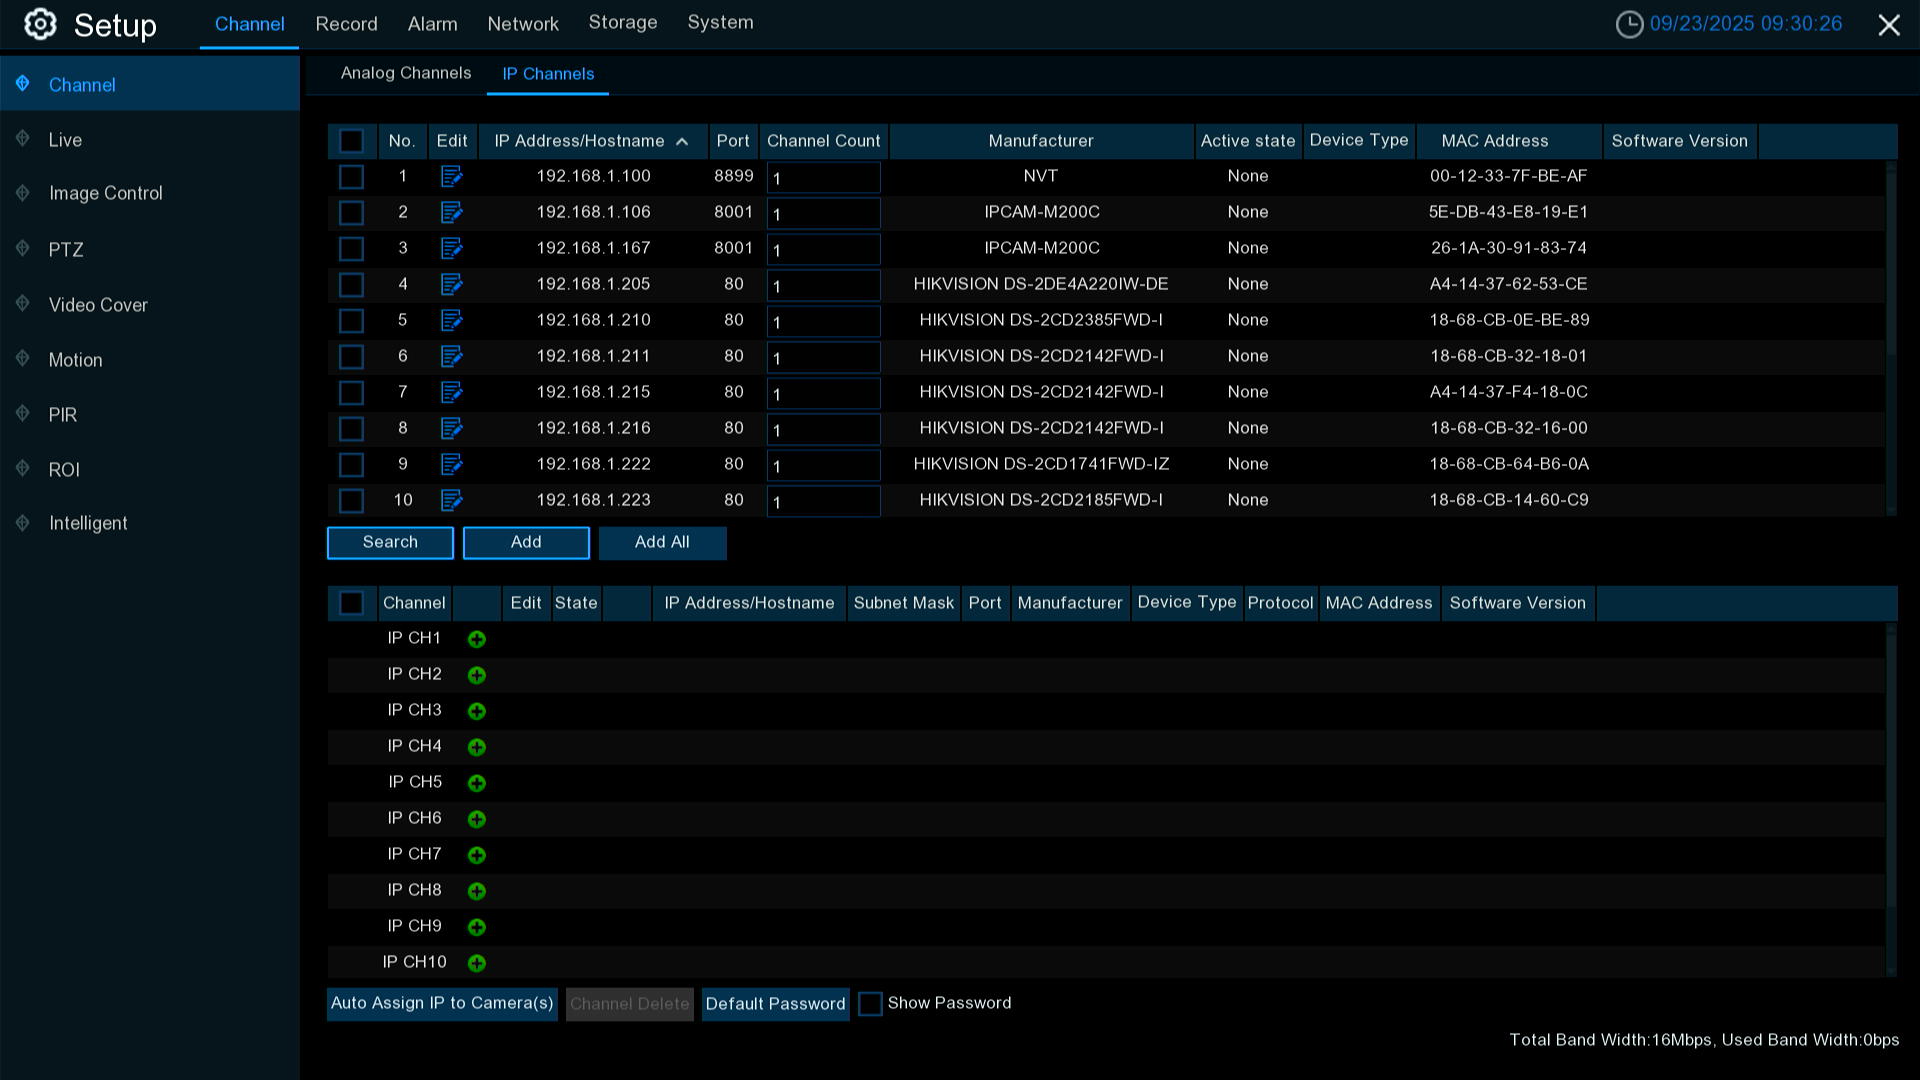
In my case I know the camera I am looking to add is the 2nd camera on the list, so what we do now is click the little tickbox to the left on if and click the add button, the important part here is to set the password as whatever you set it to at the start of this guide and to chose which channel to bind it to, I normally just go from channel 1 and work my way down.
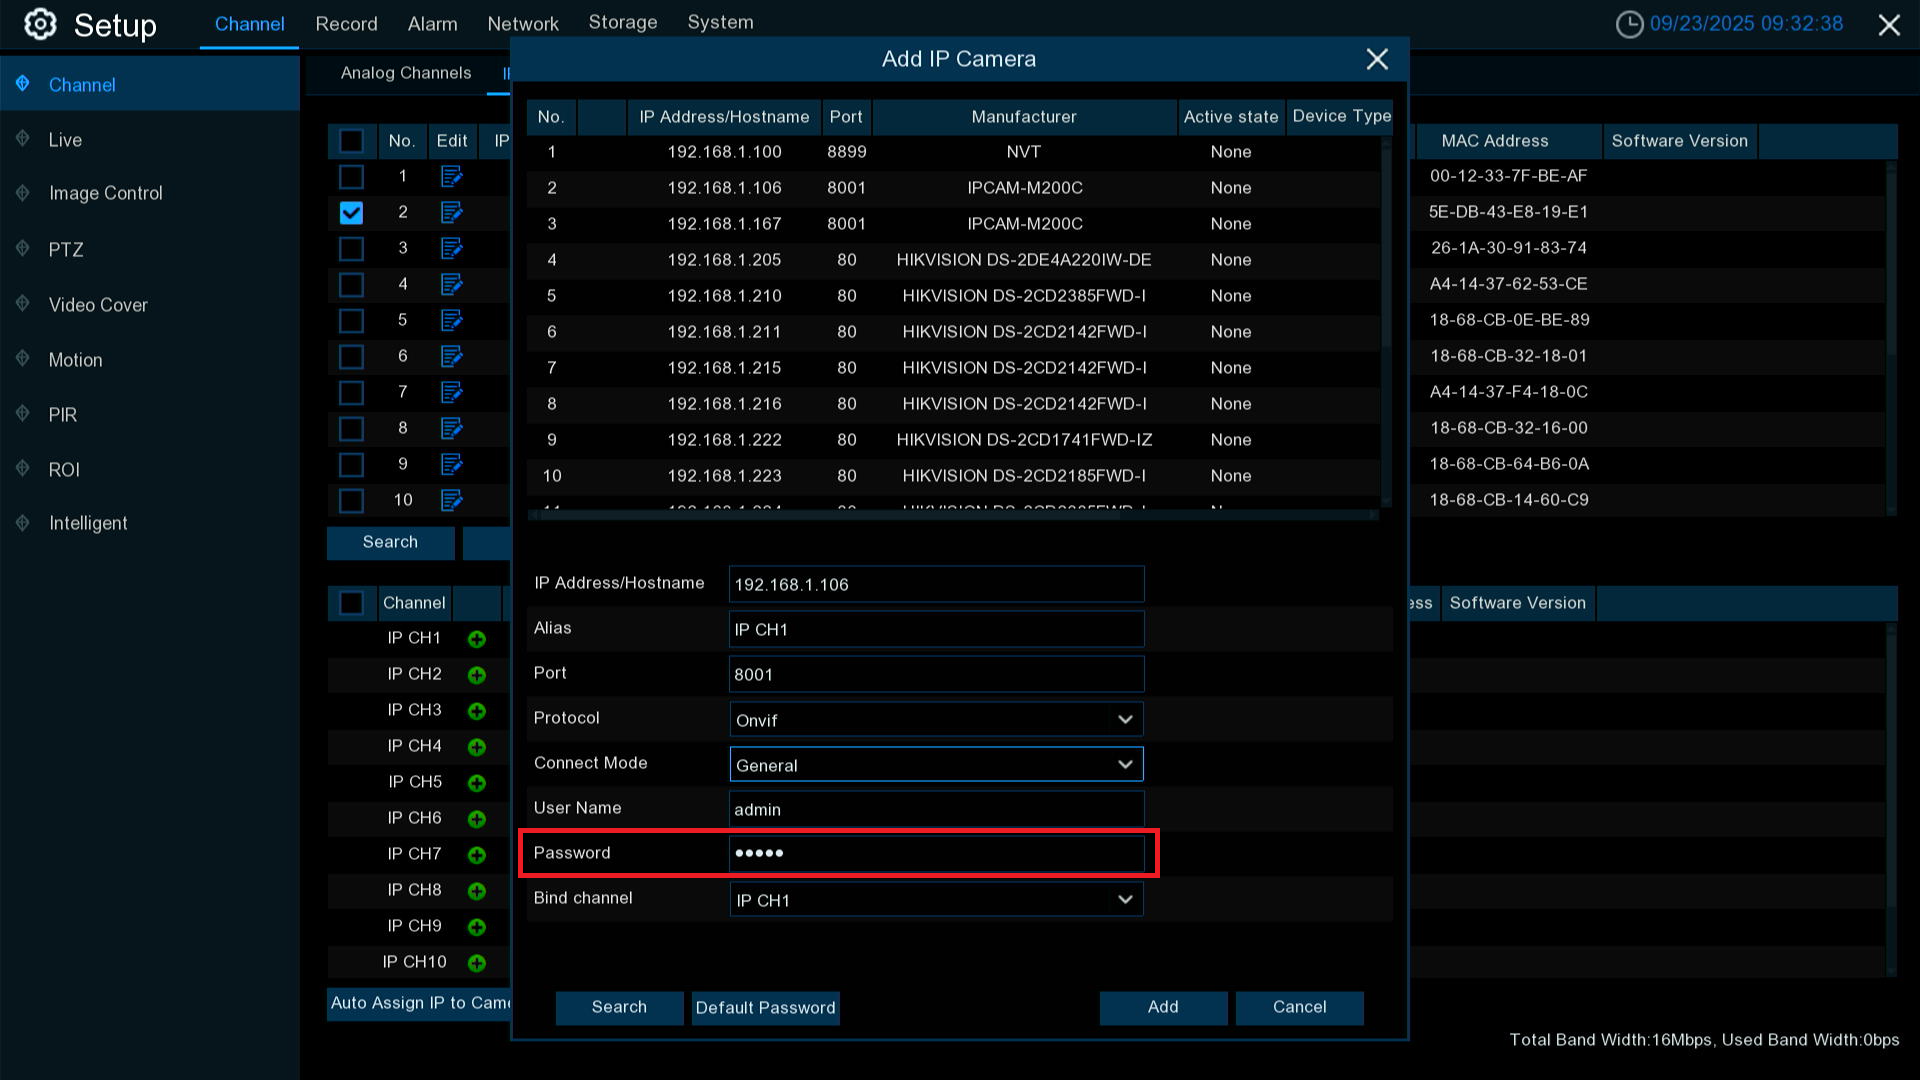
Once you have put the password in and chosen the channel click the Add button and then click on cancel to close the window, the important part now is to make sure it has worked, you'll notice it should have added the camera and after a moment the State section should go green like below.
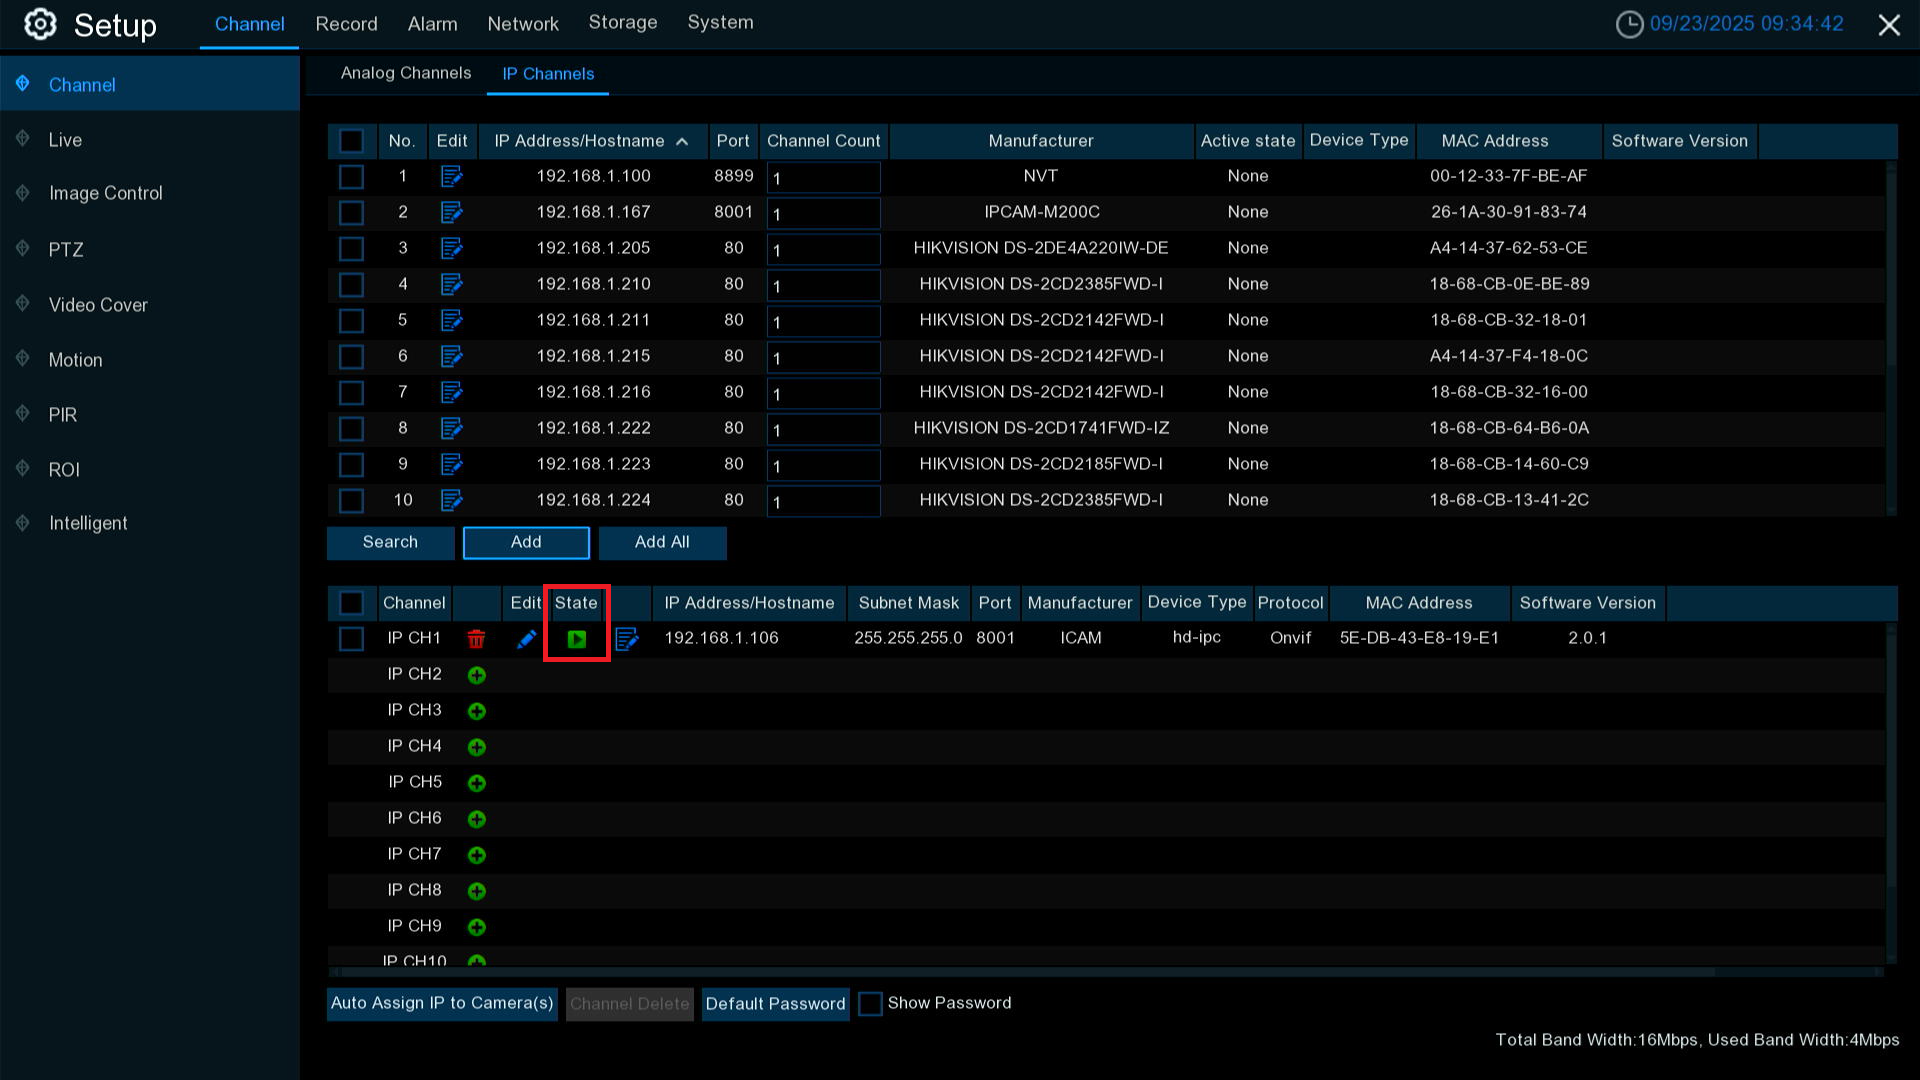
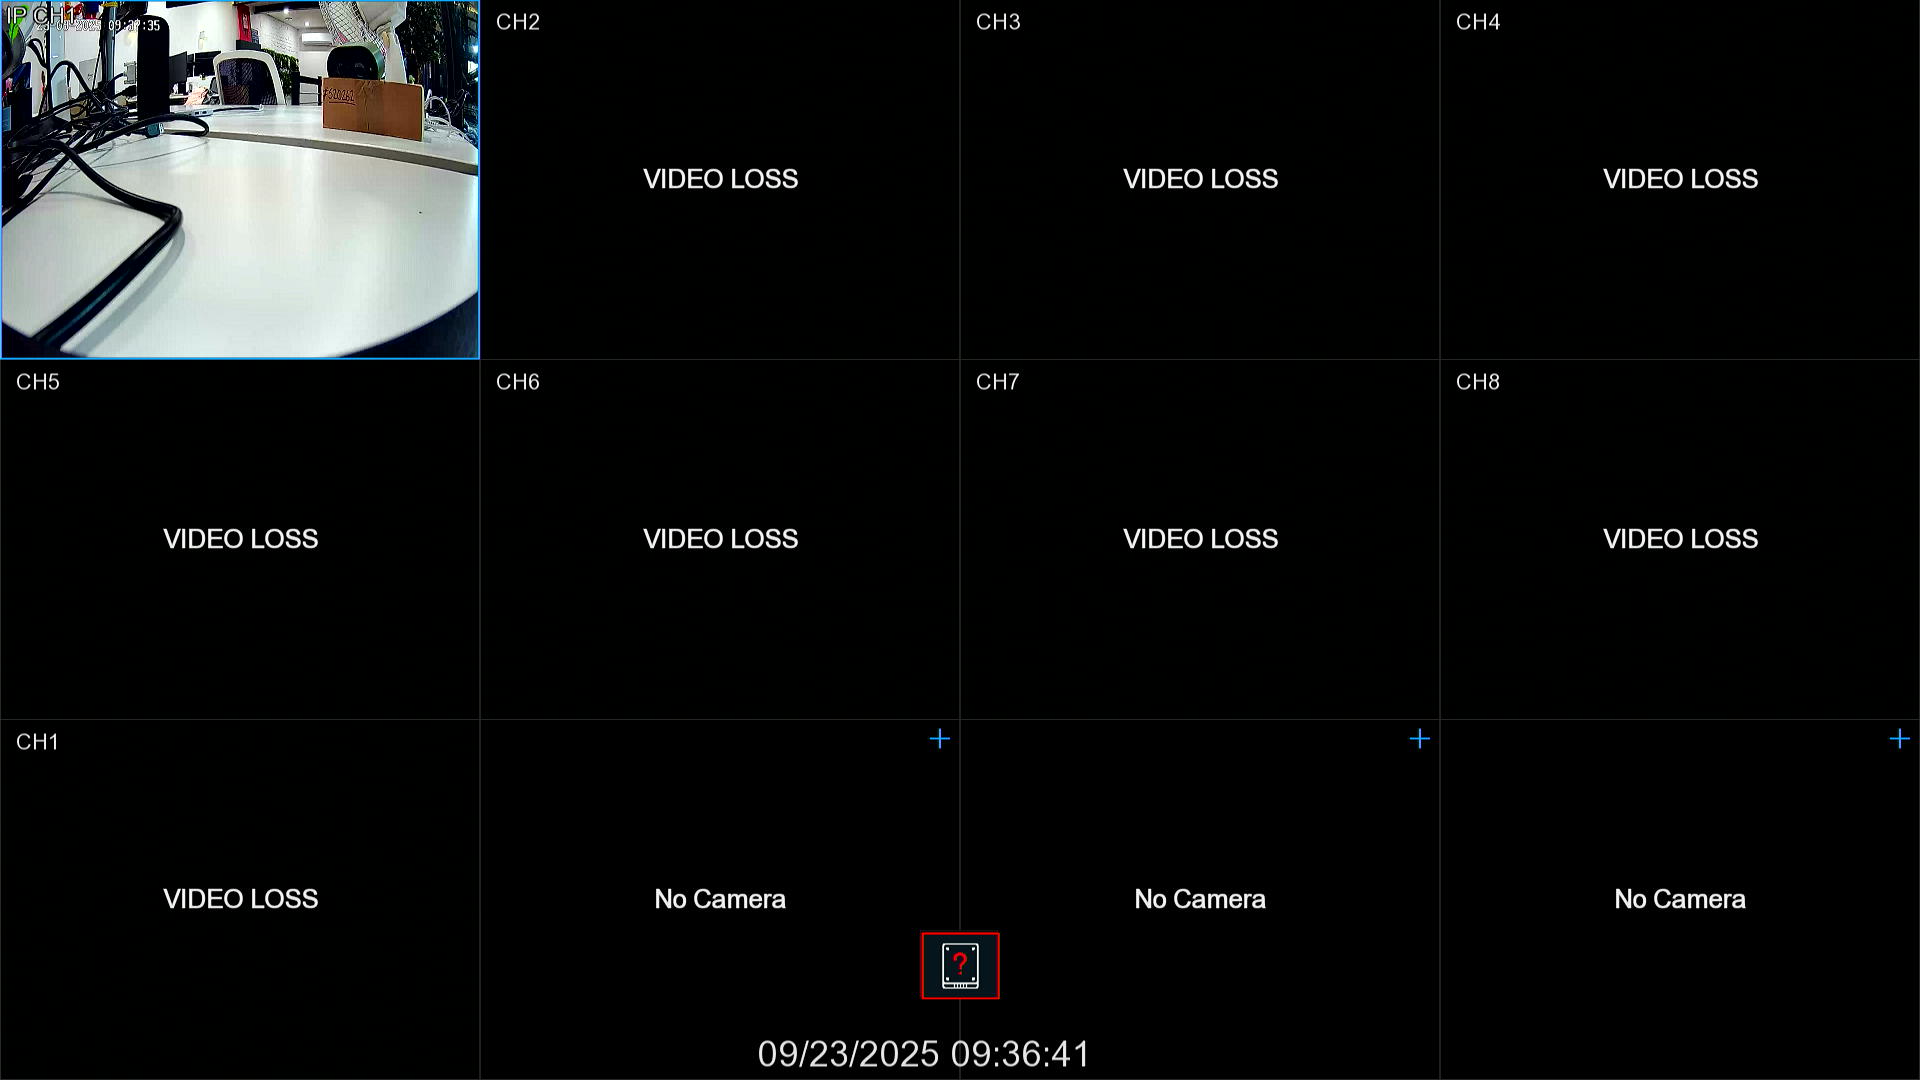
This indicates that the camera has been added and should be working, if we then go back to the live view you should have a working camera.
If you have more cameras to add it will just be a case of repeating the previous steps to get the rest added.