1st & 2nd Gen bird box camera add to additional Mac computers (NCIP9WF, NCIP2WF, NCIP9, NCIP2)Updated 19 days ago
After you have configured your WiFi bird box camera to your internet network this guide will show you how to connect the camera on an additional Mac desktop computer.
Before You Begin
- Make sure that you have connected your camera to your internet router. Follow this guide if you have not already done so.
- Ensure that the camera is switched on.
- Download and install CMS5 (for Windows) by clicking on this link
- Download and install VMS (for Mac) by clicking this link. If installing on a Mac, make sure to drag the application file onto your desktop instead of into the applications folder. Mac computers may also stop the program from being installed because it is an unrecognised developer, see this article to allow the installation: https://support.apple.com/en-gb/guide/mac-help/mh40616/mac
- If you are using a Mac on the Big Sur OS, you will need to give the program permission by going to System Preferences > Security > General.
This video shows how to add the camera to CMS5, the Windows version of VMS which is used for Macs. However there is almost no difference between the two, so it is recommended you quickly read through this guide then follow the video.
Finding the serial number in iCSee Pro
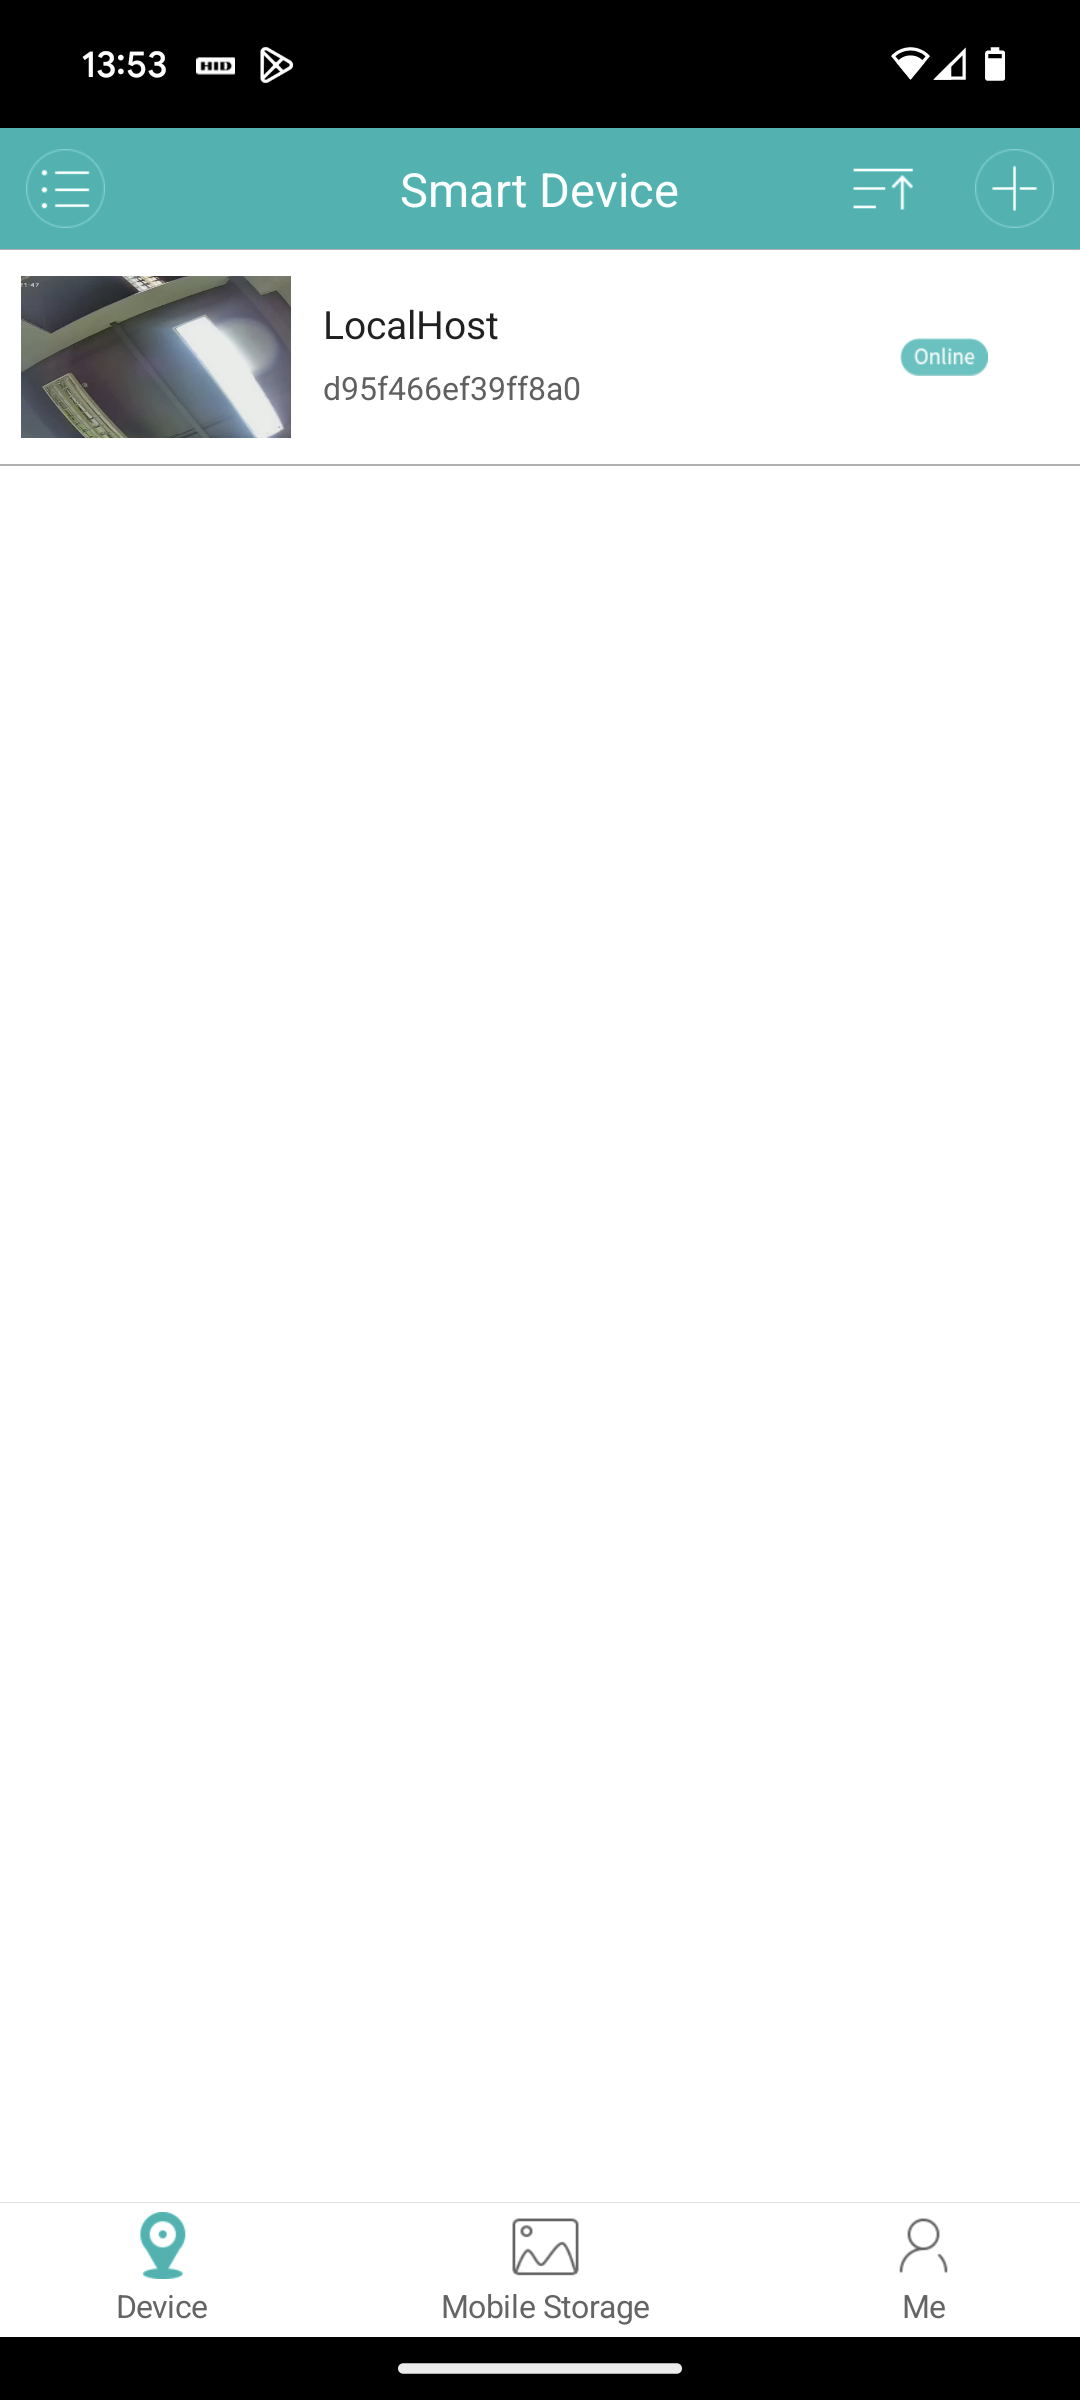
Open ICSee Pro on the first device you added the camera to. We need to make a note of the serial number for the camera. The easiest place to find this is on the device list, the serial number will be shown just below the name of the camera as shown in the image below. Make a note of this serial number as we will need it later.
Adding the camera to your Mac computer
Once you have the serial number, install VMS if you have not already done so.
Mac computers may stop the program from being installed because it is an unrecognised developer, see this article to allow the installation: https://support.apple.com/en-gb/guide/mac-help/mh40616/mac
Open the program and login, you will not need to change the password, which is 'admin' by default.
Select Login and then click on Device Manager:
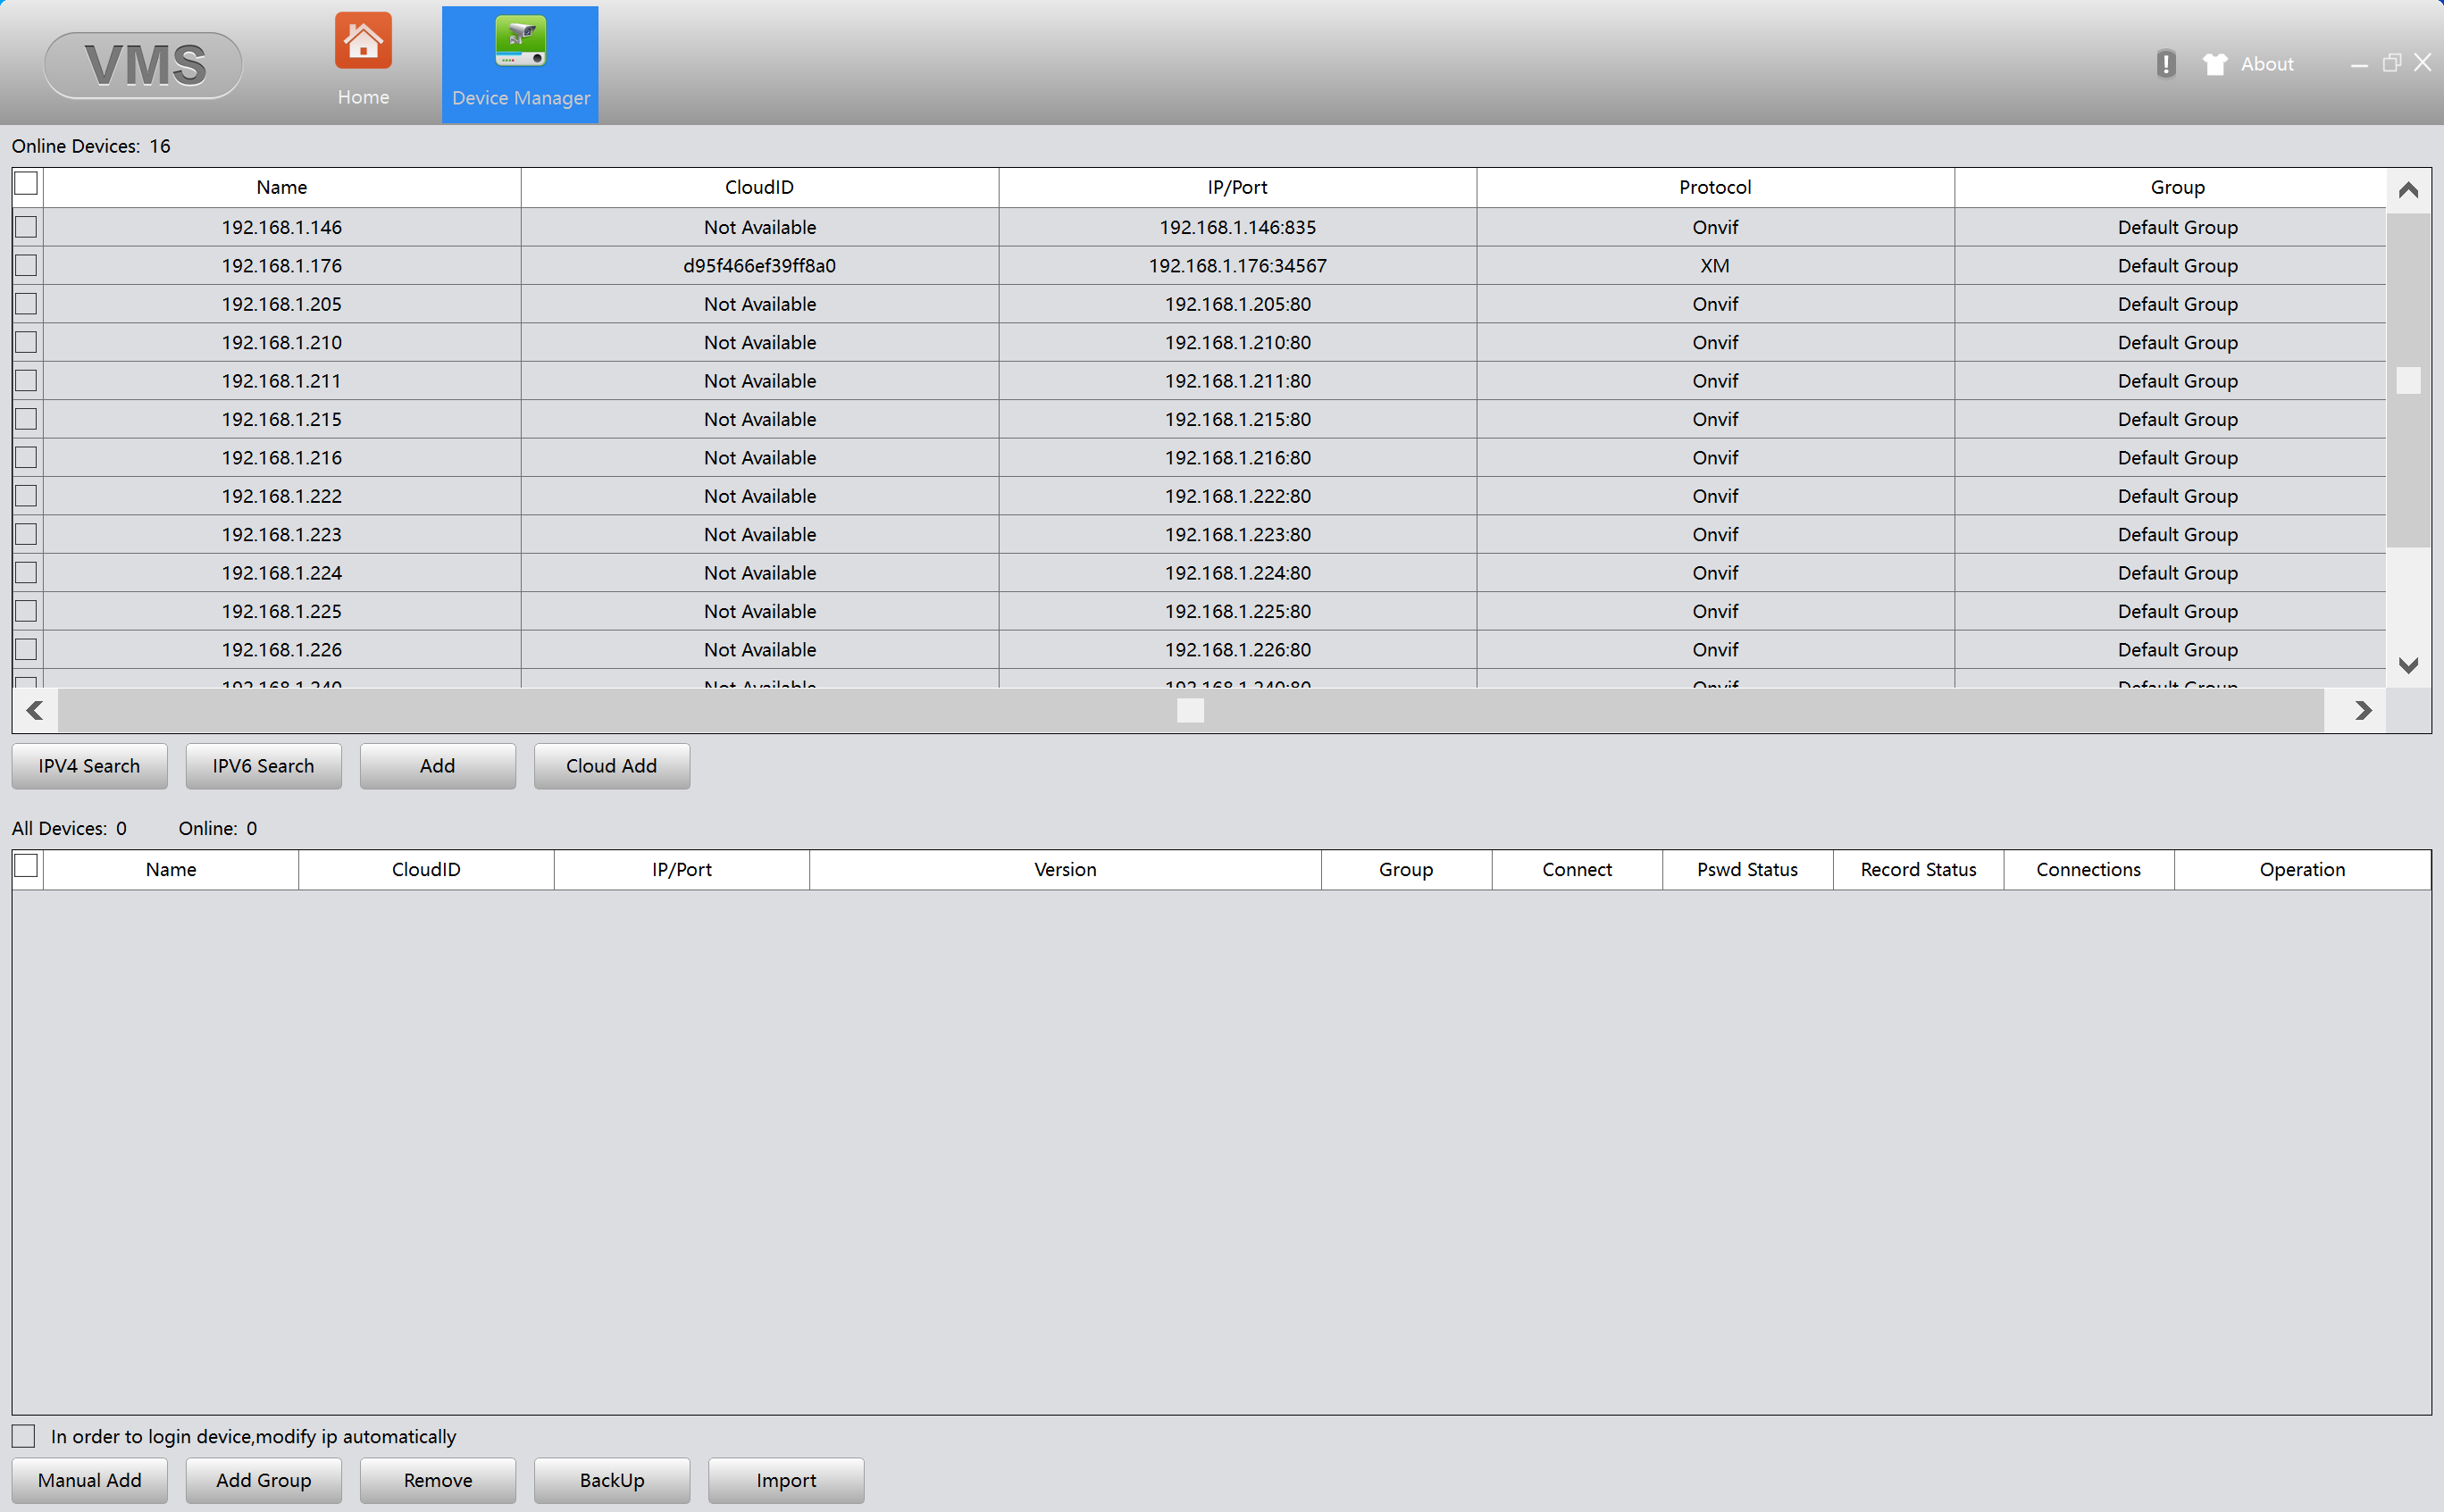
Click on Manual Add at the bottom of the page:
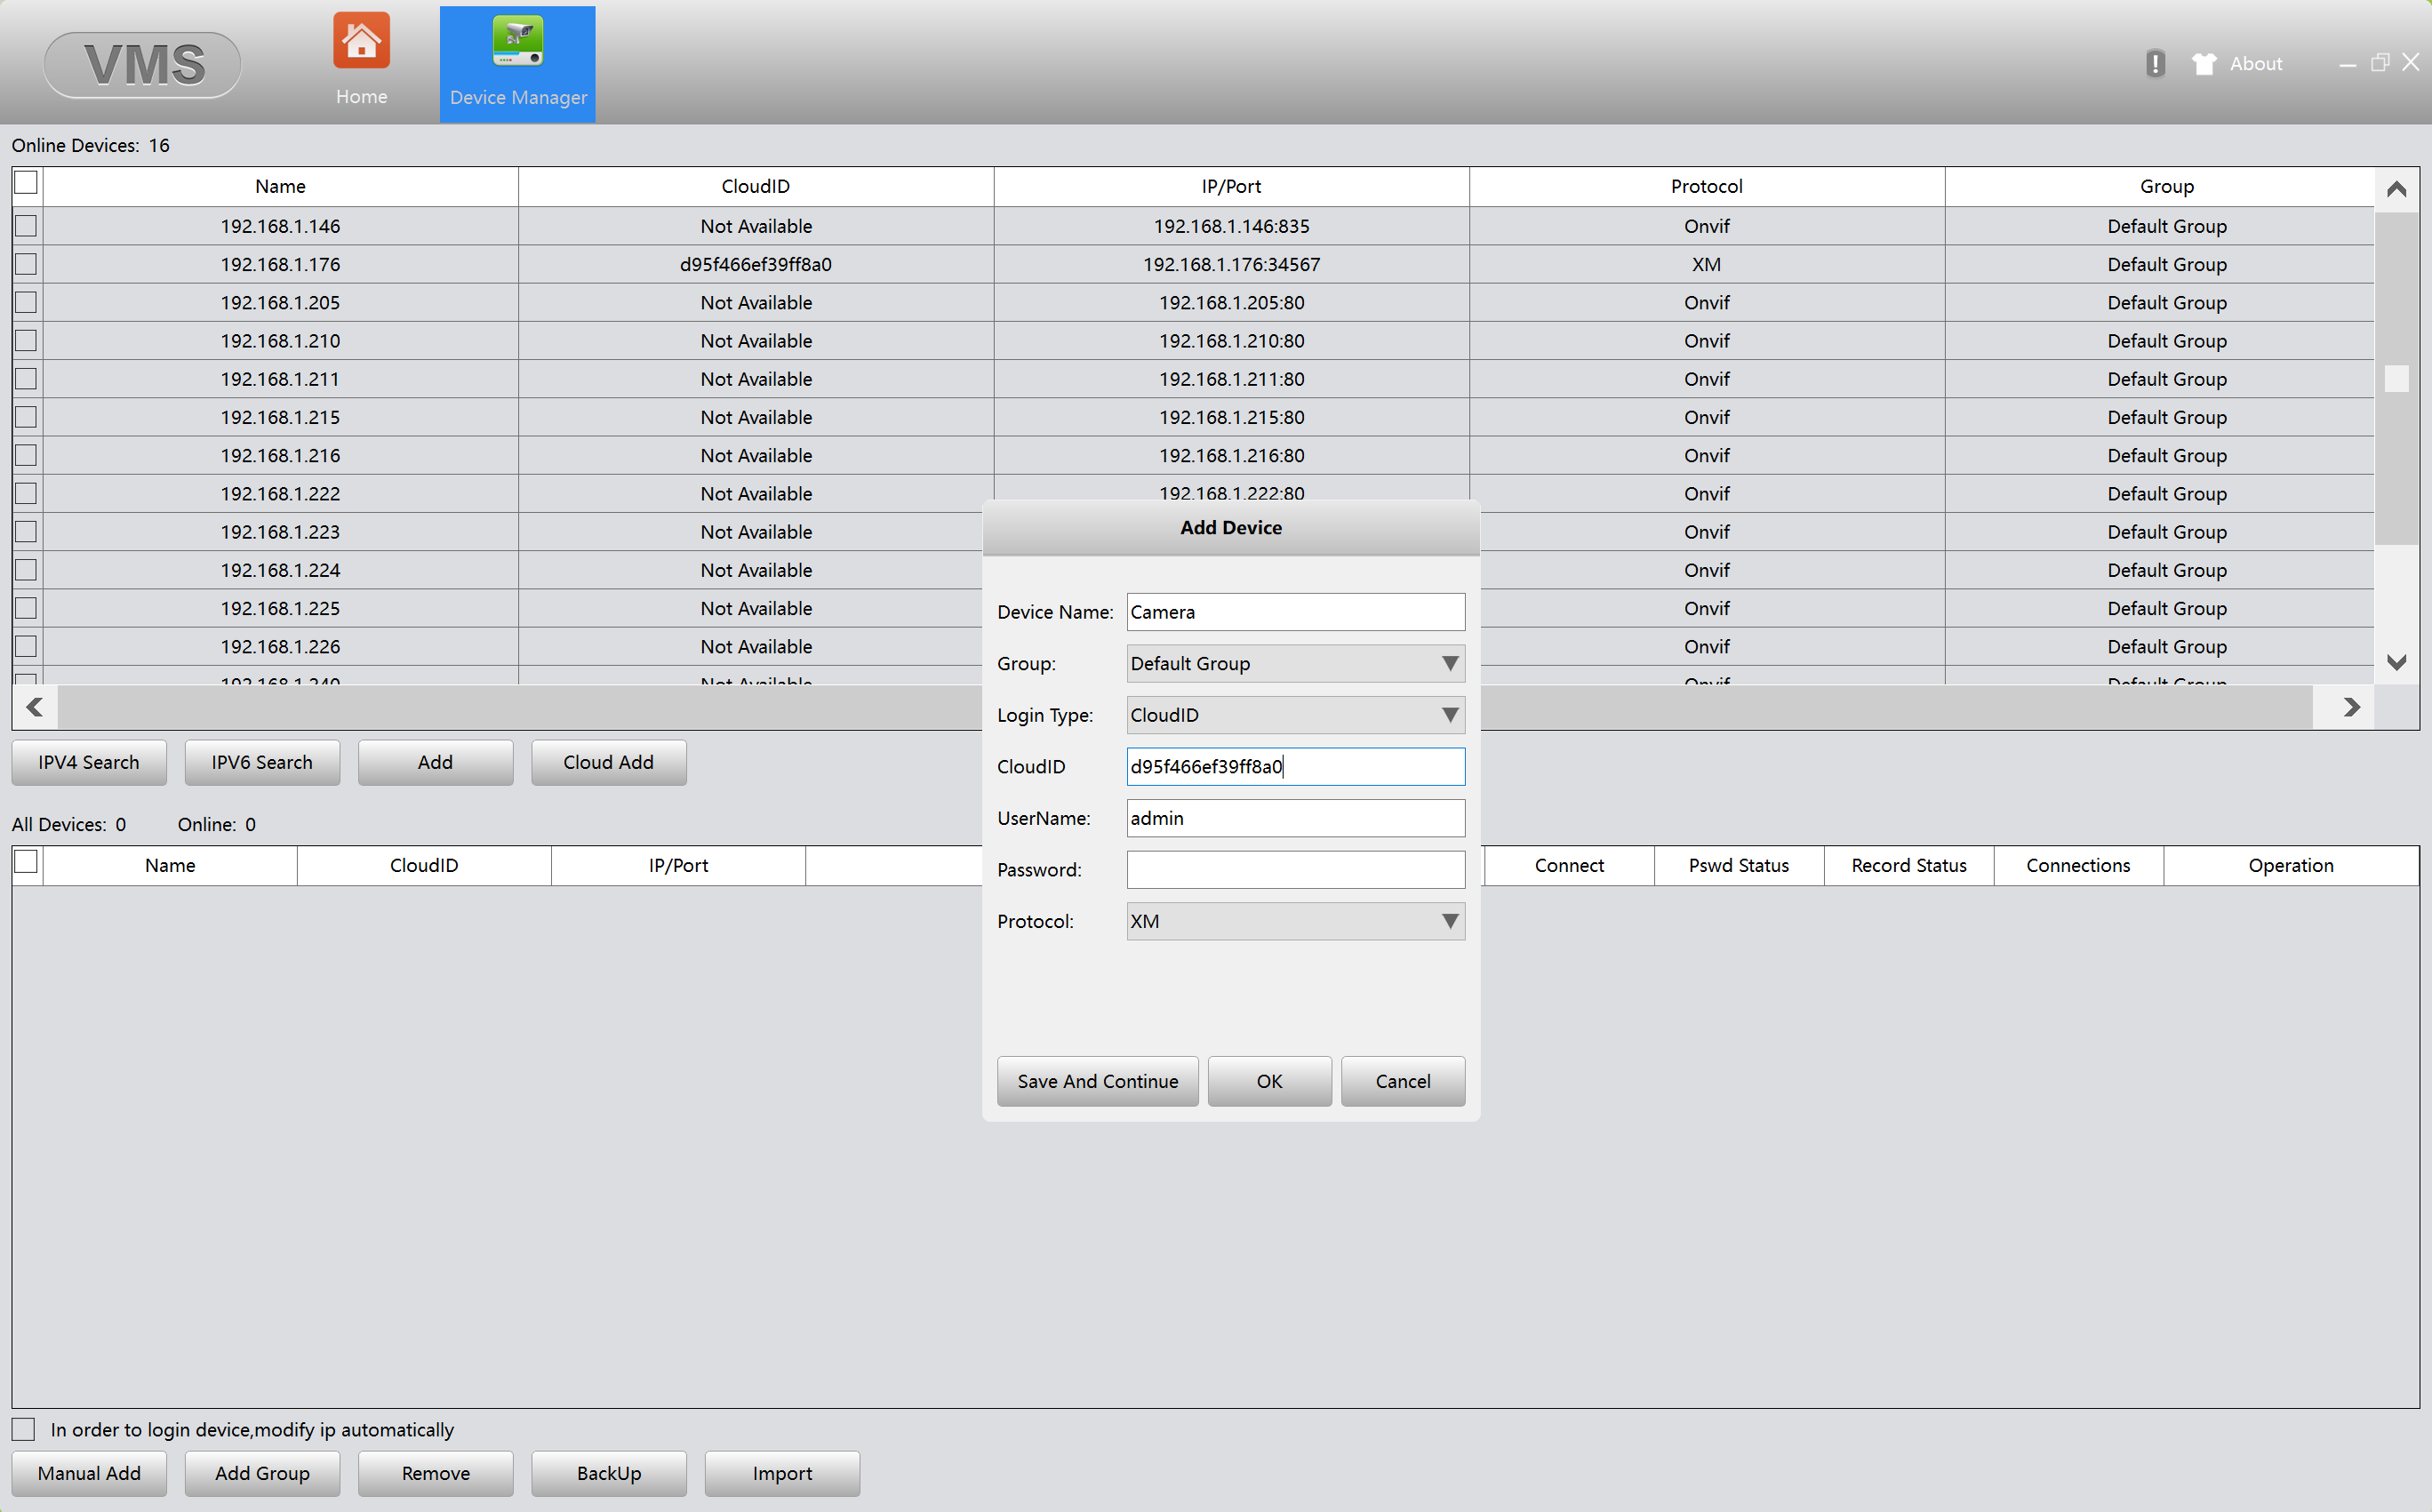
Change the Login Type to Cloud ID if it is not already. Enter a name in Device Name, the Serial Number in Cloud ID, leave the username as Admin and leave the password blank unless you have set one on the camera, then press OK:
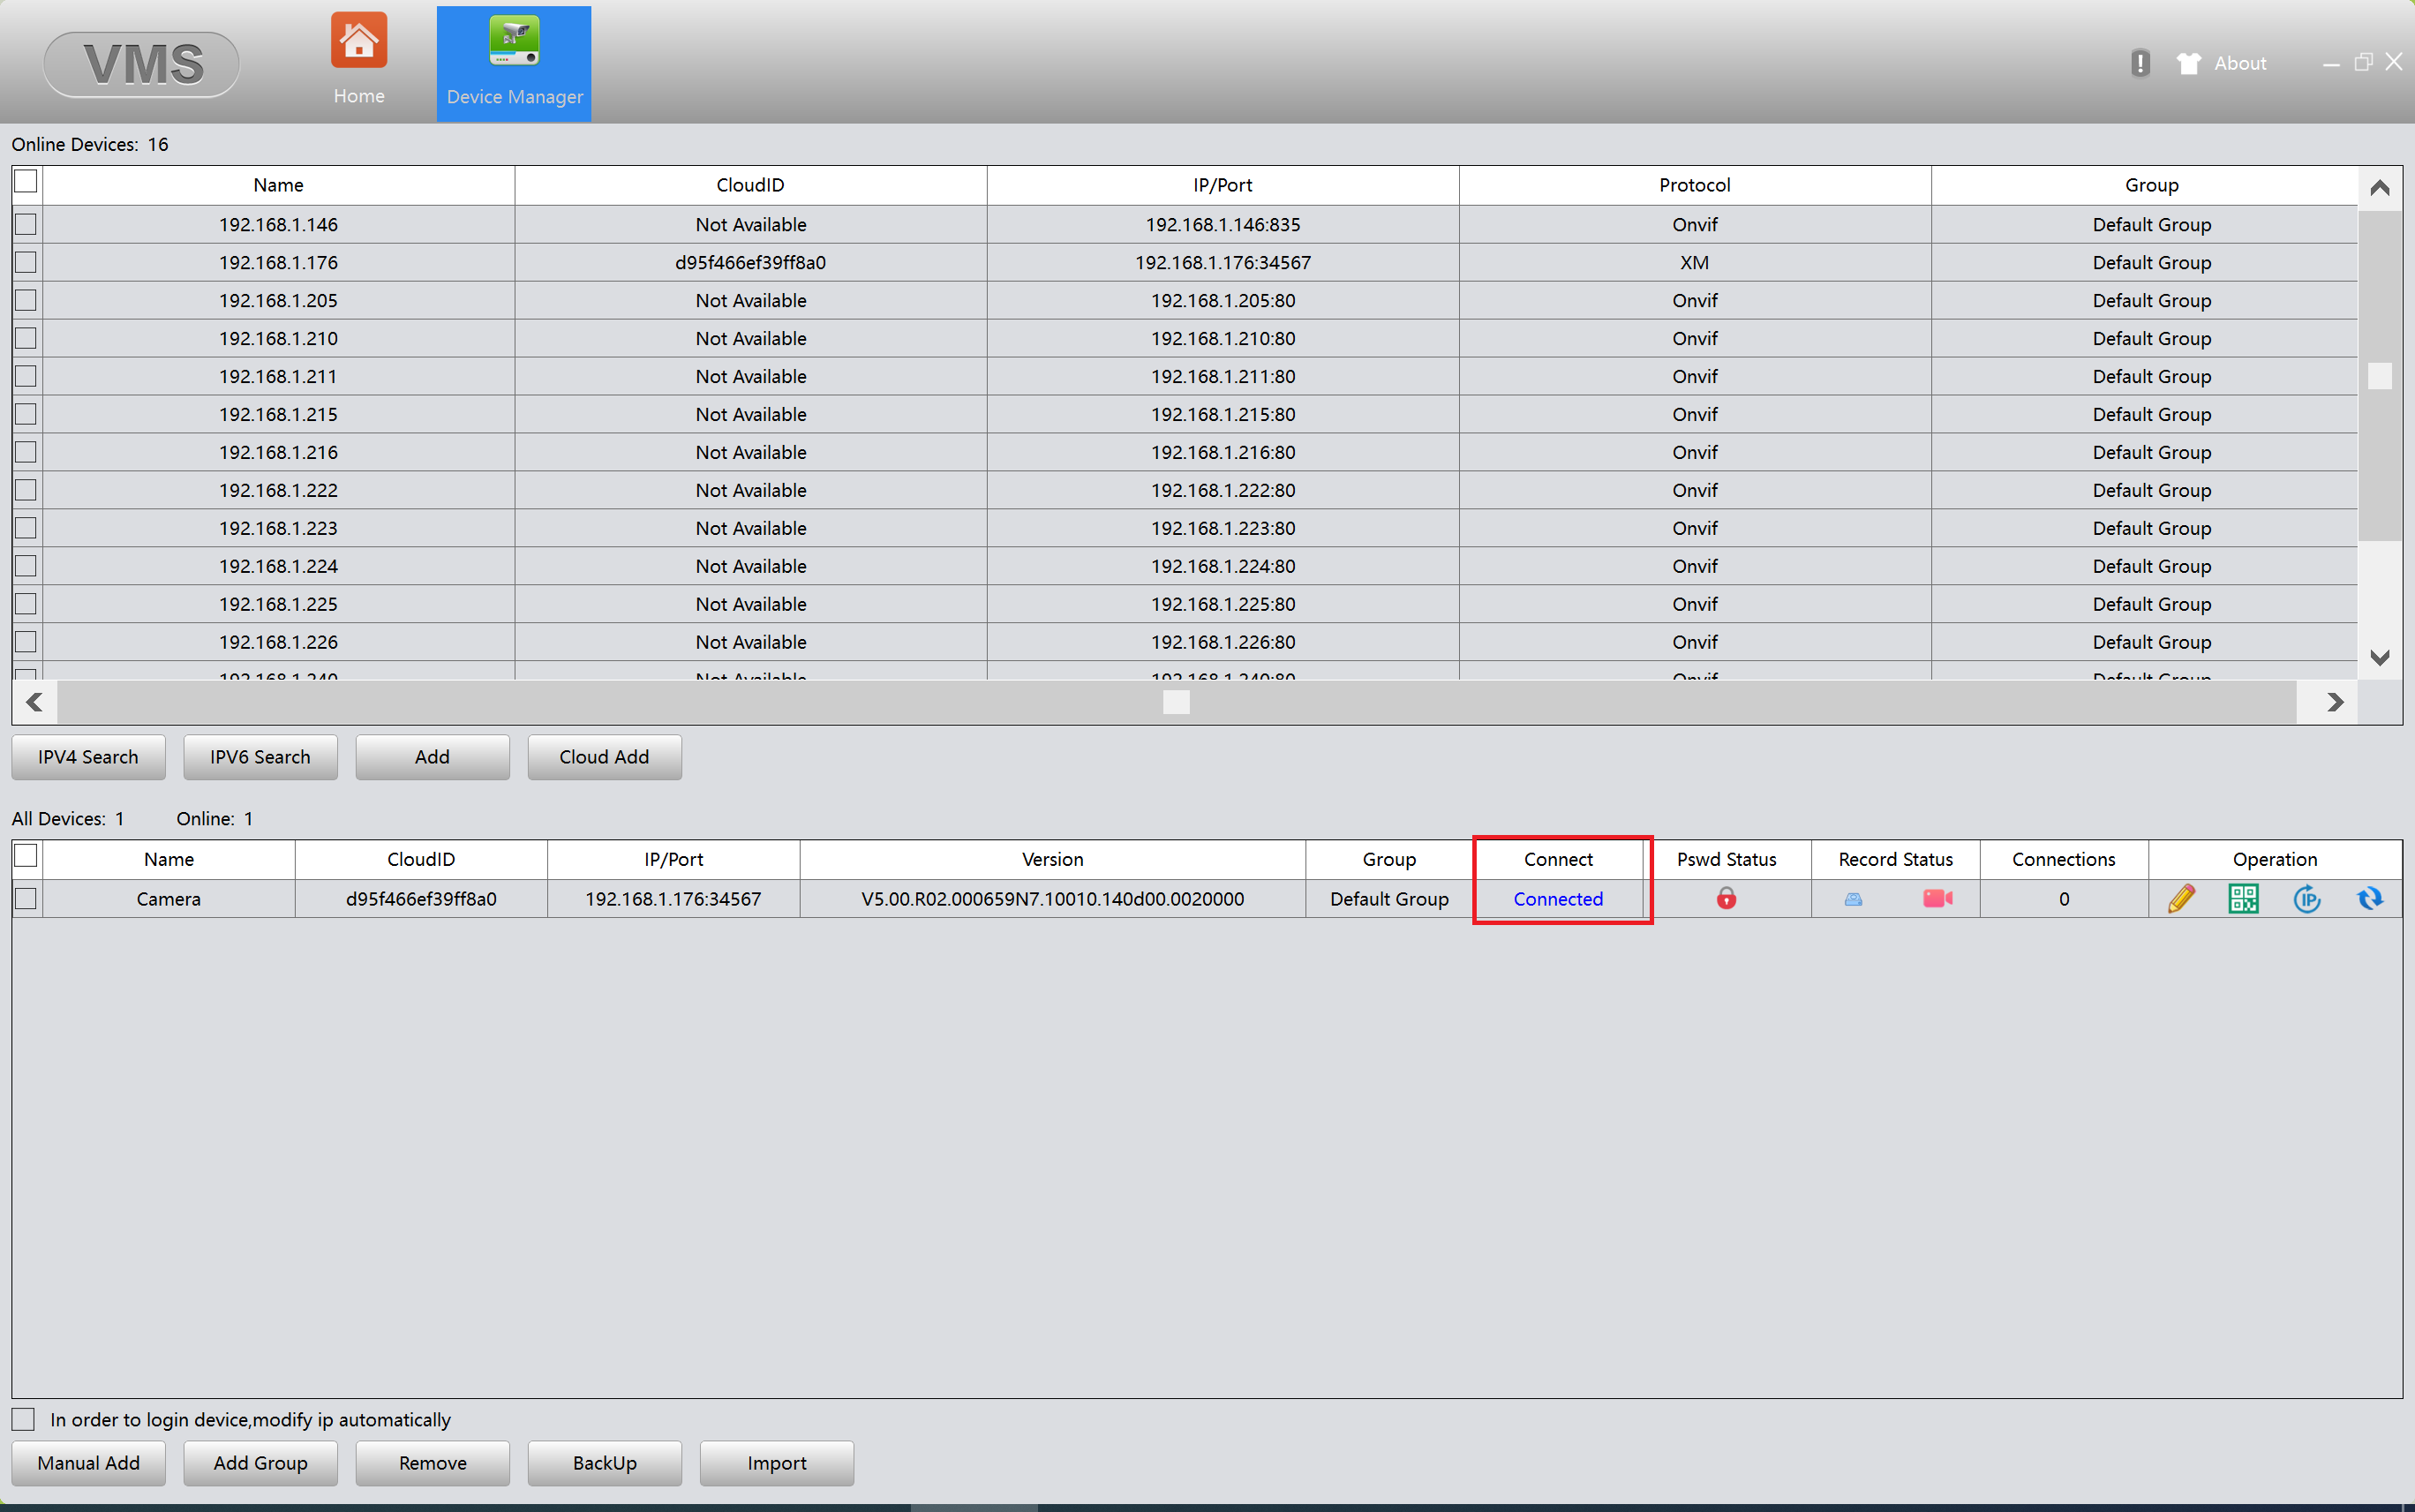
Make sure the camera says 'Connected':
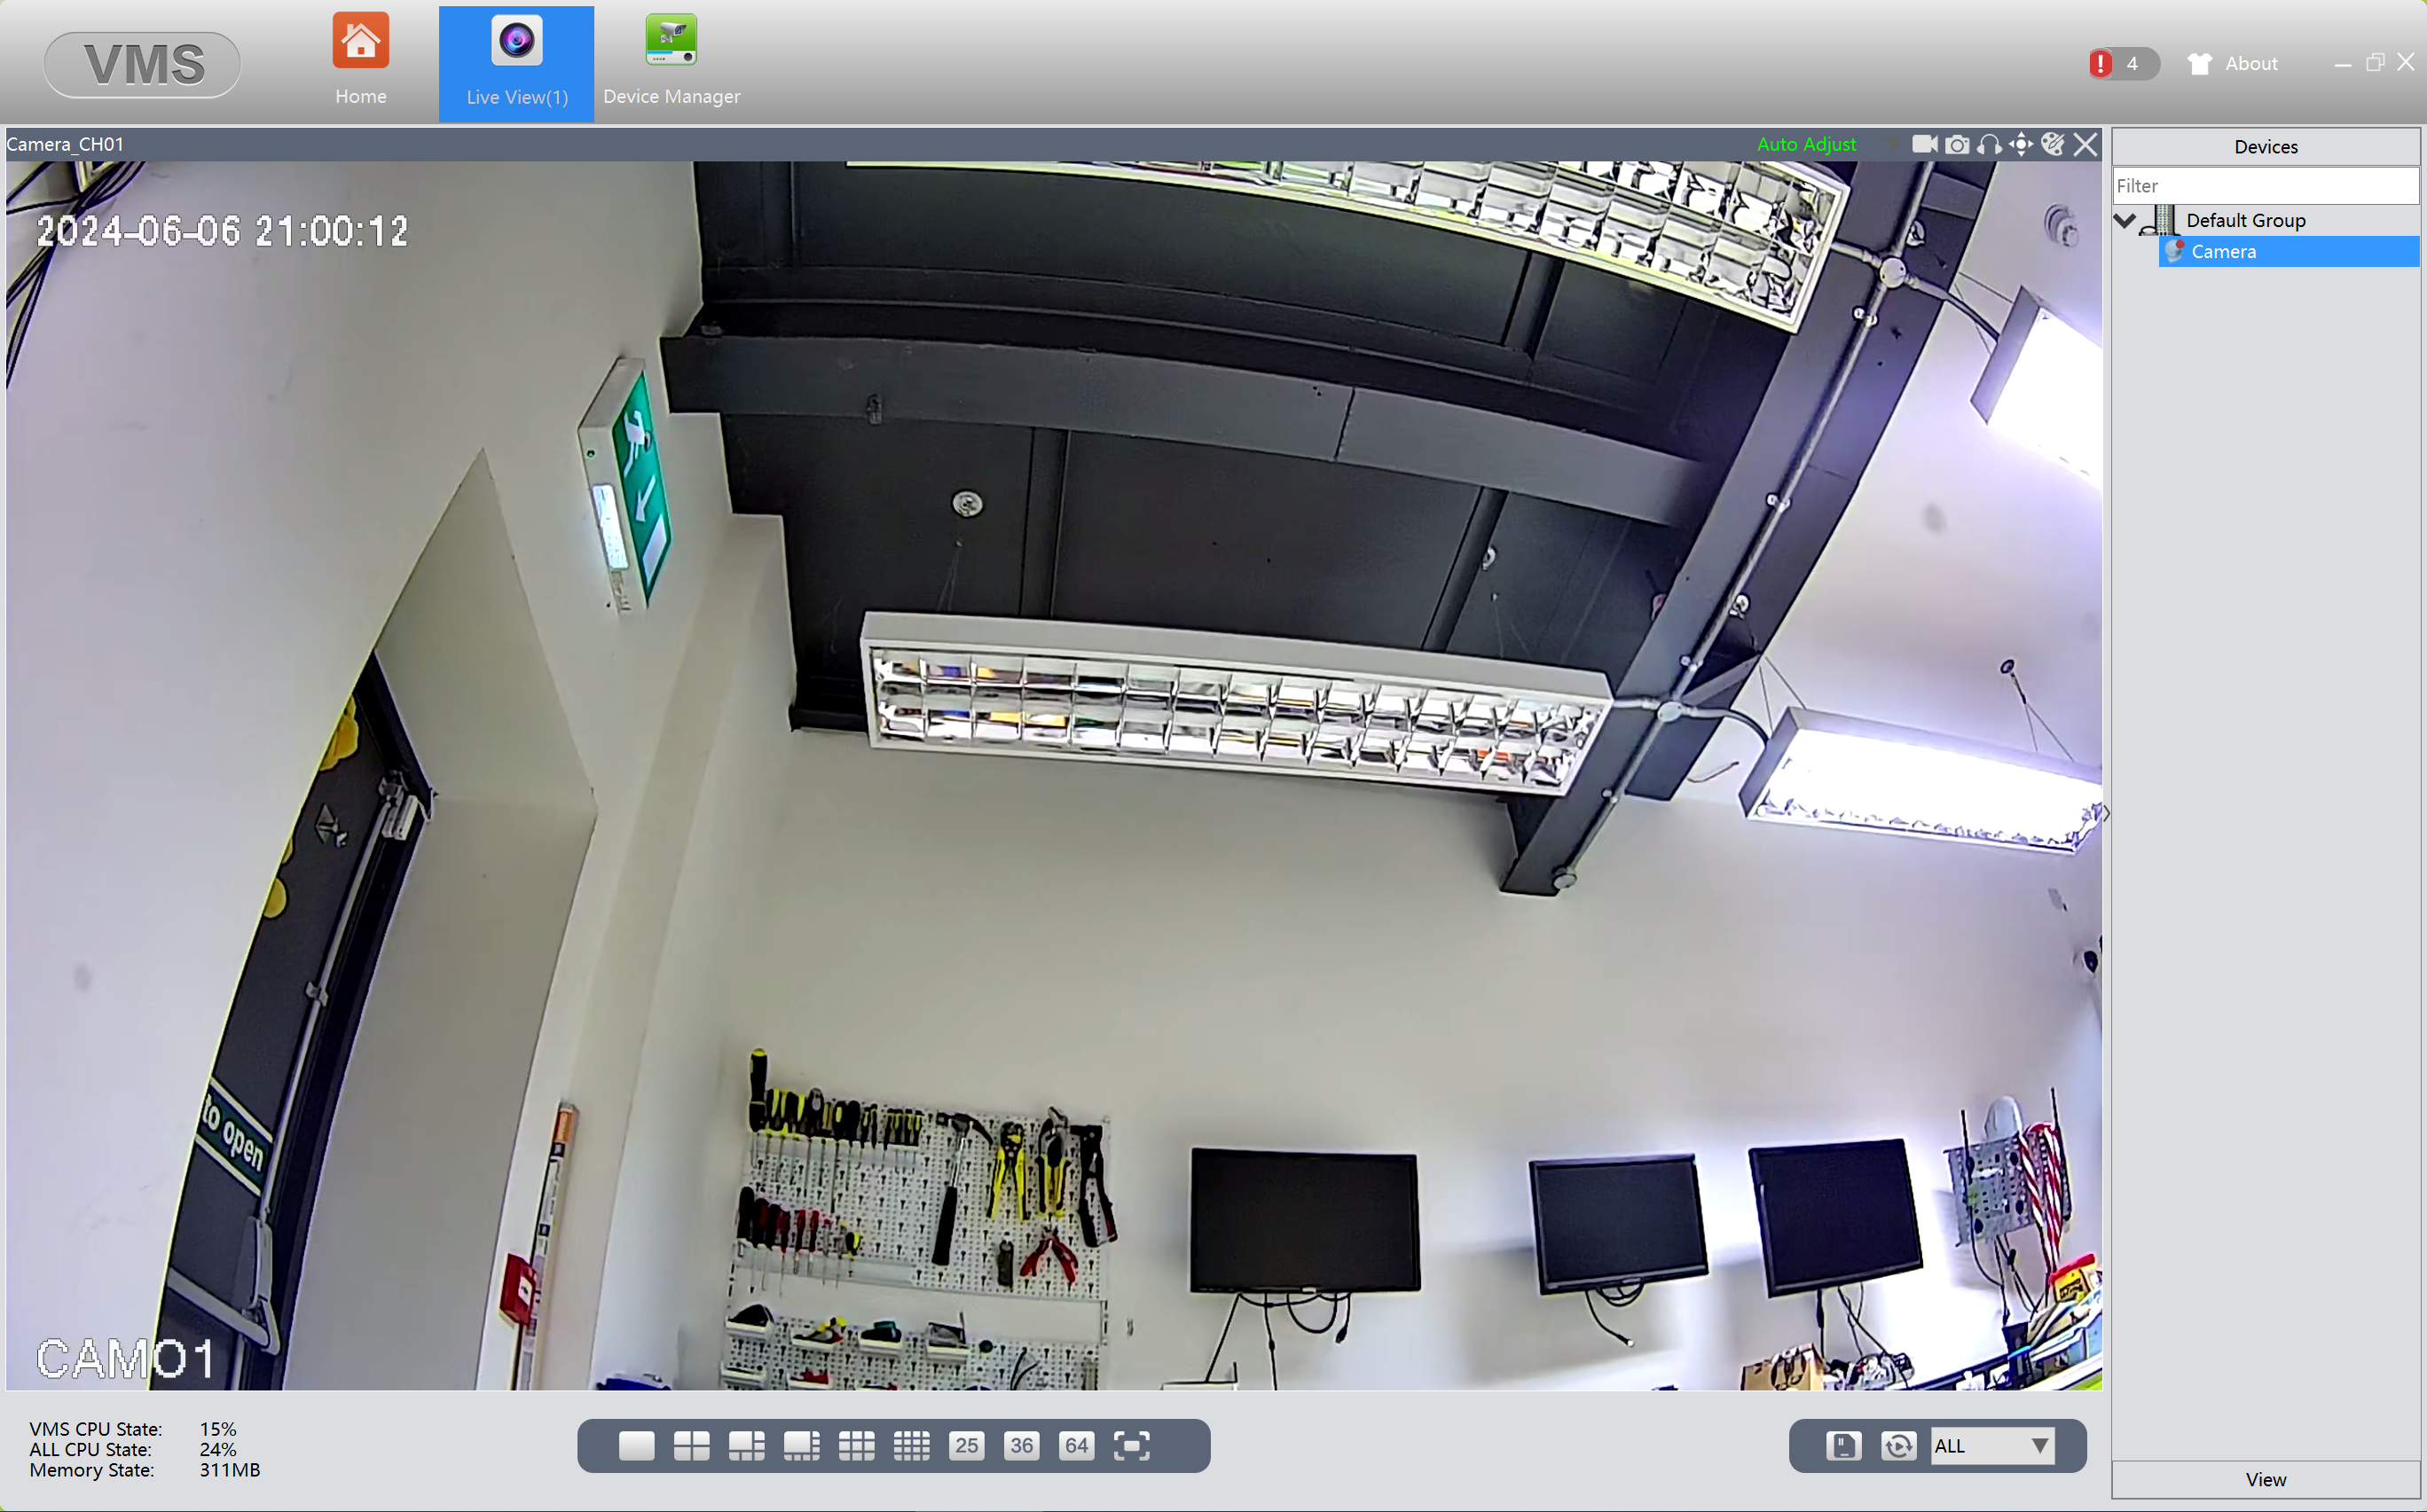
To view the camera just click on 'Home' to return to the main menu then go to Monitor. Your camera will be in the list on the right hand side, double click on it and the camera will open up the live view:
Need more help?
If you need help with anything else please check out our other guides or get in contact.